EasyManuals Logo

APC Automatic Transfer User Manual

APC Automatic Transfer
25 pages
To Next Page IconTo Next Page
To Previous Page IconTo Previous Page
Page #9 background imageLoading...
Page #9 background image
Installation
Automatic Transfer Switch - Installation and Quick Start 5
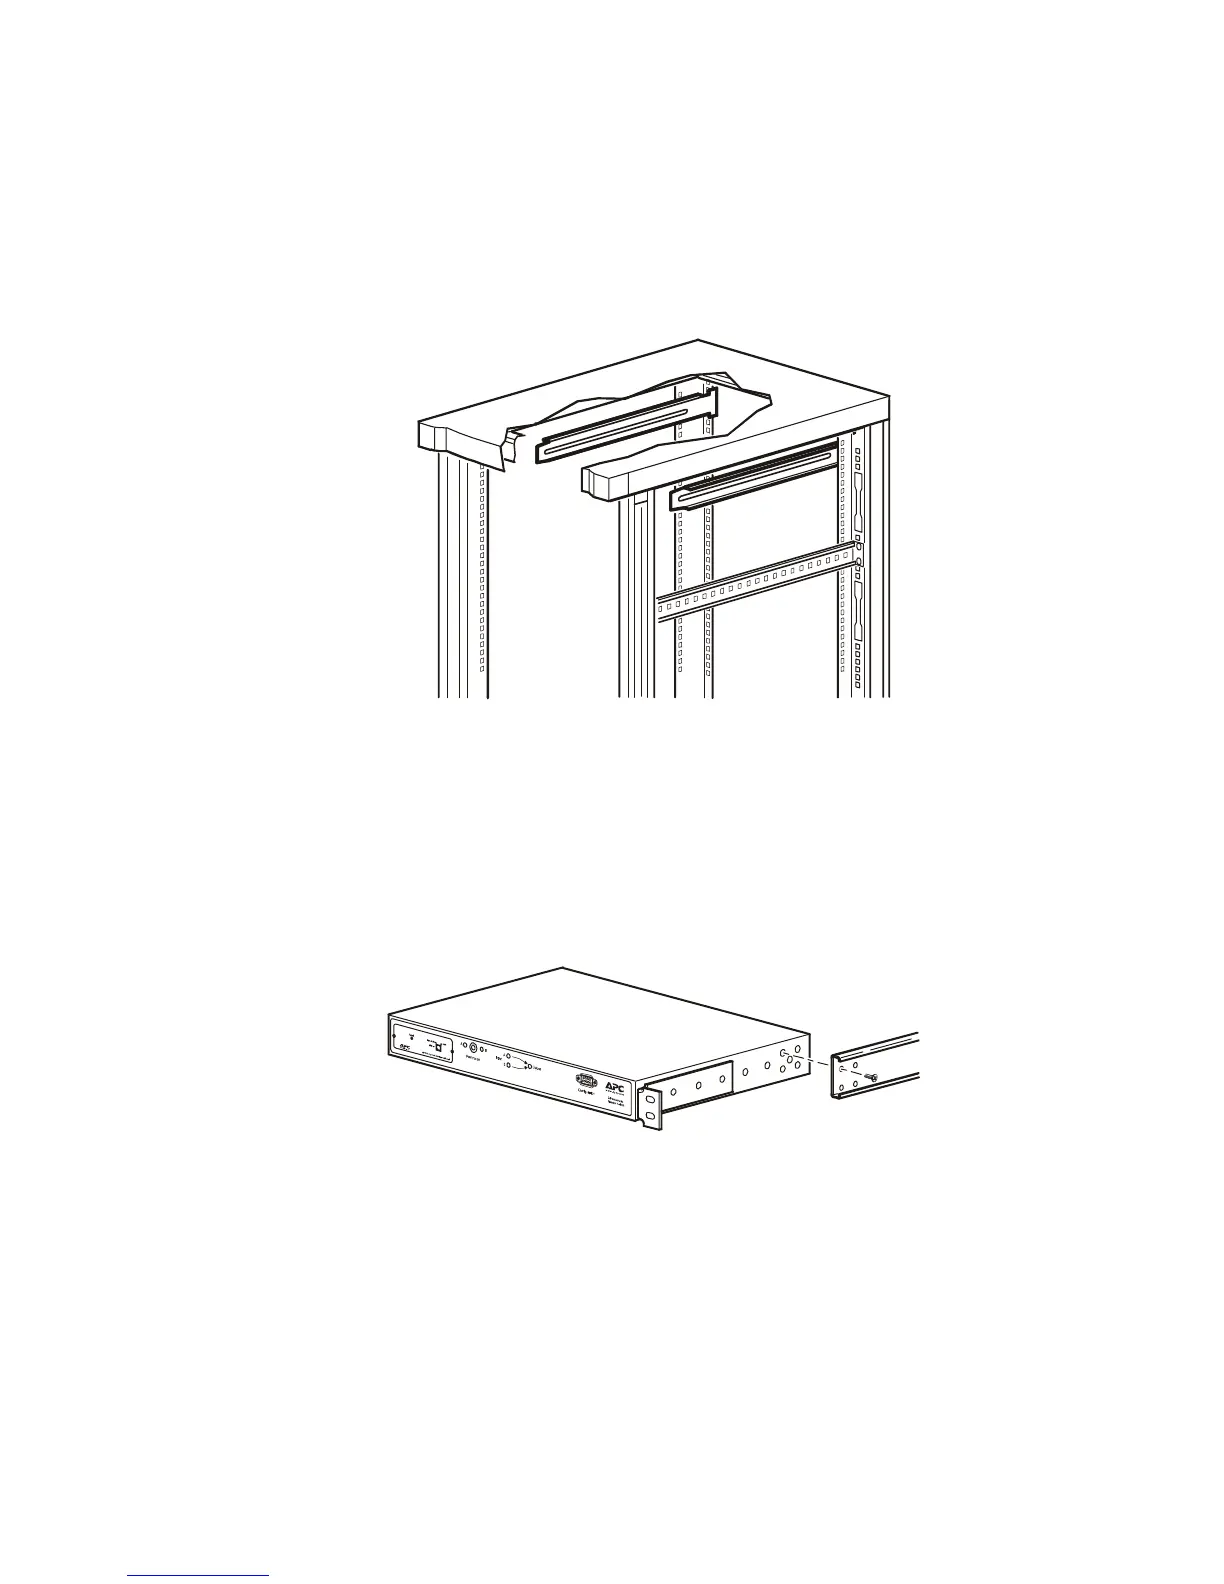
Attach rear segments to the rack
1. Insert caged nuts (provided with your enclosure) on the enclosure’s rear vertical mounting rails
at your chosen location.
2. Align the rear segments of the adjustable bracket with the caged nuts you inserted in step 1.
3. Insert and tighten mounting screws (provided).
Attach front segments to the switch
1. Align the front segments of the adjustable bracket with the four corresponding holes on the
sides of the switch.
2. Attach both front segments to the switch using two Phillips pan-head screws (provided) for each
bracket segment.
mph0013a
mph0095a

Questions and Answers:

Question and Answer IconNeed help?

Do you have a question about the APC Automatic Transfer and is the answer not in the manual?

APC Automatic Transfer Specifications

General IconGeneral
Frequency50/60 Hz
Form FactorRack-mountable
DimensionsVaries by model
WeightVaries by model
Network ManagementOptional
Humidity0 - 95% RH, non-condensing
Operating Temperature0°C to 40°C

Related product manuals