25
RUNNING A TEST
Parts
Setup M.L. How to
M.L. Software Download Troubleshooting
Hardware Cong
Tech Stats/Info
Parts
Setup M.L. How to
M.L. Software Download Troubleshooting
Hardware Cong
Tech Stats/Info
Parts
Setup M.L. How to
M.L. Software Download Troubleshooting
Hardware Cong
Tech Stats/Info
Parts
Setup M.L. How to
M.L. Software Download Troubleshooting
Hardware Cong
Tech Stats/Info
Parts
Setup M.L. How to
M.L. Software Download Troubleshooting
Hardware Cong
Tech Stats/Info
Parts
Setup M.L. How to
M.L. Software Download Troubleshooting
Hardware Cong
Tech Stats/Info
Parts
Setup M.L. How to
M.L. Software Download Troubleshooting
Hardware Cong
Tech Stats/Info
1. Click on the subject you wish to test. Click on the
“New Test” button on the top right of your
screen.
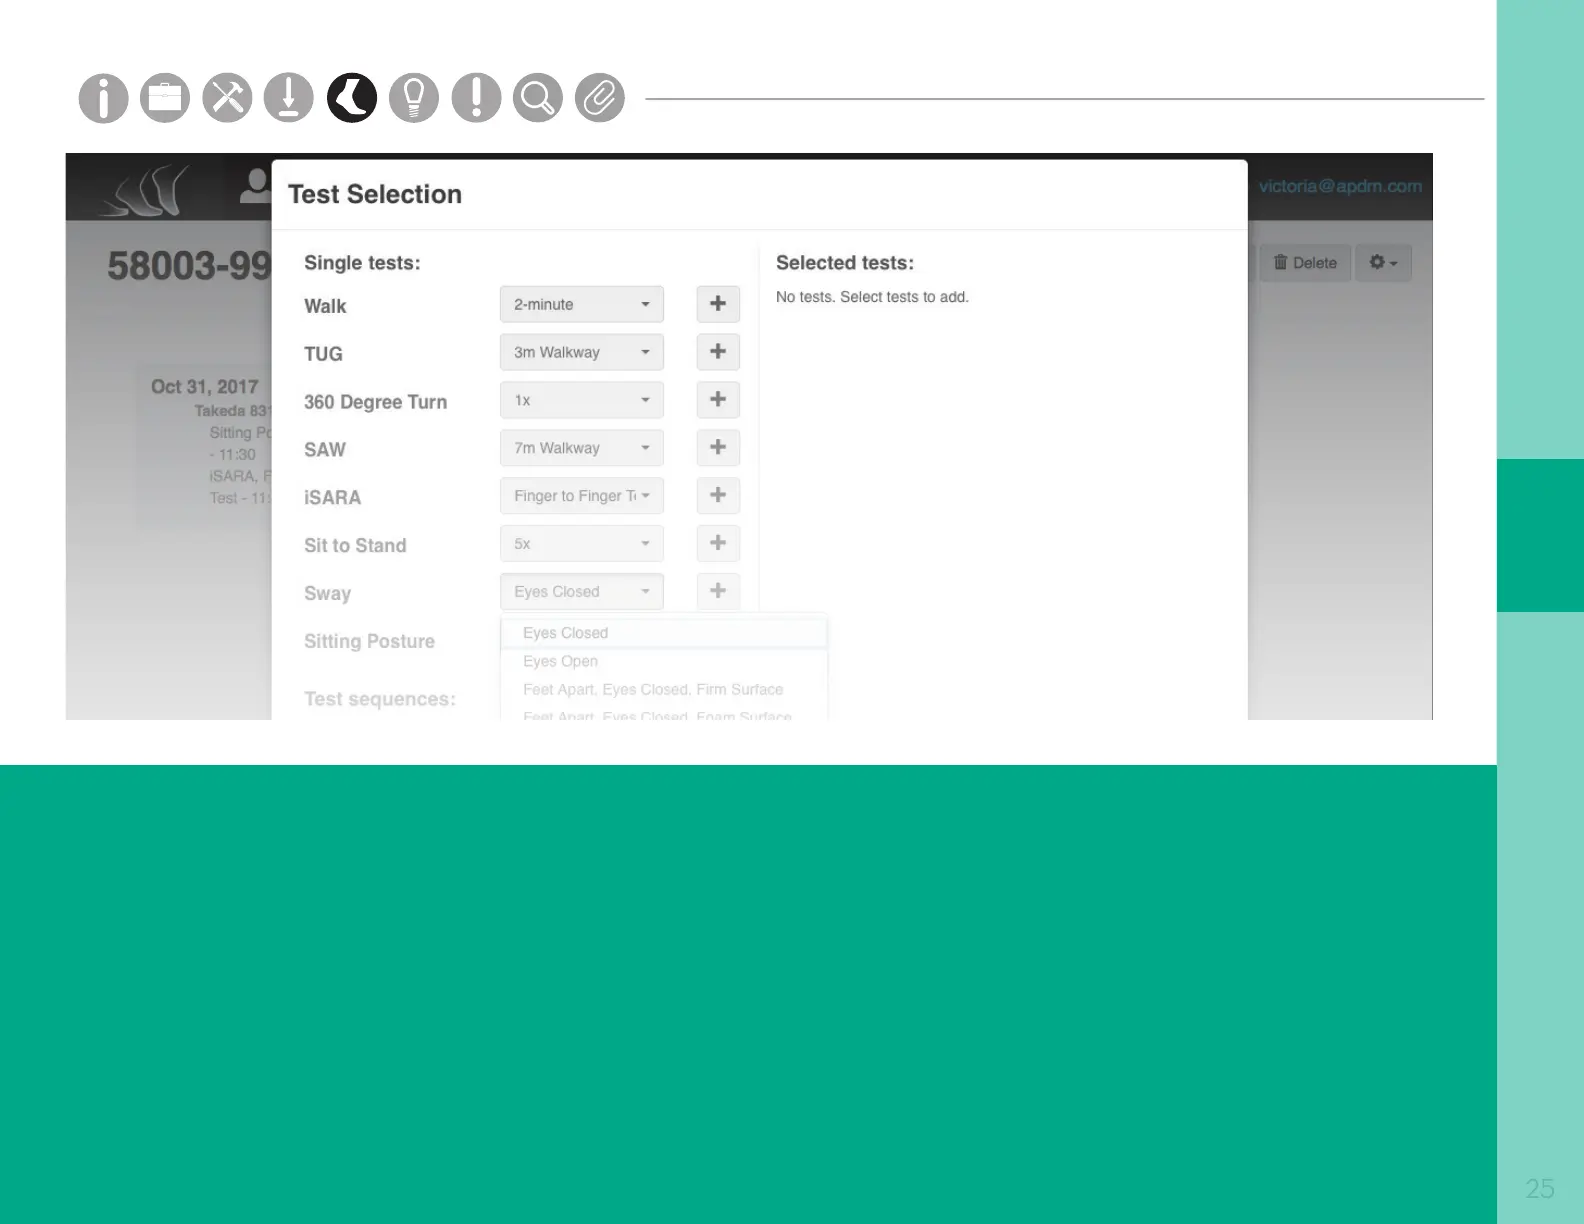
2. Select the test(s) and condition(s) you would
like to run. You may select multiple tests or one
predened test sequence. Click Next to continue.
3. Follow the instructions on each dialog box to
complete each test. Click on blue text for more
instructions, including how to place sensors.
Click Next.
4. Subject instructions should be read out loud, and
Administrator instructions should be referred to for
more information.
5. If annotations were enabled under Options/UI, enter
label(s) for the annotation buttons
6. If using the wireless remote, press the forward
button to start and stop each test.
Tip: Your subject should remain still during the 3 second
countdown at the beginning of the tests for proper calibration.