26
Brake Adjustment
Note: this section will go over how to tighten your
brakes. For an in-depth brake adjustment tutorial,
please visit the help centre.
Your brakes are arguably the most important
component of your scooter. We’re strong
believers that you need to be able to stop on
a dime at all times. Tightening your brakes
will be the longest step in the process, but
one you definitely do not want to skip.
If you’ve put over 300 miles on your scoot-
er, you will also want to replace your brake
pads. We have included two extra sets for
you in the box, but you can always purchase
spare ones on our website at apolloscoot-
ers.co
The disc brakes and the hydraulic brakes
(depending on which version of the Phan-
tom you own) can be tightened in the same
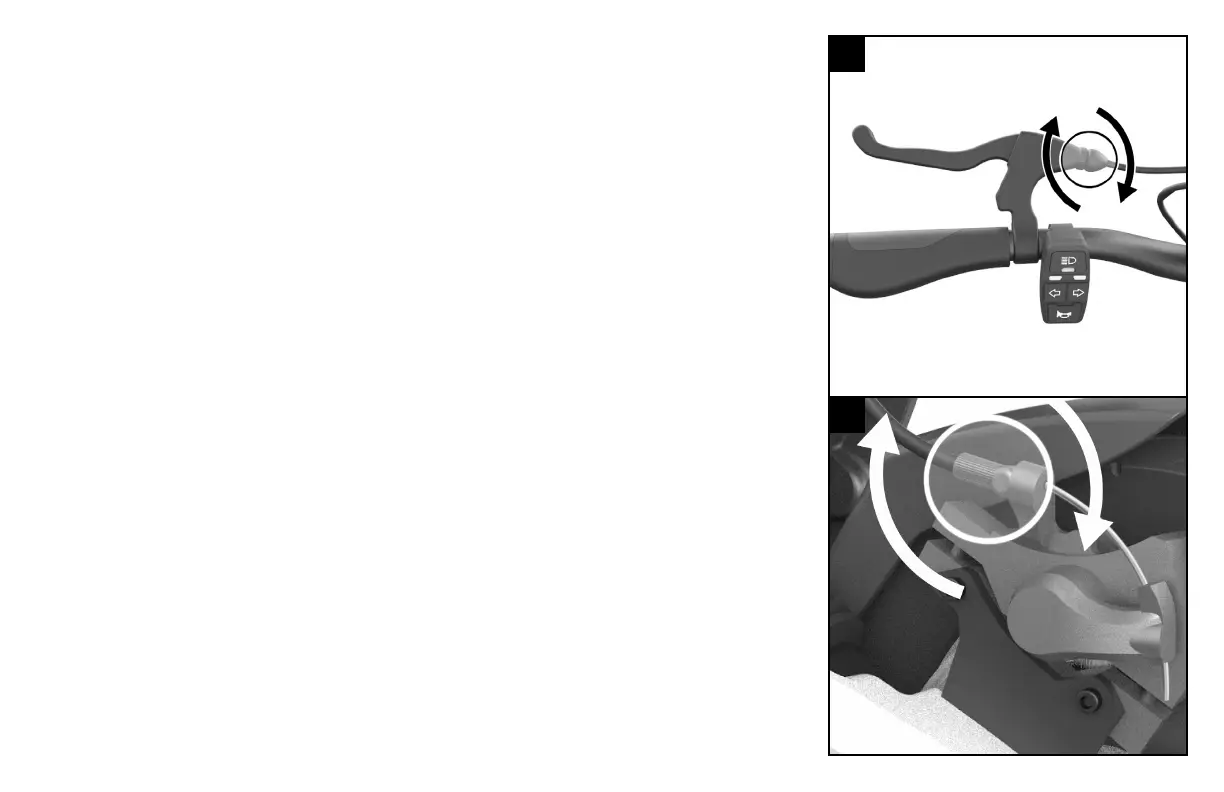
way. The first point of control is your brake
handle. Locate the adjustment screw at the
connection of the brake line to the brake
handle.
Turning it counterclockwise will tighten
your brake. Turning it clockwise will do the
opposite, making the brake looser. If you
have reached the maximum position of the
adjustment screw and the brakes are not
comfortably tight, proceed to the next step.
Please note this next section only applies to
Phantom scooters with mechanical brakes,
not hydraulic. For adjustments of hydraluic
brake calipers, visit our help centre. Locate
the brake caliper corresponding to the brake
handle you just adjusted (le = rear, right =
front). Identify the calliper adjustment screw
at the connection of the
brake line to the calliper.
Like before, turning the adjustment screw
will tighten your brake. Turning it clockwise
will do the opposite, making the brake
looser. Pause aer each turn to turn the
wheel and apply the brake, testing the brake
tension. When the brake feels comfortably
tight, move on to the other handle/brake.
If your brakes do not feel comfortably tight
or perform as expected aer these steps,
please reference the brake adjustment guide
on our help centre.
1
2