Chapter 3 Working Inside Your Computer 63
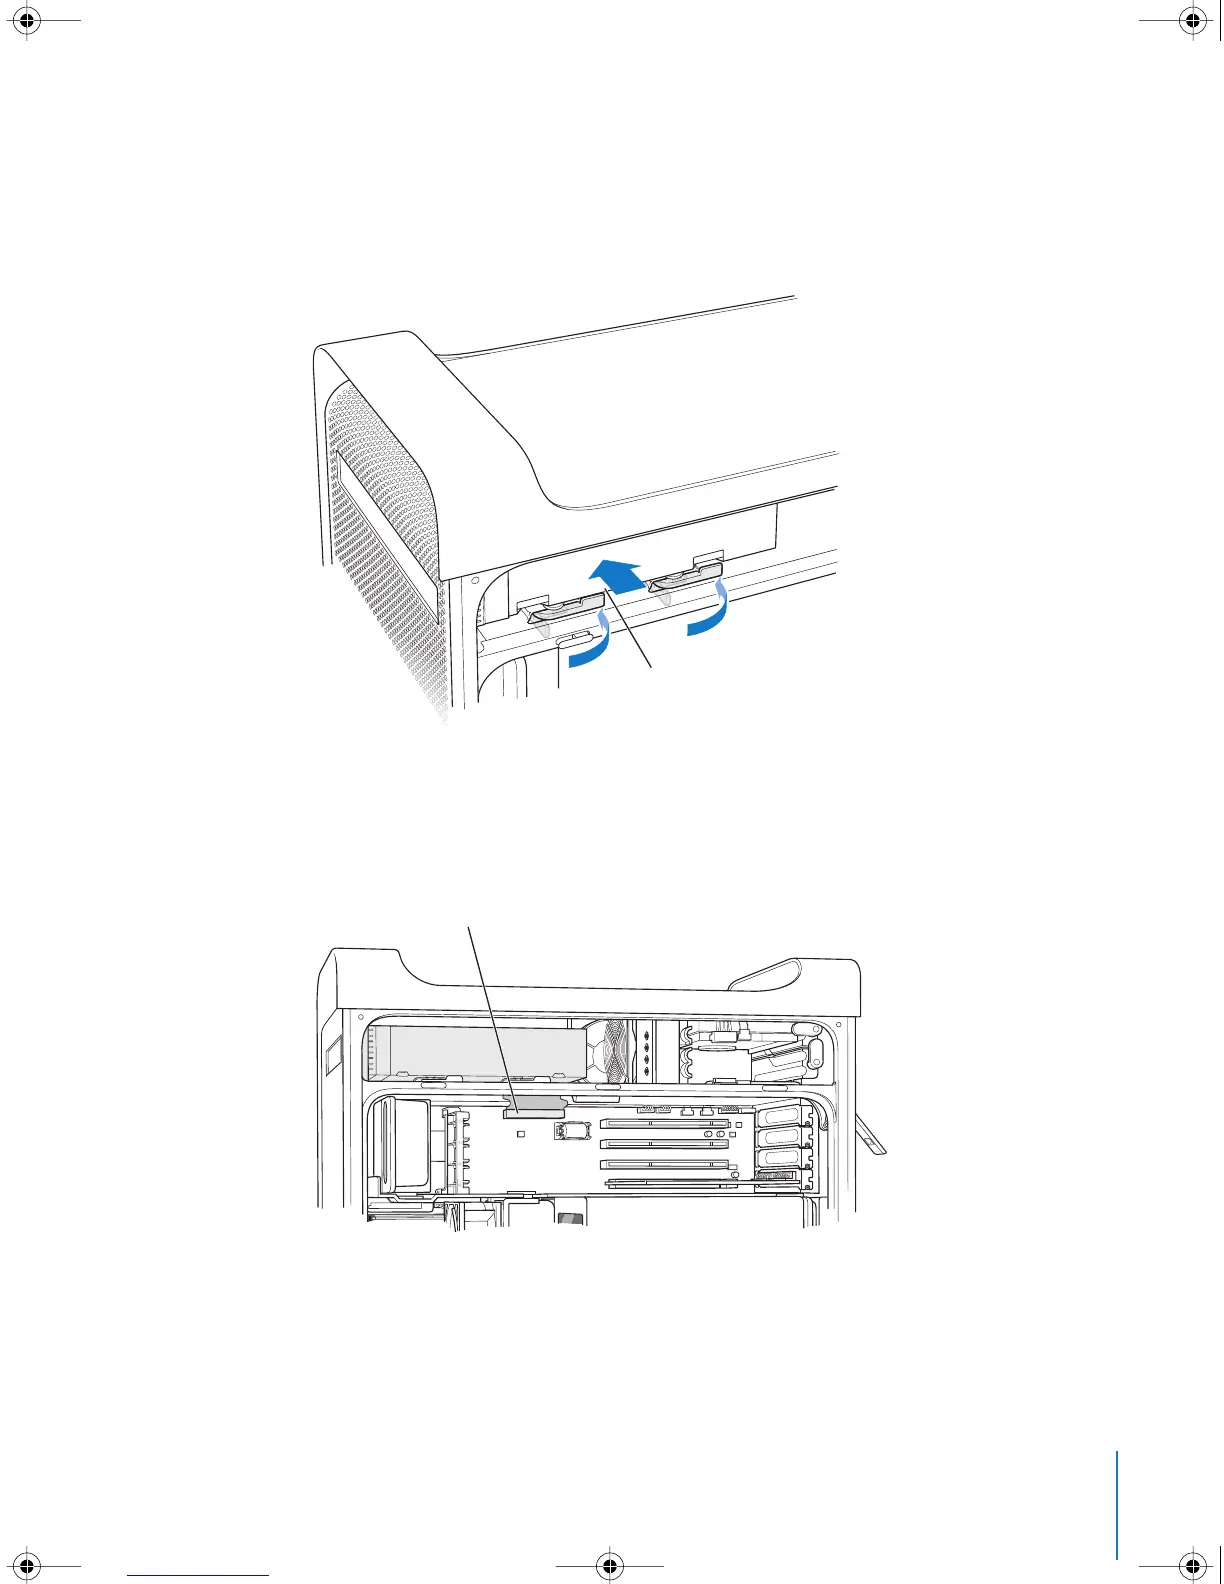
13 Slide the drive the rest of the way into the drive bay, aligning the optical drive guide
pins in the slots, and gently push the drive into place.
14 The optical drive release levers should close when the drive is installed correctly. If they
don’t close, gently push them.
15 Attach the optical drive ribbon cable to its connector on the logic board.
16 Replace the side panel, following the directions that begin on page 54.
Push the optical drive into the computer so
that the guide pins on the bottom of the drive
engage the four slots inside the computer.
Close the optical drive release levers completely
when the drive is properly seated.
Reattach this cable to the connector
on the main logic board.
LL3218Q87.book Page 63 Wednesday, March 16, 2005 6:28 PM