WARNING
120 Volts may cause serious injury from electrical shock. Disconnect power and shut off water supply before servicing.
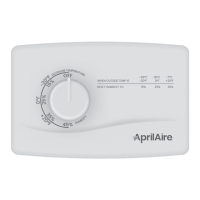
1. Note manual humidifier control setting and
turn dial to the “OFF” position.
2. Turn off water supply.
3. Remove the three “Z” clips (1) that hold the top
half of humidifier to furnace plenum.
4. Slide off four closure clips (2 & 3) that hold the
two humidifier halves together.
5. Loosen compression fitting (4) on copper feed
tube (5) and remove.
6. Remove top screw holding sheet metal
ductwork to humidifier.
7. Remove top half of humidifier (lift straight up).
Remove water distribution pan cover (6) and
remove any mineral deposits from the “V”
notches. DO NOT scrape off granular coating
from the bottom. This textured surface helps
ensure even water flow for maximum
performance. If the granular coating has been
removed, place several drops of liquid
dishwashing soap on the distribution tray. This
will only need to be done once if there is no
granular coating.
8. Remove Water Panel evaporator and scale
control insert (if used).
9. Remove Water Panel evaporator from insert (if
used) and clean insert by flexing or using putty
knife. If scale control insert is not used, contact
your dealer about obtaining one.
10. Install a new Water Panel evaporator, with
colored spot UP, in scale control insert (if
used), or directly into the humidifier if insert is
not used. IMPORTANT: When installing scale
control insert and Water Panel evaporator into
the humidifier, the insert spout must discharge
directly into the drain.
11. Remove drain line (7) from the bottom of the
humidifier. If applicable, flex it to loosen
internal mineral deposits or blockages. Then
flush it with water under pressure. If it does
not properly clear, replace it. Slip drain line
back onto the drain fitting. Make sure the drain
line has a constant downward slope and is not
flattened or blocked.
12. Following Water Panel evaporator replacement
and maintenance, reassemble humidifier.
13. Turn on water supply.
14. Check system operation: With the furnace
blower operating, turn up manual humidifier
control and check system operation.
15. Set manual humidifier control to its original
position.
6
1
2
3
7
1
5
1
2
4
3
6
2
4
3
1
7
4
5
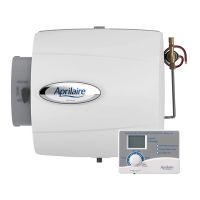
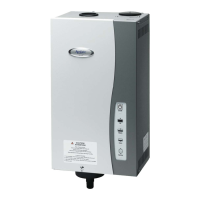
Aprilaire / Chippewa
Model 220
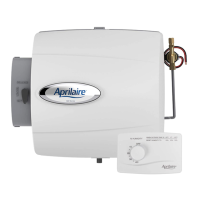
Aprilaire Model 110
(Serial number 89414 and higher)
1
3
4
10
5 6
8
7
9
2
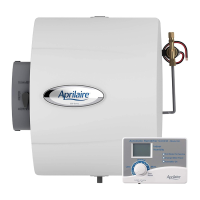
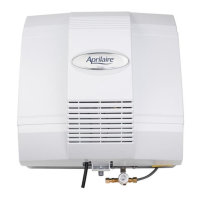
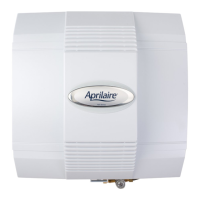
Aprilaire
Models 550, 550A & 558
90-941
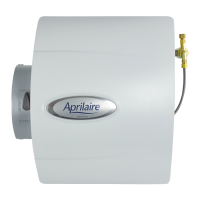
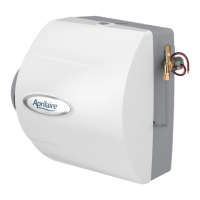
Aprilaire
Models 500,
500A & 500M
90-1076
1
4
5
6
7
8
2
9
3
Water Line Inspection and Service Instructions for All Models
The humidifier is
equipped with an in-line
water strainer. See the
following instructions for
strainer cleaning.
1. Note manual humidifier control setting and turn
dial to the “OFF” position.
2. Disconnect electrical power. Turn off water supply.
3. Disconnect: a) 120 volt electrical service.
b) Copper water supply line (1) and feed tube (2).
c) Drain line. d) 24 volt leads.
4. Turn two swing locks (3), one at either side of
lower housing of humidifier flange.
5. Lift humidifier straight up until bottom of humidifier
clears lip of lower housing. Pull humidifier out at
bottom, lower and remove.
6. Slide off three closure clips (4 & 5) that hold 2
halves of humidifier together.
7. Remove upper half of humidifier. Remove water
distribution pan cover (6) and remove any mineral
deposits from the “V” notches. DO NOT scrape off
granular coating from the bottom. This textured
surface helps ensure even water flow for
maximum performance. If the granular coating has
been removed, place several drops of liquid
dishwashing soap on the distribution tray. This will
only need to be done once if there is no granular
coating.
8. Remove Water Panel evaporator and scale control
insert (if used).
9. Remove Water Panel evaporator from insert (if
used) and clean insert by flexing or using putty
knife. If scale control insert is not used, contact
your dealer about obtaining one.
10. Install a new Water Panel evaporator, with
colored spot UP, in scale control insert (if used),
or directly into the humidifier if insert is not used.
IMPORTANT: When installing scale control insert
and Water Panel evaporator into the humidifier, the
insert spout must discharge directly into the drain.
11. Remove drain line (7) from the bottom of the
humidifier. If applicable, flex it to loosen any
mineral deposits or blockages. Then flush it with
water under pressure. If it does not properly clear,
replace it. Slip drain line back onto the drain fitting.
Make sure the drain line has a constant downward
slope and is not flattened or blocked.
12. Following Water Panel evaporator replacement
and maintenance, reassemble humidifier.
13. Reconnect electrical power.
14. Turn on water supply.
15. Check system operation: With the furnace blower
operating, turn up manual humidifier control and
check system operation.
16. Set manual humidifier control to its original
position.
1. Disconnect electrical power to the furnace and shut off water supply.
2. Disconnect the water line at the inlet compression nut.
3. Remove the in-line strainer from inside the inlet side of the valve by
using a small nail or wire.
4. Flush the in-line strainer clean or replace with a new strainer, Service
Department, Part No. 4004.
5. Reconnect the inlet water line. Double Wrench to Prevent Leaking.
6. Disconnect the water feed tube at the outlet compression nut.
7. Inspect the water feed tube (plastic only) by gently flexing it and looking
for cracks or signs of wear. Replace tube if it is cracked, brittle, or has
been damaged.
8. Remove the orifice from the copper or plastic water feed tube and make
sure this small opening is unplugged.
9. Replace the orifice with Part No. 4007 (white – Models 110 and 220) or
Part No. 4231 (yellow – Models 500, 500A, 500M, 550, 550A and 558) and
reconnect the water feed tube. Double Wrench to Prevent Leaking.
10. Turn on water supply and reconnect electrical power to the furnace.
ORIFICE
INLET
COMPRESSION
NUT
INLET
SOLENOID
VALVE
OUTLET
COMPRESSION
NUT
IN-LINE
STRAINER
WATER
FEED TUBE
1. Note Humidifier Control setting and turn dial to the “OFF” position.
2. Turn off water supply. Move the integral bypass damper (10), if present, to the
SUMMER position.
3. At the side of the humidifier opposite the airflow duct, pull front cover (1) off
holding with both hands and set aside.
4. Carefully pull the feed tube (2) out of the nozzle (3) at the top of the evaporative
assembly (4). Pull this assembly out by grasping at top and tipping out.
5. Remove the distribution tray (5) from the Water Panel evaporator assembly (4) by
unsnapping the plastic ends of the scale control insert (8), from the tabs at the end
of the tray. Follow the instructions below depending upon the type of distribution
tray in your humidifier:
For trays with a synthetic fabric liner: Lightly scrape out or brush off any
mineral deposits, being careful not to stretch or loosen the synthetic fabric liner.
Soaking the tray in vinegar or a lime-removing agent is helpful when trying to
remove stubborn mineral deposits.
For trays with granular coating: Do not scrape off the granular coating, but
lightly scrape out any mineral deposits and clean the “V” notches (6). This textured
surface helps ensure even water flow for maximum performance. If the granular
coating has been removed, place several drops of liquid dishwashing soap on the
distribution tray. This will only need to be done once if there is no granular coating.
6. Slide the Water Panel evaporator (7) out of the scale control insert (8). Clean the scale
control insert of mineral deposits. Slide the new Water Panel evaporator into the scale
control insert with the colored spot up and snap the distribution tray (5) back into place.
7. Inspect feed tube (plastic only) by gently flexing it and looking for cracks or signs of
wear. Replace tube if it is cracked, brittle, or has been damaged.
8. Reinstall the Water Panel evaporator assembly (4) into the humidifier by fitting its
drain into the round receptacle at the base of the humidifier. Push the assembly in
at the top against the beveled tabs that will hold it in place. Push the end of the
feed tube (2) firmly back into the nozzle (3) and replace the front cover (1).
9. Remove the drain line (9) from the bottom of the humidifier. If applicable, flex it to
loosen any mineral deposits or blockages. Then flush it with water under pressure. If
it does not properly clear, replace it. Slip drain line back onto the drain fitting. Make
sure the drain line has a constant downward slope and is not flattened or blocked.
10. Turn on the water supply. Return integral bypass damper (10), if present, to
appropriate position.
11. Check system operation:
Manual Humidifier Control: With the furnace blower operating, turn up manual
humidifier control and check system operation.
Automatic Humidifier Control: (Automatic or Manual mode) Check system
operation by turning the knob to “Test”. With furnace blower operating, humidifier
will operate for one minute. DO NOT LEAVE IN TEST MODE AS HUMIDIFIER WILL
NOT OPERATE. For Controls with Change Water Panel indicator light, turning knob
to “Test/Reset” will reset Change Water Panel indicator.
12. Set Humidifier Control to its original position.
1. Note Humidifier Control setting and turn dial to the “OFF” position.
2. Turn off water supply. Move the integral bypass damper (3) to the
SUMMER position.
3. Press the tabs in the latches on the top and bottom of front cover
(1) and pull cover off base with both hands. Set aside.
4. Pull the plastic feed tube (2) out of the distribution tray (5) at the
top of the Water Panel evaporator assembly (4). Pull this assembly
out by grasping at top and tipping out.
5. Unsnap the distribution tray (5) from the scale control insert (8).
Lightly scrape out or brush off any mineral deposits, being careful
not to stretch or loosen the synthetic fabric liner. Soaking the tray
in vinegar or a lime-removing agent is helpful when trying to
remove stubborn mineral deposits.
6. Slide the Water Panel evaporator (7) out of the scale control insert
(8). Clean the scale control insert of mineral deposits. Slide the
new Water Panel evaporator into the scale control insert with the
colored spot up and snap the distribution tray (5) back into place.
7. Inspect the plastic feed tube (2) by gently flexing it and looking for
cracks or signs of wear. Replace tube if it is cracked, brittle, or has
been damaged.
8. Reinstall the Water Panel evaporator assembly (4) into the
humidifier by fitting its drain into the round receptacle at the base
of the humidifier. Push the assembly in at the top until it snaps
into place. Push the end of the feed tube (2) firmly back into the
distribution tray (5) and replace the front cover (1).
9. Remove the drain line (9) from the bottom of the humidifier. If
applicable, flex it to loosen any mineral deposits or blockages.
Then flush it with water under pressure. If it does not properly
clear, replace it. Slip drain line back onto the drain fitting. Make
sure the drain line has a constant downward slope and is not
flattened or blocked.
10. Turn on the water supply. Return integral bypass damper (3) to
appropriate position.
11. Check system operation:
Manual Humidifier Control: With the furnace blower operating,
turn up manual humidifier control and check system operation.
Automatic Humidifier Control: (Automatic or Manual mode)
Check system operation and reset Change Water Panel indicator
by turning the knob to “Test/Reset”. With furnace blower
operating, humidifier will operate for one minute. DO NOT LEAVE
IN TEST MODE AS HUMIDIFIER WILL NOT OPERATE.
12. Set Humidifier Control to its original position.
No. 10 Water Panel Evaporator Installation Page 1