Do you have a question about the APRILIA ATLANTIC 250 and is the answer not in the manual?
| Displacement | 244 cc |
|---|---|
| Cooling System | Liquid cooled |
| Fuel System | Carburetor |
| Front Suspension | Telescopic fork |
| Front Brake | Disc |
| Rear Brake | Disc |
| Seat Height | 780 mm |
| Front Tire | 120/70-14 |
| Rear Tire | 140/60-14 |
| Engine Type | Single cylinder, 4-stroke |
| Transmission | Automatic |
| Rear Suspension | Dual shock absorbers |
| Length | 2120 mm |
| Height | 1370 mm |
Provides introductory information about the manual's purpose and scope.
Contains the main introductory text, purpose, and intended audience of the manual.
Lists other relevant manuals and documentation for comprehensive understanding of the vehicle.
Explains common abbreviations, symbols, and conventions used throughout the manual for clarity.
Describes the structure and organization of the manual for efficient navigation and reference.
Explains symbols, abbreviations, and terms used to convey information and instructions in the manual.
Details safety warnings, danger alerts, and important notes for safe operation and maintenance.
Outlines essential rules and safety precautions to follow during vehicle operation and maintenance.
Covers fundamental safety guidelines and practices for vehicle handling and service.
Identifies hazardous materials and components encountered during motorcycle maintenance.
Provides specific warnings and safety precautions related to fuel, lubricants, coolant, and other fluids.
Offers recommendations and guidelines for the initial period of vehicle operation to ensure durability.
Details the specific procedures and advice for breaking in the new vehicle.
Explains how to locate and understand the vehicle's identification numbers for registration and warranty.
Specifies the exact locations of the frame and engine serial numbers on the vehicle.
Advises on the correct use of tools and the importance of using genuine Aprilia spare parts.
Emphasizes the use of Aprilia original spare parts for optimal performance and safety.
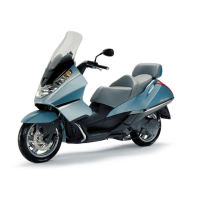
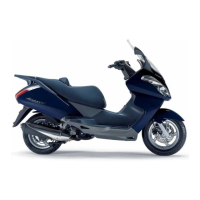
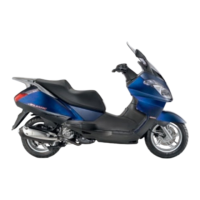
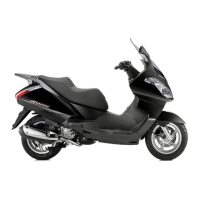
Provides detailed specifications and dimensions for various vehicle components and systems.
Lists comprehensive technical data including dimensions, engine specs, capacities, and transmission details.
Guides on the correct procedure for applying decals to the vehicle's bodywork.
Details recommended products, lubricants, and fluids for maintenance and operation.
Provides a comprehensive chart of recommended lubricants, greases, and fluids for different vehicle parts.
Explains the specific uses and applications of various recommended maintenance products.
Covers general principles and settings for tightening various fasteners and components.
Specifies torque values for common screws and bolts, essential for safety and assembly.
Introduces the importance and scope of regular maintenance for vehicle performance.
Explains the significance of adhering to the scheduled maintenance for optimal vehicle condition.
Presents a detailed table outlining maintenance tasks and intervals for various vehicle components.
Identifies specific points on the vehicle that require lubrication for smooth operation.
Details the locations and types of lubrication required for key moving parts.
Covers general procedures and safety aspects related to tightening vehicle components.
Guides on the accurate tightening of various fasteners, focusing on safety-critical parts.
Provides specific torque settings and notes for various fastening elements throughout the motorcycle.
Details the care, maintenance, and testing procedures for the vehicle's battery.
Explains battery types, activation, maintenance, and inspection requirements.
Provides instructions for inspecting and cleaning battery terminals to ensure good electrical contact.
Guides on how to check and maintain the correct electrolyte level in the battery.
Outlines the procedure for safely recharging the vehicle's battery.
Offers advice on battery care when the vehicle is stored for extended periods.
Covers checks and inspections related to various electrical components of the vehicle.
Details checks for lighting, switches, connectors, and sensors for proper electrical system function.
Explains how to check, clean, and replace spark plugs for optimal engine performance.
Provides detailed instructions on spark plug inspection, cleaning, gap adjustment, and replacement.
Guides on cleaning and replacing the air filter to ensure proper engine air intake.
Details the procedure for cleaning and replacing the air filter element for engine health.
Covers inspection and replacement guidelines for various fuel, brake, and cooling system tubes.
Provides warnings and replacement advice for fuel, brake, and cooling system lines.
Details procedures for checking and topping up the engine coolant level.
Explains how to check and maintain the coolant level in the expansion reservoir.
Provides instructions on how to clean the radiator for optimal cooling efficiency.
Covers checking, topping up, and changing the brake fluid for system safety.
Details the procedure for checking and refilling the brake fluid reservoir to maintain braking performance.
Outlines the process for replacing old brake fluid with new fluid to ensure system integrity.
Explains how to visually inspect brake pads for wear and determine when replacement is needed.
Details the critical procedure for removing air from the hydraulic brake system.
Covers checking and topping up the engine oil level for proper lubrication.
Provides instructions for checking engine oil level and adding oil if necessary.
Details the procedure for changing engine oil and replacing the oil filter for engine maintenance.
Covers checking and topping up the transmission oil for gearbox lubrication.
Explains how to check and replenish the transmission oil level.
Outlines the procedure for changing the transmission oil.
Covers inspection and adjustment of the throttle control system.
Details how to check throttle operation, cable lubrication, and adjuster settings.
Provides instructions for adjusting the engine's idle speed for stable operation.
Covers inspection and adjustment of the steering and front suspension.
Explains how to check and adjust steering bearing play for smooth handling.
Guides on inspecting and maintaining the front fork suspension system.
Covers inspection of the rear axle and suspension components.
Details how to check for clearance in the engine shaft bushes and axle parts.
Explains how to inspect rear suspension for oil leaks and proper tightening.
Covers inspection and balancing of the front and rear wheels.
Provides instructions for checking wheel rotation, bearings, and balancing.
Covers tyre condition checks, pressure, and replacement guidelines.
Details tyre inspection for wear, damage, and correct inflation procedures.
Covers maintenance tasks related to the exhaust system.
Specifies the procedure for tightening exhaust manifold nuts to ensure a secure connection.
Introduces the lubrication system and its importance for vehicle operation.
Refers to the engine workshop manual for detailed information on the lubrication system.
Details the components and flow of the vehicle's fuel supply system.
Illustrates the fuel supply system with a diagram and key for identification.
Provides step-by-step instructions for replacing the fuel filter to ensure clean fuel delivery.
Guides on safely removing the fuel tank from the vehicle for maintenance or replacement.
Details the procedure for removing the fuel level sensor from the fuel tank.
Covers inspection, cleaning, and replacement of the air filter for engine performance.
Explains how to remove the air filter box assembly to access the air cleaner.
Provides instructions for removing the air cleaner element from the air box for servicing.
Covers removal, disassembly, assembly, and adjustment of the carburetor.
Details the procedure for safely removing the carburetor from the engine.
Provides step-by-step instructions for disassembling the carburetor for cleaning or repair.
Guides on the correct procedure for reassembling the carburetor after servicing.
Explains how to test the automatic starter for proper functioning.
Covers the procedure for adjusting the fuel-air mixture for optimal idling.
Illustrates the components and flow of the cooling system with a diagram.
Provides a detailed diagram of the cooling system, including pump, radiator, and reservoir.
Covers procedures for changing the engine coolant.
Details the process for draining and refilling the engine coolant.
Covers the removal and installation of the radiator.
Provides step-by-step instructions for safely removing the radiator from the vehicle.
Guides on how to remove the electric cooling fan from the radiator assembly.
Covers the removal and replacement of the water temperature sensor.
Details the procedure for removing the water temperature sensor.
Covers the removal of the coolant expansion reservoir.
Provides instructions for safely removing the coolant expansion reservoir.
Details the removal and installation procedures for the exhaust system components.
Provides instructions for removing the exhaust silencer from the motorcycle.
Guides on the complete removal of the exhaust system, including manifold and silencer.
Lists engine parts that can be removed without detaching the entire engine from the frame.
Covers the procedures for removing and installing the engine into the vehicle frame.
Provides a detailed, step-by-step guide for removing the engine from the motorcycle frame.
Guides on the correct procedure for reinstalling the engine into the motorcycle frame.
Details the removal and installation of various body panels and covers.
Provides an overview and diagram of the vehicle's bodywork components.
Explains how to remove the rider's seat (saddle) from the vehicle.
Guides on how to remove the side panels located at the rear of the vehicle.
Details the procedure for removing the luggage rack from the vehicle.
Explains how to remove the tail section of the motorcycle's bodywork.
Guides on how to remove the component that holds the license plate.
Details the procedure for removing the central tunnel cover section.
Explains how to remove the air dam component from the vehicle.
Guides on how to remove the legshield or front fairing panel.
Details the procedure for removing the front cover section of the bodywork.
Explains how to remove the windshield screen.
Guides on how to remove the side rear-view mirrors.
Details the procedure for removing the side fairing panels.
Explains how to remove the front mudguard.
Guides on how to remove the rear mudguard.
Details the procedure for removing the helmet storage compartment.
Explains how to remove the covers around the handlebars.
Guides on how to remove the splashguard.
Provides instructions for safely removing the vehicle's battery.
Details how to remove the Engine Control Unit (ECU).
Explains how to remove the voltage regulator.
Guides on removing the switch assembly located on the right handlebar.
Explains how to remove the switch assembly located on the left handlebar.
Provides instructions for removing the instrument cluster (dashboard).
Details how to remove the front headlight assembly.
Guides on removing the front turn signal indicators.
Explains how to remove the tail light assembly.
Details how to remove the ignition coil.
Covers the removal and inspection of various controls like throttle and brake levers.
Provides instructions for removing the throttle control assembly.
Guides on removing the rear brake master cylinder.
Covers removal and inspection of frame components.
Details the procedure for removing the handlebars from the steering stem.
Explains how to remove the bracket that supports the dashboard and windshield.
Guides on removing the side stand.
Details the procedure for removing the centre stand.
Provides comprehensive instructions for removing the main vehicle frame.
Covers inspection, removal, disassembly, and refitting of the front wheel.
Illustrates the components of the front wheel assembly with a key.
Details the step-by-step process for removing the front wheel.
Guides on disassembling the front wheel, including bearing and seal removal.
Explains how to inspect bearings, seals, wheel spindle, and rim for wear or damage.
Provides instructions for correctly reassembling and refitting the front wheel.
Covers inspection, removal, and refitting of the rear wheel.
Illustrates the components of the rear wheel assembly with a key.
Details the step-by-step process for removing the rear wheel.
Covers inspection, replacement, and removal of brake components.
Illustrates the front and rear brake system components with a key.
Provides detailed instructions for replacing the front brake pads.
Guides on inspecting the front brake disc for thickness and run-out.
Details the procedure for removing the front brake disc.
Provides detailed instructions for replacing the rear brake pads.
Guides on inspecting the rear brake disc for thickness and run-out.
Details the procedure for removing the rear brake disc.
Explains how to remove the proportioning valve from the brake system.
Covers removal and inspection of the headstock and steering bearings.
Provides step-by-step instructions for removing the headstock assembly.
Guides on inspecting the headstock bearing components for wear and damage.
Covers diagrams, removal, disassembly, and inspection of the front fork.
Illustrates the components of the front fork assembly with a key.
Details the procedure for removing the stanchion tubes and sliders from the fork legs.
Guides on disassembling the fork stanchion tubes and sliders for maintenance.
Explains how to drain the oil from the front fork assembly.
Provides instructions for refilling the front fork with the correct type and amount of oil.
Covers inspection of stanchion tubes and sliders for damage or wear.
Guides on reassembling and refitting the fork stanchion tubes and sliders.
Covers inspection and removal of the rear shock absorber and linkages.
Details the procedure for removing the rear shock absorber.
Guides on removing the rear suspension linkage components.
Shows the location of major electrical components on the vehicle.
Provides a diagram identifying key electrical system components.
Introduces the electrical system section and provides important reading notes.
Contains introductory information for the electrical system chapter.
Covers battery activation, maintenance, inspection, and warranty information.
Details battery rating, activation, maintenance, inspection, and return under warranty conditions.
Explains the ignition system and the function of the side stand safety switch.
Details the ignition system operation and the side stand switch logic.
Covers inspection and testing of the charging system components.
Explains how to check charge voltage, alternator operation, and power supply.
Covers troubleshooting and testing of the starter circuit components.
Details the starter circuit diagram, troubleshooting, and testing of relays and motors.
Covers testing procedures for various vehicle sensors.
Explains testing procedures for coolant temperature and fuel level sensors.
Covers testing of the cooling fan and rear top box light system.
Details testing procedures for the cooling fan and thermal switch.
Covers troubleshooting and testing of the vehicle's lighting circuits.
Provides a diagram and troubleshooting steps for the vehicle's lighting system.
Covers visual and acoustic warning signals and their troubleshooting.
Details troubleshooting for direction indicators and warning horn systems.
Guides on replacing various bulbs on the vehicle.
Provides detailed instructions for replacing parking, headlight, tail, and indicator bulbs.
Covers the procedure for inspecting and replacing fuses in the electrical system.
Details the location and replacement procedure for main and auxiliary fuses.
Covers adjustment of headlight beam height and horizontal position.
Provides instructions for adjusting the vertical aim of the headlight beam.
Guides on adjusting the horizontal aim of the headlight beam.
Presents the complete wiring diagram for the vehicle's electrical system.
The detailed electrical wiring schematic for troubleshooting and reference.