6
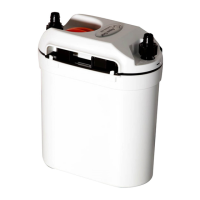
Installation
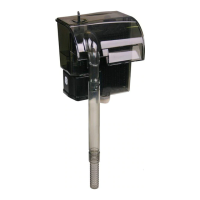
Clearview 75-100
1. Remove the lter lid to access the lter
body.
2. Place the inlet u-pipe into position. The
longer side of the pipe sits on the outside of
the lter body. The shorter side locks into the
impeller housing.
3.The extension tube then connects to the
inlet u-pipe. The strainer then attaches to the
extension tube. The strainer and extension
tube is the part that sits in the water of the
aquarium.
4. Wash the carbon cartridge in tap water
before use. DO NOT USE DETERGENT OR
SOAP. The carbon cartridge slides into the
furthest grooves with the wool
facing the rear of the lter.
(refer to the Diagram on the previous page)
5. The sponge slides in between the cartridge
and the front of the lter.
6. Push the adjusting wheel into the bottom
of the lter body. This is used to keep the
whole lter level from top to bottom, otherwise
the lter will slant away at the top and may
overow if the lter
cartridge becomes blocked.
7. Hang the lter off the back wall of the
aquarium with the extension tube and strainer
inside the aquarium water.
8. Fill the lter body with aquarium water until
it overows back into the aquarium. Turn on at
the power supply. It may take a little while to
start as it expels the air from the impeller.
9. Adjust the ow with the knob on the top
of the inlet u-pipe. It is better to leave at full
ow but if this current is too strong, turn down
slightly.
10. Place the lid back on the lter body.
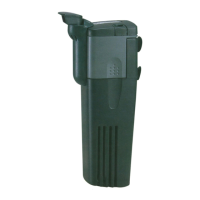
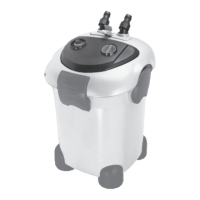
Clearview 200-800
1. Remove the lter dust cover to access the
lter body.
2. Place the inlet u-pipe into position. The
longer side of the pipe sits on the outside of
the lter body. The shorter side locks into the
impeller housing.
3. Extend the extension tube from the longer
side of the inlet u-pipe.
4. The strainer then attaches to the extension
tube.
5. Wash the carbon cartridge in tap water
before use. DO NOT USE DETERGENT OR
SOAP. The carbon cartridge slides into the
furthest grooves with the wool
facing the rear of the lter. (refer to the Diagram
on the previous page)
6. The biogrid slides in between the cartridge
and the front of the lter.
7. Hang the lter off the back wall of the
aquarium with the extension tube and strainer
inside the aquarium water.
8. Fill the lter body with aquarium water until
it overows back into the aquarium.
9. Turn on at the power supply. It may take a
little while to start as it expels the air from the
impeller.
10. Adjust the ow with the knob on the top
of the inlet u-pipe. It is better to leave at full
ow but if this current is too strong, turn down
slightly.
11. Place the dust cover back on the lter
body.
 Loading...