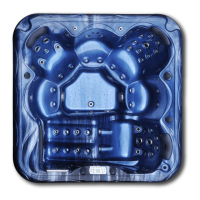
The Lorne Luxury Spa is a sophisticated hot tub designed for relaxation and hydrotherapy, offering a range of features for an enhanced user experience. This user manual provides comprehensive instructions for its operation, maintenance, and troubleshooting, ensuring safe and efficient use.
The spa operates in two primary modes: Standby and Active. The Standby mode is for setting up various cycles and preferences, while the Active mode is for enjoying the spa's features. The spa is equipped with multiple jets, a heater, an air blower, and LED lights, all controllable via a digital touchpad. It also includes an ozonator for water purification and a frost prevention system for cold weather.
-
Setting the Time: Before initial use, the spa's internal clock needs to be set in Standby mode. This is done by pressing the "HOUR" button, then using the "HOUR" and "MINUTE" buttons to adjust the time in a 24-hour format. The time setting is crucial for scheduling automated cycles.
-
Cycle Cleaning: To maintain water hygiene, the spa offers a cycle cleaning feature that purges the jets and filters the water for a set duration. This must be run for a minimum of 6 hours daily. In Standby mode, press the "CYCLE" button, then set the start time using the "HOUR" and "MINUTE" buttons. After selecting the time, press "SET" and then set the duration, again using "HOUR" and "MINUTE" buttons, ensuring it's at least 6 hours. Press "SET" again to confirm. A specific symbol will appear on the display to indicate that cycle cleaning has been set.
-
Cycle Heating (Preheating): This function allows you to preheat the spa water, ideally in conjunction with the cleaning cycle. In Standby mode, press "PREHEAT." Set the desired start time and duration, mirroring the cleaning cycle settings, using the "HOUR" and "MINUTE" buttons, followed by "SET." Then, adjust the target temperature using the temperature button. Press the power button to confirm, and an "on" sign will appear next to the time, indicating preheating is active.
-
Manual Heater Operation: In Active mode, the heater can be manually turned on to maintain a desired temperature. Press the temperature button to set the target temperature, then press the heater button. The word "heat" will flash and then become solid on the touchpad, indicating heating is in progress. The spa will automatically maintain the set temperature within a 3-degree range.
-
Hot Water Massage Pump: In Active mode, the hot water massage pump can be activated by pressing its dedicated button. Pressing it again will turn it off. The pump has an automatic shut-off after a set time.
-
Air Blower: The air blower, also operated in Active mode, is turned on and off with its specific button. Similar to the massage pump, it has an automatic shut-off.
-
Waterfall Control: The waterfall feature runs only when the spa is heating. To activate it, ensure the spa is heating (manual heater on), and the temperature is set at least two degrees above the current water temperature. Then, turn the waterfall control handle anticlockwise. To turn it off, turn the handle clockwise and reduce the temperature setting back to normal. It's important to close the handle fully when not in use to prevent water leakage.
-
Jet Control: The larger jets can be turned on or off by rotating their faces clockwise or anticlockwise, respectively. Smaller jets remain continuously on.
-
Air Control Handle: This handle adjusts the air pressure coming from the jets, increasing it when turned anticlockwise and decreasing it when turned clockwise.
-
Main Water Diverter: This handle diverts water flow within the spa, changing water pressure in different seating areas. It should not be operated while pumps are running to avoid damage.
-
Aromatherapy: The spa includes an inbuilt aromatherapy stick. To use it, turn off all pumps, unscrew the fitting, remove the stick, and expose the scented part by removing the plastic transport cover. Reinstall the stick. Turning the handle clockwise activates the aroma scent when the air blower is on, and anticlockwise turns it off.
-
LED Lights: In Active mode, pressing the light button cycles through different colors. Pressing it a second time holds a particular color, and a third press turns the lights off.
-
Frost Prevention System: This automatic system activates the heater if the water temperature drops below 5°C, raising it to 8°C to prevent freezing.
-
Ozonator: The ozonator operates automatically as needed for water purification, requiring no user adjustments.
-
Water Treatment: Proper water balance is critical for the longevity of the spa's components, including the acrylic shell, pumps, jets, heater, headrests, and fittings. The manual explicitly states that damage due to improper water balance is not covered under warranty. Users must follow the chemical pack's instructions for water treatment. Weekly water testing at a professional pool or spa store is recommended, and a dated monthly digital water test result history is a warranty requirement. Certain chemicals (Bromine, Liquid chlorine, Hydrochloric acid, Trichlor chlorine, Dichlor chlorine, Stabilized chlorine, Cyanuric acid, Magnesium, Hydrogen peroxide & Polyhexamethylene biguanide) are strictly prohibited as they can damage the spa shell and acrylic layer, voiding the warranty.
-
Filter Cleaning: Filters should be removed and thoroughly washed with a garden hose weekly. For deeper cleaning, soak them in a bucket with filter cleaner and degreaser for 24 hours, then wash and dry them. Filters should be replaced every 12 months, or every two years if rotating between two filters. The filter box face and headrests are sensitive to chemical exposure and should only be cleaned with fresh tap water.
-
Filling the Spa: To prevent air locks, the spa should be filled through the filter box with the hose fitting removed. Air locks can prevent pumps and the heater from working. If an air lock occurs, turn off the pump, loosen the unions at the suction end of the pump until water flows, then retighten and restart the pump.
-
Hardcover Care: The hardcover should always be locked when the spa is not in use to protect the spa from elements and debris. It should be lifted from underneath the valance, not by the handles or valance, to prevent tearing. Standing or sitting on the hardcover is prohibited. Zippers should not be opened. The hardcover should be cleaned with a damp fresh tap water cloth, and 303 aerospace protectant should be applied every 30 days to the vinyl side.
-
Synthetic Cabinet Care: The synthetic cabinet should be cleaned regularly with a microfibre cloth and fresh tap water. Avoid chemical cleaners and prolonged sun exposure to prevent discoloration and warping.
-
Acrylic Shell Care: The acrylic spa shell should be wiped down weekly with a chemical-free microfibre cloth, both in and above the waterline.
-
Draining the Spa: The spa should only be drained at night and refilled the same night to prevent damage to the fiberglass shell and acrylic layer from sunlight exposure when empty or partially empty. The drain fitting is located on the touchpad side of the spa, underneath the synthetic cabinet. To operate, turn the handle clockwise, pull it away from the spa to release it, unscrew the handle, attach a garden hose, push the drain halfway back, and it will begin draining. After draining, replace the handle by screwing it on clockwise and pushing it back into the fiberglass base, then slightly turning it to prevent it from coming out.