— 5 —
Customer Service (800) 945-2726 • www.aquaticbath.com
Installation Instructions
4-Piece A
2
Composite Shower System Models
12
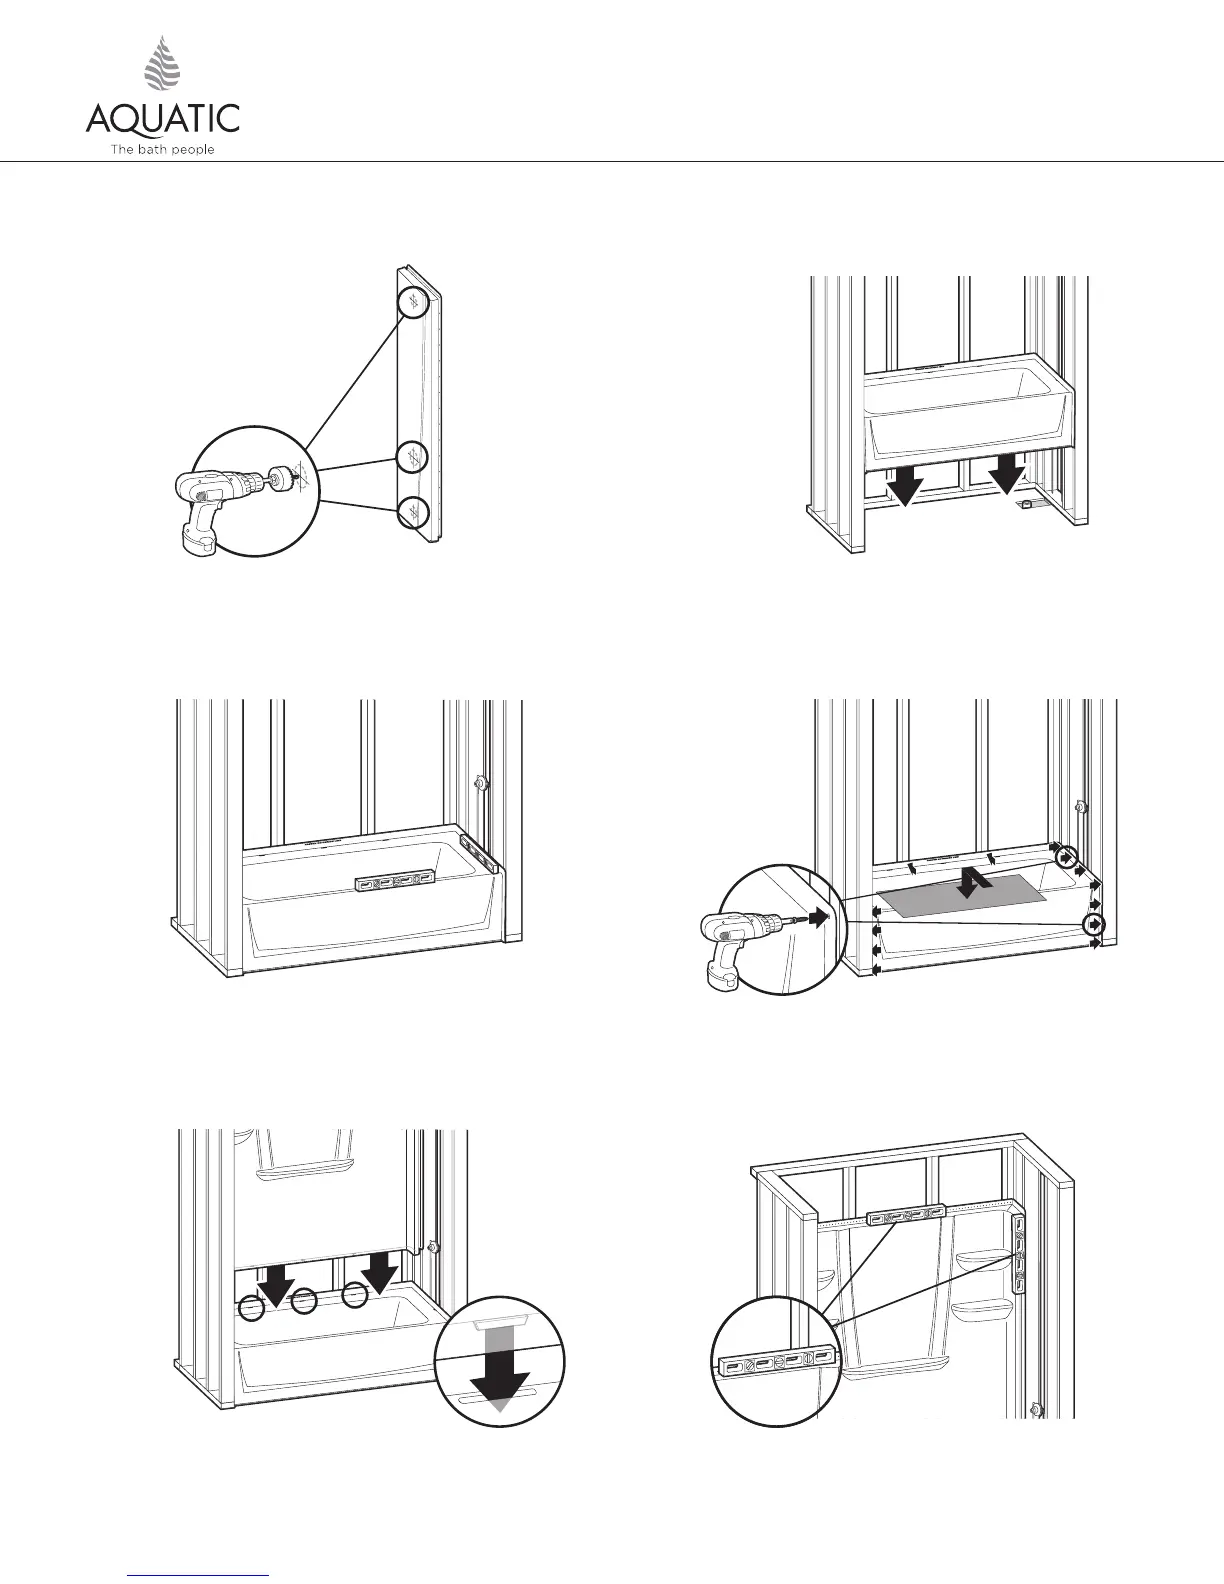
Using a hole saw (fine tooth or abrasive grit cutting edge), make necessary
openings for filler and valves, drilling from inside (smooth side) out.
Install drain assembly per manufacturer’s instructions. Place base into
framing pocket.
13
Level lengthwise and widthwise using 3 ft. (915mm) level
by shimming if necessary. The unit must be set level.
14
Pre-drill horizontal flanges along top of base section and fasten into each
corresponding stud. Pre-drill both (vertical) side flanges and fasten to side
studs 8” (200mm) on center. Place cardboard to protect finish.
15
Lift and place back wall, making sure locking tab is engaged.
16
Level back wall vertically & horizontally. Shim if necessary.
17
INSTALLATION PROCEDURE, CONT.