Aquor
®
House Hydrant V2+
ASSE 1019A CERTIFIED / meets IAPMO/cUPC
7
www.aquorwatersystems.com
(800) 458-1749
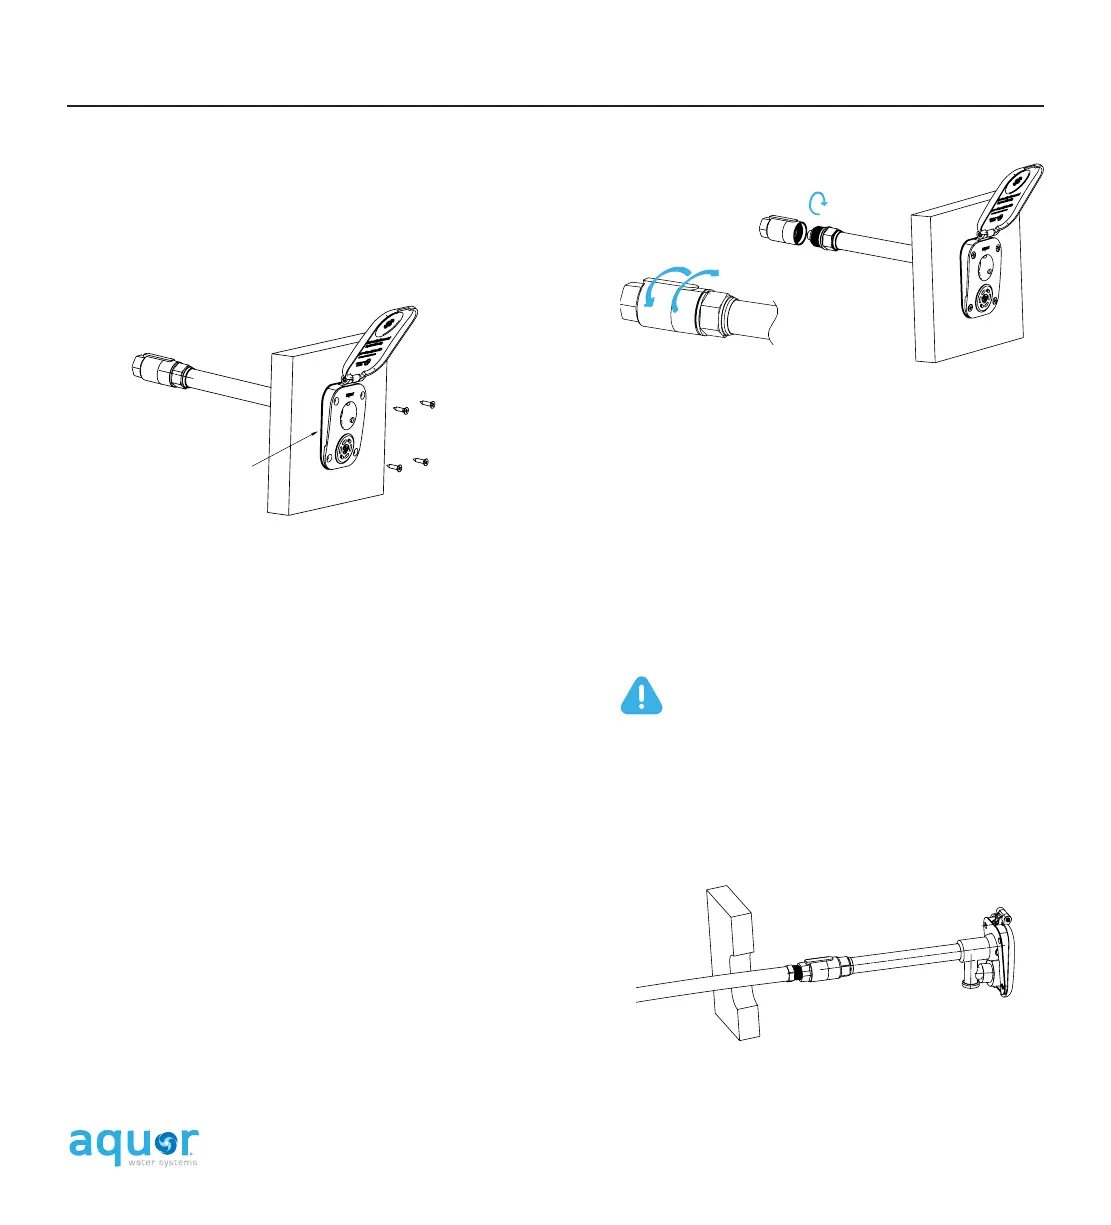
With the cover wedge behind the faceplate flange
secure the hydrant to the wall. x4 #10 1.5” stainless
steel screws are provided.
Cover wedge
behind faceplate
With the appropriate fitting installed, re-attach the
inlet to the hydrant body.
INSTALLATION
Tip: Drilling into brick or stone? Consider using
specialized fasteners and/or anchors. We also
manufacture optional stainless steel mounting plates
to space the mounting holes out further if needed.
After securing, test the cover to make sure it opens
and closes properly.
Tip: The inlet is on an O-ring seal. It’s designed to
rotate up to one turn while still keeping a watertight
seal. This is useful for alignment, especially for the
optional 90° elbow inlets. Tighten the inlet until it
stops, then rotate back to the desired spot. This seal
is rated to 250 PSI.
. CONNECT TO PLUMBING
With the appropriate fitting threaded in, connect the
hydrant to your plumbing system.
Hand-tight is fine; do not over-torque the
hydrant’s body connection. Do NOT apply
teflon tape or any kind of sealant to the
hydrant’s body threads.
. ATTACH FITTING
Proceed to the interior of the wall. Before attaching
a fitting, unscrew the hydrant’s rear inlet from the
main hydrant body.
The hydrant’s default inlet is ” NPT (f). Other
optional inlet styles are available.
Thread in the appropriate ” NPT fitting for your
plumbing type, wrapped in teflon tape then pipe-
joint compound. Firmly tighten with a wrench.