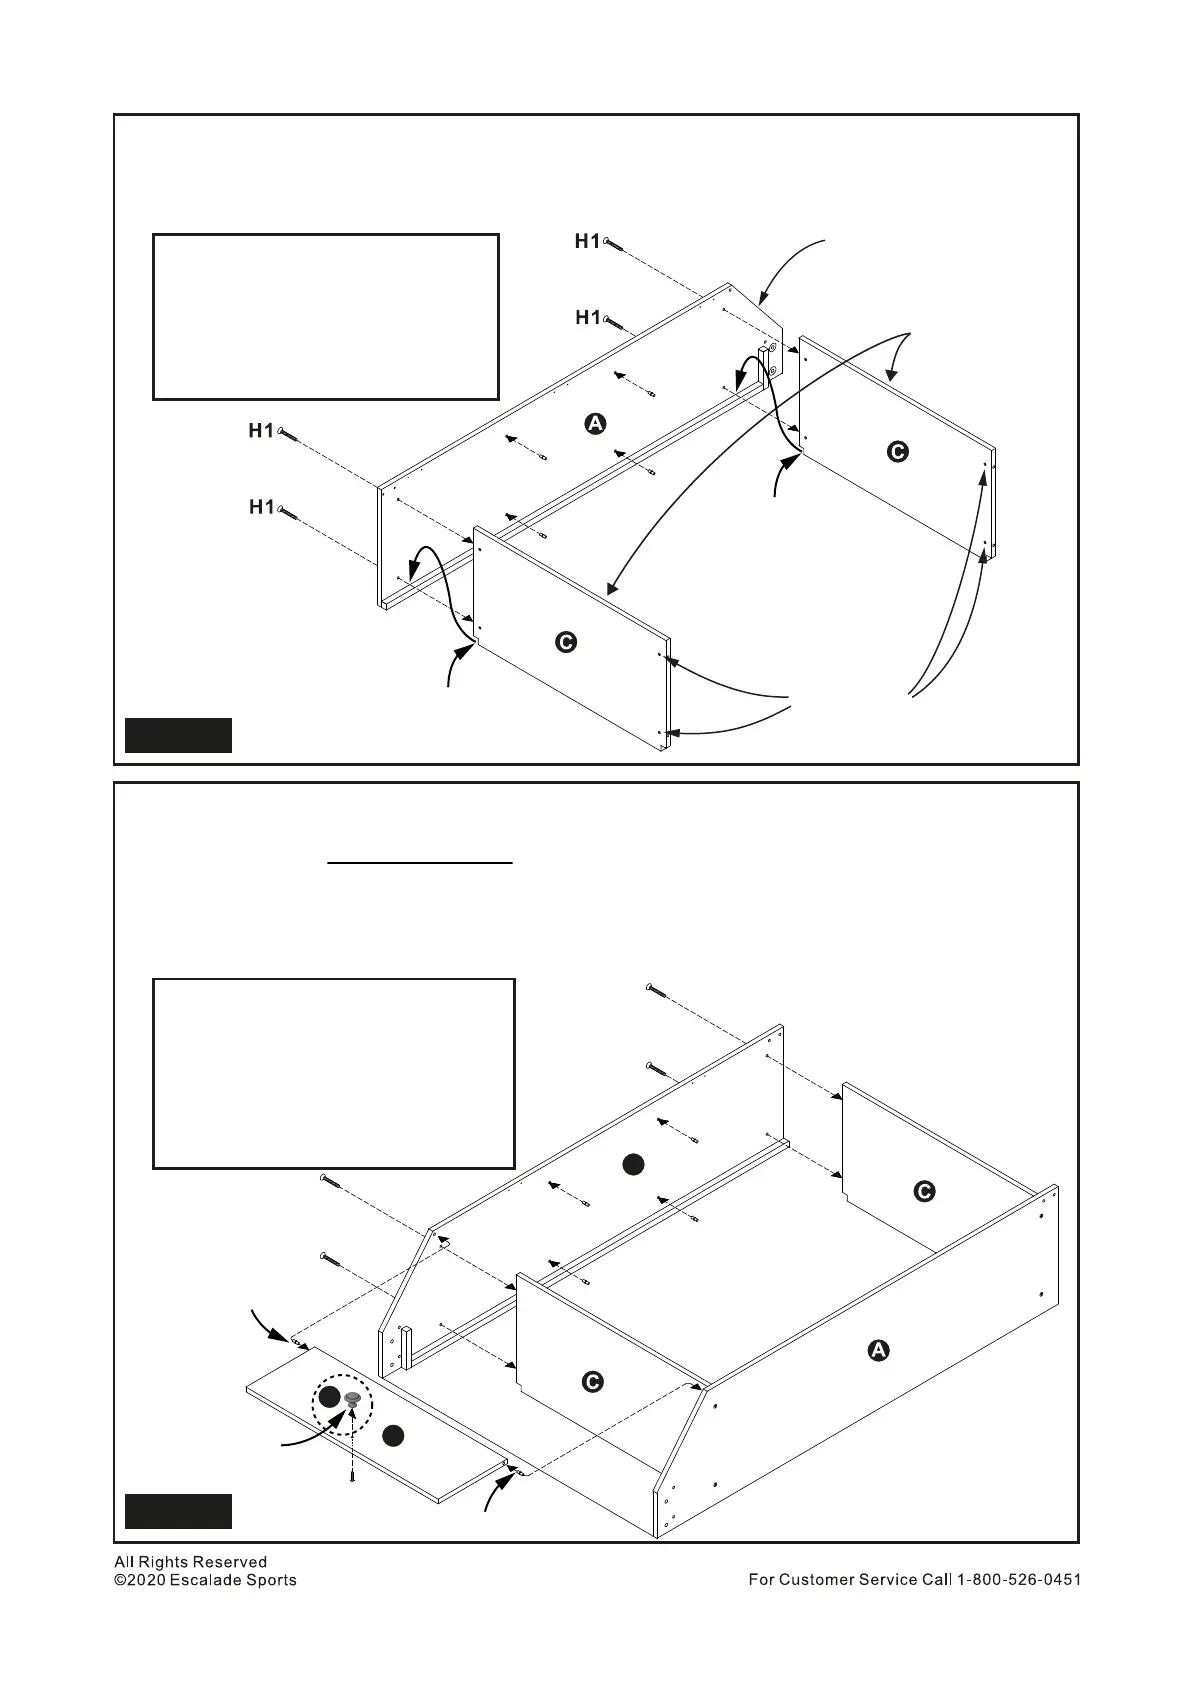
Install Parts C to Part A using 4 pcs H1 Phillips Flat Head Bolts. See Figure 1.
Tighten, but do Not over tighten or strip out H1 Bolts.
Insert H7 Pins into pre-drilled holes on Part A. Use a rubber hammer to lightly tap these H7 Pins into
place if need be. See Figure 1.
1.
2.
Angle cut at
this position
Barrel Nuts
on bottom side
H1
H7
A
C
Phillips Screw Driver
Phillips Flat Head Bolt - 4 pcs
Pin - 4 pcs
Lower Left Side Panel - 1 pc
Top & Bottom Shelves - 2 pcs
PARTS REQUIRED
H7
H7
H7
H7
Install 4 pcs H7 Pins into Part B.
Install Part B to partially assembled Lower Cabinet using 4 pcs H1 Phillips Flat Head Bolts to secure
it to 2 pcs Part C. IMPORTANT NOTE: Do NOT tighten H1 Bolts at this time (Must complete Step 6
before tightening H1 Bolts).
Install Part Q to the Part M using 1 pc H11 Screw.
Install Part M to Lower Cabinet using 2 pcs H7 Pivot Pins.
Fully tighten but do Not over tighten or strip out H1 Bolts.
3.
4.
5.
6.
For all these steps, see Figure 2.
H1
H1
H1
H1
H7
H7
H7
H7
B
M
H7
H7
Laminated edge
must face up
H1
H7
H11
B
M
Q
Phillips Screw Driver
Phillips Flat Head Bolt - 4 pcs
Pin - 6 pcs
Phillips Round Head Bolt - 1 pc
Lower Right Side Panel - 1 pc
Tilt-Down Door Panel - 1 pc
Door Knob - 1 pc
PARTS REQUIRED
Notch on the lip
Figure 1
7
Q
H11
Figure 2
Notch on the lip
Pivot Pin
Pivot Pin
Door Knob