2.1 Connecting for Use
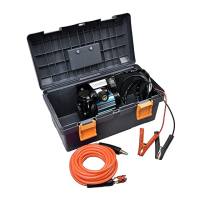
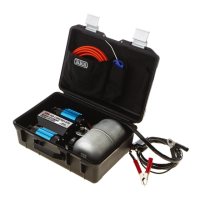
Position the compressor on a sturdy flat surface before opening the box.
Unlock and open the box using the two toggle clamps.
Make sure that the switch is in the ‘OFF’ position by pressing down on
the top of the switch rocker.
Uncoil the power lead and connect the positive (+) alligator clamp
(RED handle) directly to the positive (+) terminal of the vehicle’s 12 volt
battery.
Connect the negative (-) alligator clamp (BLACK handle) directly to the
negative (-) terminal of the vehicle’s 12 volt battery.
NOTE: The switch should now be illuminated but the compressor
will not start until the switch rocker is pressed on the
bottom. This tells you the compressor has now been
connected to power.
Attach the air hose to the compressor by inserting the male end of the
hose into the hose coupling on the compressor and pressing inward until
the coupling sleeve clicks forward. The sleeve of the coupling does not
need to be pulled back by hand.
Attach the tyre filler (or other compatible device) to the opposite end of
the hose in the same way.
Press the bottom of the rocker switch down to start the compressor and
pressurize the manifold and hose.
NOTE: Once compressed air has expelled through the attached
device (e.g., tyre filler, air tool, etc.) the compressor should
automatically start running. It will continue to run until air
use has stopped and the pressure in the manifold and
hose reaches the pre-set pressure switch cut-out level.