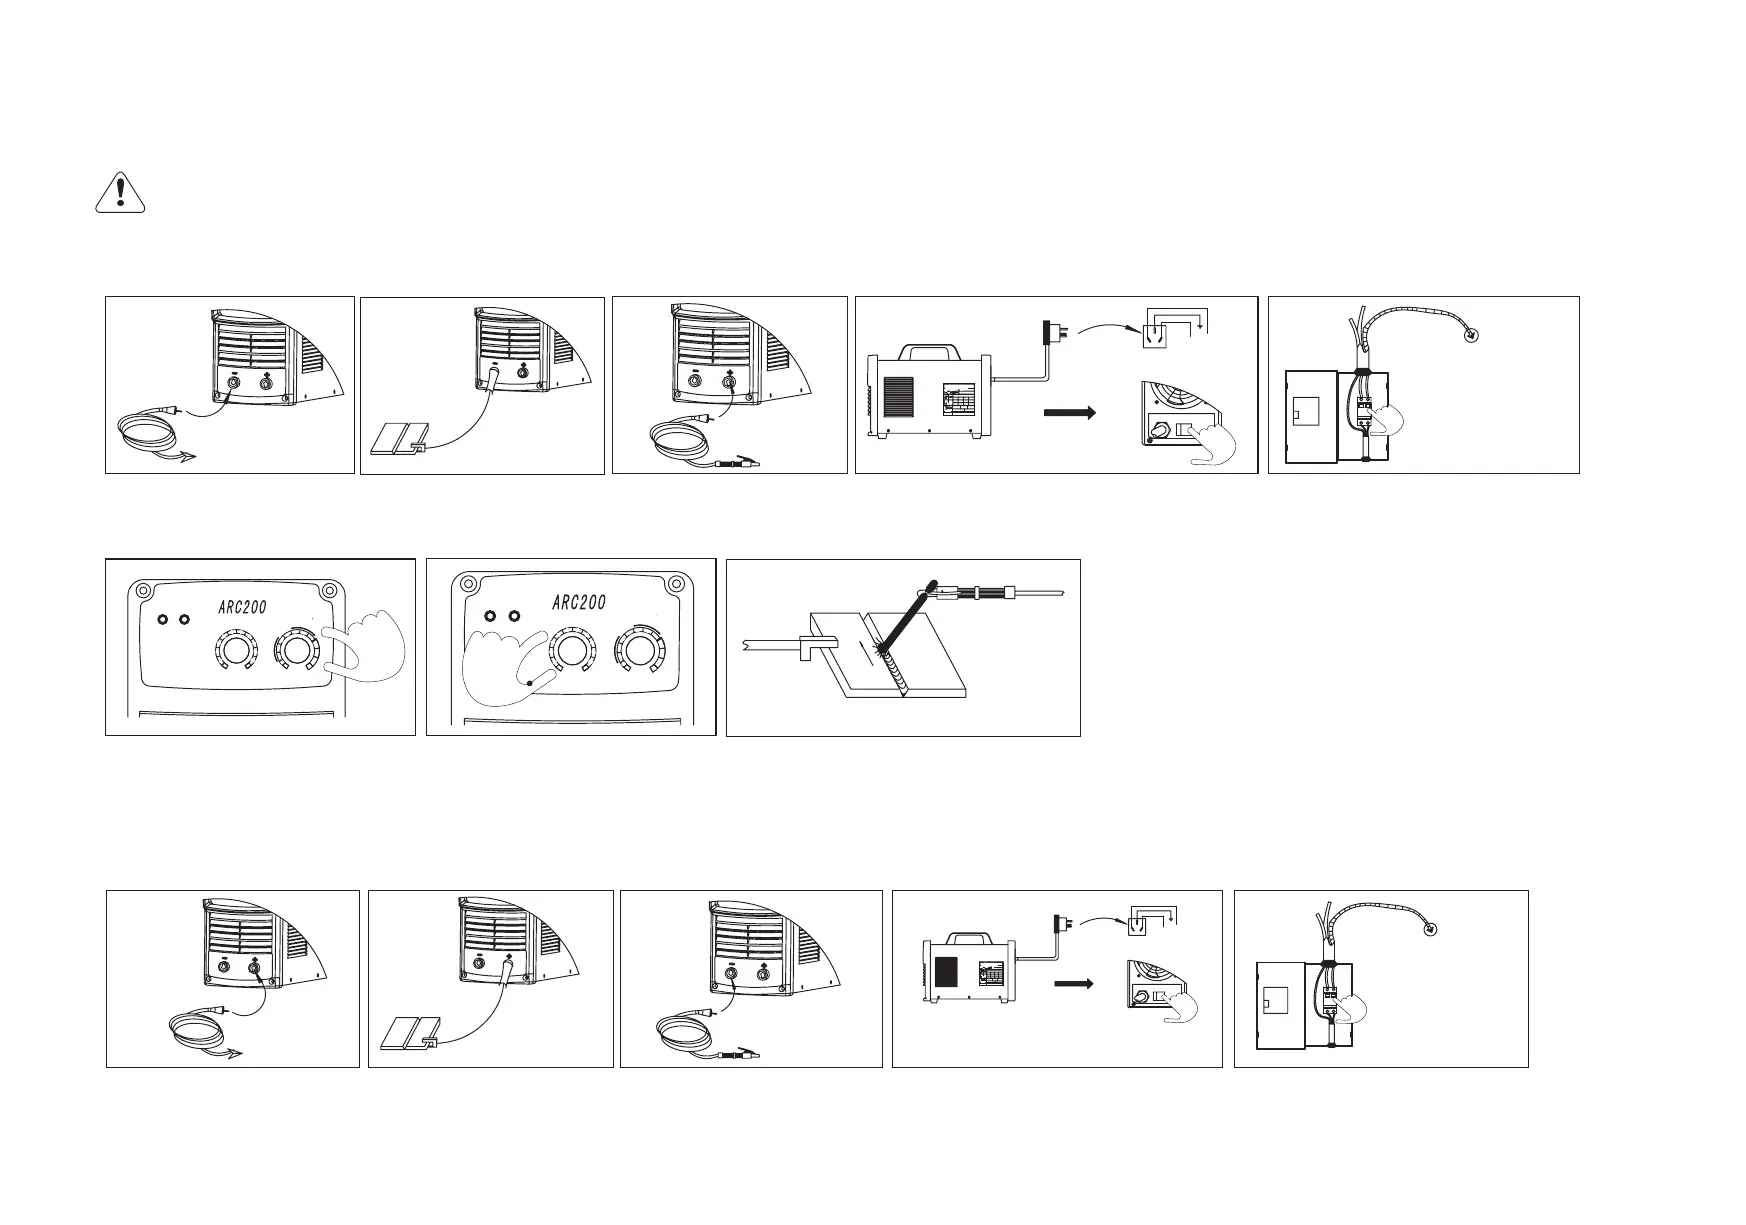
3. Plug the welding cable into the
output socket (+) and fasten it
8. Start welding
4. Connect with single phase 230V power
supply, and put the power switch in ON position
5. Switch on the mains switch
Warning! Operating the equipment incorrectly can cause serious injury and damage.
Do not use the machine until you have read "Safety Rules".
f
2
f
1
MODEL
No.
X
I
2
U
2
1~
100%60%
MADE NI
STAND ARD:G B1557 9.1- 2004
20%
200A A 115 89A
1~(50/6 0Hz)
U
2
I
2
28V 4.6V 32.5V2
U
1
=220V
~
230V I
1max
=48A I
1eff
=21.5A
U
0
=9V
ARC200
10A/20.4V
~
200A/28V
PROTECTION DEGREE:PI21
INSULATION DEGREE:F
E
L
N
E
N
L
GN D
0
OF F
AC 220 V~23 0V
ON
GN D/PE Ea rth
Wo r k p iece
Electrode holder
ARC Series Quick Instructions (This quick instruction is based on ARC200 model)
5. Switch on the mains switch
4. Connect with single phase 230V power
supply, and put the power switch in ON
position
----Stick Welding with cellulose electrode E6010 (II series) & acid electrode E6013
3. Plug the welding cable into the
output socket (-) and fasten it
f
2
f
1
MODEL
No.
X
I
2
U
2
1~
100%60%
MADE NI
STANDARD:GB15579.1-2004
20%
200A A 115 89A
1~(50/60Hz)
U
2
I
2
28V 4.6V 32.5V2
U
1
=220V
~
230V I
1max
=48A I
1eff
=21.5A
U
0
=9V
ARC200
10A/20.4V
~
200A/28V
PROTECTIONDEGREE: PI21
INSULATIONDEGREE:F
E
L
N
E
N
L
GND
0
OF F
AC 22 0V~23 0V
ON
GN D/PE Ea rth
----SMAW welding with basic electrode: E7016 & E7018
1. Plug the ground cable into the
output socket (-) and fasten it
2. With the other end of ground
cable, establish a connection to
the work piece
6. Turn “Welding Current” knob to adjust the
welding current according to the size of
electrode
7. Turn “Arc Force” knob to adjust the
arc force according the size of electrode,
normally set in range 4-7
1. Plug the ground cable into the
output socket (+) and fasten it
2. With the other end of ground
cable, establish a connection to the
work piece
W o
r
k
p ie c e
2
3
4
5
7
8
9
1
0
10
2
0
4
0
2
0
0
1
4
0
10
2
0
4
0
6
0
8
0
1
2
0
1
0
0
2
0
0
6
A
E
1
U
S
1
6
0
1
8
0
1
6
0
1
8
0
F
1
C U R R E N T ( A )
6
A R C F O R C E
P O W E R P R O T E C T I O N
W o r k
p
i e c e
2
3
4
5
7
8
9
1
0
1
0
2
0
4
0
2
0
0
1
4
0
1
0
2
0
4
0
6
0
8
0
1
2
0
1
0
0
2
0
0
6
A
E
1
U
S
1
6
0
1
8
0
1
6
0
1
8
0
F
1
P R O T E C T I O N
A R C FO RC E C U R R E N T (A )
6
P O W E R