Do you have a question about the arcelik BEKO COSMOS and is the answer not in the manual?
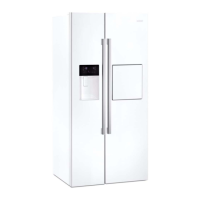
Safety considerations specific to refrigerator models equipped with a water dispenser.
Defines the product's authorized usage and limitations for domestic applications.
Essential safety precautions to protect children from potential hazards.
Information on WEEE compliance and responsible disposal of electronic waste.
Details regarding the recyclable materials used in the product's packaging.
Guidelines for environmentally sound disposal of the appliance at its end of life.
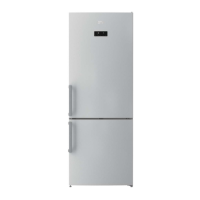
Provides the external width, height, and depth specifications of the refrigerator.
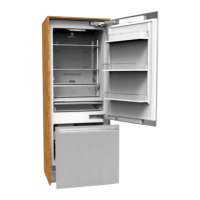
Illustrates the appliance with its doors fully opened.
Guidance on safe transport and initial handling of the appliance.
Requirements for the installation room and ambient temperature conditions.
Criteria for selecting the optimal placement for the refrigerator.
Steps for attaching plastic wedges to ensure proper ventilation clearance.
Instructions for safely connecting the appliance to the electrical supply.
Procedure for adjusting the appliance's legs to ensure stability.
Steps for connecting the water supply from a jug using a pump.
Procedure for linking the water pipe, incorporating a Dragon filter.
Instructions for connecting the appliance directly to the main water supply.
Guide for installing an external water filter into the system.
Explains the fundamental operating mechanism and cooling process of the refrigerator.
Details the functions and indicators on the V3/V4/V5 touch control panel.
Instructions on how to operate the water and ice dispensing functions.
Important preliminary steps and information before using ice/water dispenser.
Guidance on the proper operation and loading of the Door-in-Door compartment.
Identifies and lists the key components within the refrigerator's cooling system.
Specific electronic system details applicable to software versions 3, 4, and 5.
Procedures for the removal and installation of various door handle types.
Steps for detaching and attaching the refrigerator's main display unit.
Instructions for servicing the ice dispenser's pouring spout mechanism.
Procedures for removing and installing internal storage containers and trays.
Details on the removal and installation of the crenel component.
Steps for accessing and replacing the LED board for the water dispenser.
Information regarding the trigger silicon part and its function.
Procedure for removing and installing the Door-in-Door cover assembly.
Instructions for attaching and ensuring proper seating of Door-in-Door seals.
Details on the reed switch assembly for door open warning system.
Steps for removing and installing the upper hinge cover.
Information on the 60-gallon door shelf component.
Details about the egg holder capacity and placement.
Information on the 100-gallon door shelf component.
Details on the freezer door shelf assembly.
Procedures for removing and installing upper door hinges.
Steps for removing the left door of the freezer compartment.
Steps for removing the right door of the refrigerator compartment.
Critical considerations for door alignment and installation accuracy.
Instructions for removing and attaching refrigerator and freezer door seals.
Procedures for servicing the lower hinge assemblies.
Details on the door puller mechanism and its stopper component.
Steps for removing and replacing the main electronic control board cover.
Instructions for installing or removing the pipe holder.
Information on the quick fit connector for water pipes.
Details and connections for the 8mm water pipe.
Procedure for removing and installing the rear cover of the appliance.
Steps for the removal and installation of the water valve.
Procedures for the evaporation container and its related parts.
Details and procedures for the DC condenser fan.
Information on the return pipe protection rubber component.
Notes and identification of service pipes used in the system.
Procedures related to the compressor, including replacement.
Steps for removing and accessing the terminal cover.
Information on the PTC relay and its function in the compressor circuit.
Details on the capacitor component and its location.
Instructions for connecting and replacing the main power cable.
Steps for removing and installing the rear leg plate.
Information and procedures related to the water drain system.
Details on the removal and installation of fridge crisper drawers.
Instructions for servicing the freezer drawer components.
Procedures for handling fridge and freezer glass shelf assemblies.
Details on the removal and installation of fridge/freezer rails.
Steps for accessing and replacing fridge illumination glass components.
Procedures for servicing the water filter head and bypass cover.
Instructions for removing and installing the water reservoir.
Details on the blue light glass and its removal.
Steps for removing and installing the ice stock container assembly.
Information regarding connections within the ice making area.
Procedures for servicing the Icematic ice maker group.
Steps for removing the Eva cover plug.
Details on the ionizer component and its removal.
Procedures for removing the cover group of the fridge evaporator.
Information on locating and replacing the thermal fuse.
Details on the finned evaporator component.
Steps for removing and attaching sensor covers.
Troubleshooting flow chart for E0 error: Freezer Compartment Air Sensor Error.
Troubleshooting guide for E1 error: Freezer Compartment Evaporator Sensor Error.
Troubleshooting guide for E2 error: Fridge Compartment Evaporator Sensor Error.
Troubleshooting flow chart for E3 error: Fridge Compartment Air Sensor Error.
Troubleshooting steps for E4 error: Freezer Compartment Defrost Heater Error.
Troubleshooting guide for E8 error: Icematic Air Sensor Error.
Troubleshooting steps for E9 error: Icematic Motor Error.
Troubleshooting flow chart for E13 error: Cyclic Freezer Fan Error.
Troubleshooting guide for E15 error: Cyclic Condenser Fan Error.
Diagnosing cooling failures caused by electrical system problems.
Troubleshooting freezing errors resulting from electrical issues.
Diagnostic steps for when the refrigerator fails to operate.
Analysis of condensation causes within the fridge compartment and solutions.
Steps to diagnose issues when the compressor fails to run.
Addresses potential reasons for the refrigerator running excessively.
Troubleshooting guide for when compartment temperatures are excessively low.
Diagnosing and resolving sources of unusual noise from the appliance.
Specific checks for noise originating from the evaporator fan motor.
Specific checks for noise originating from the condenser fan motor.
General troubleshooting for various noises emitted by the refrigerator.
Addressing condensation that forms on the interior walls of the appliance.
Explains causes and solutions for condensation appearing on the exterior.
Troubleshooting steps for when the appliance doors do not seal properly.
Steps to resolve issues related to ice production.
Troubleshooting guide for when water is not dispensed.
Resolving problems with dispensing ice cubes or crushed ice.
Addressing condensation droplets around the water dispenser area.
Explains dealer mode access and operation for specific product versions.
| Brand | arcelik |
|---|---|
| Model | BEKO COSMOS |
| Category | Refrigerator |
| Language | English |