4-5
4
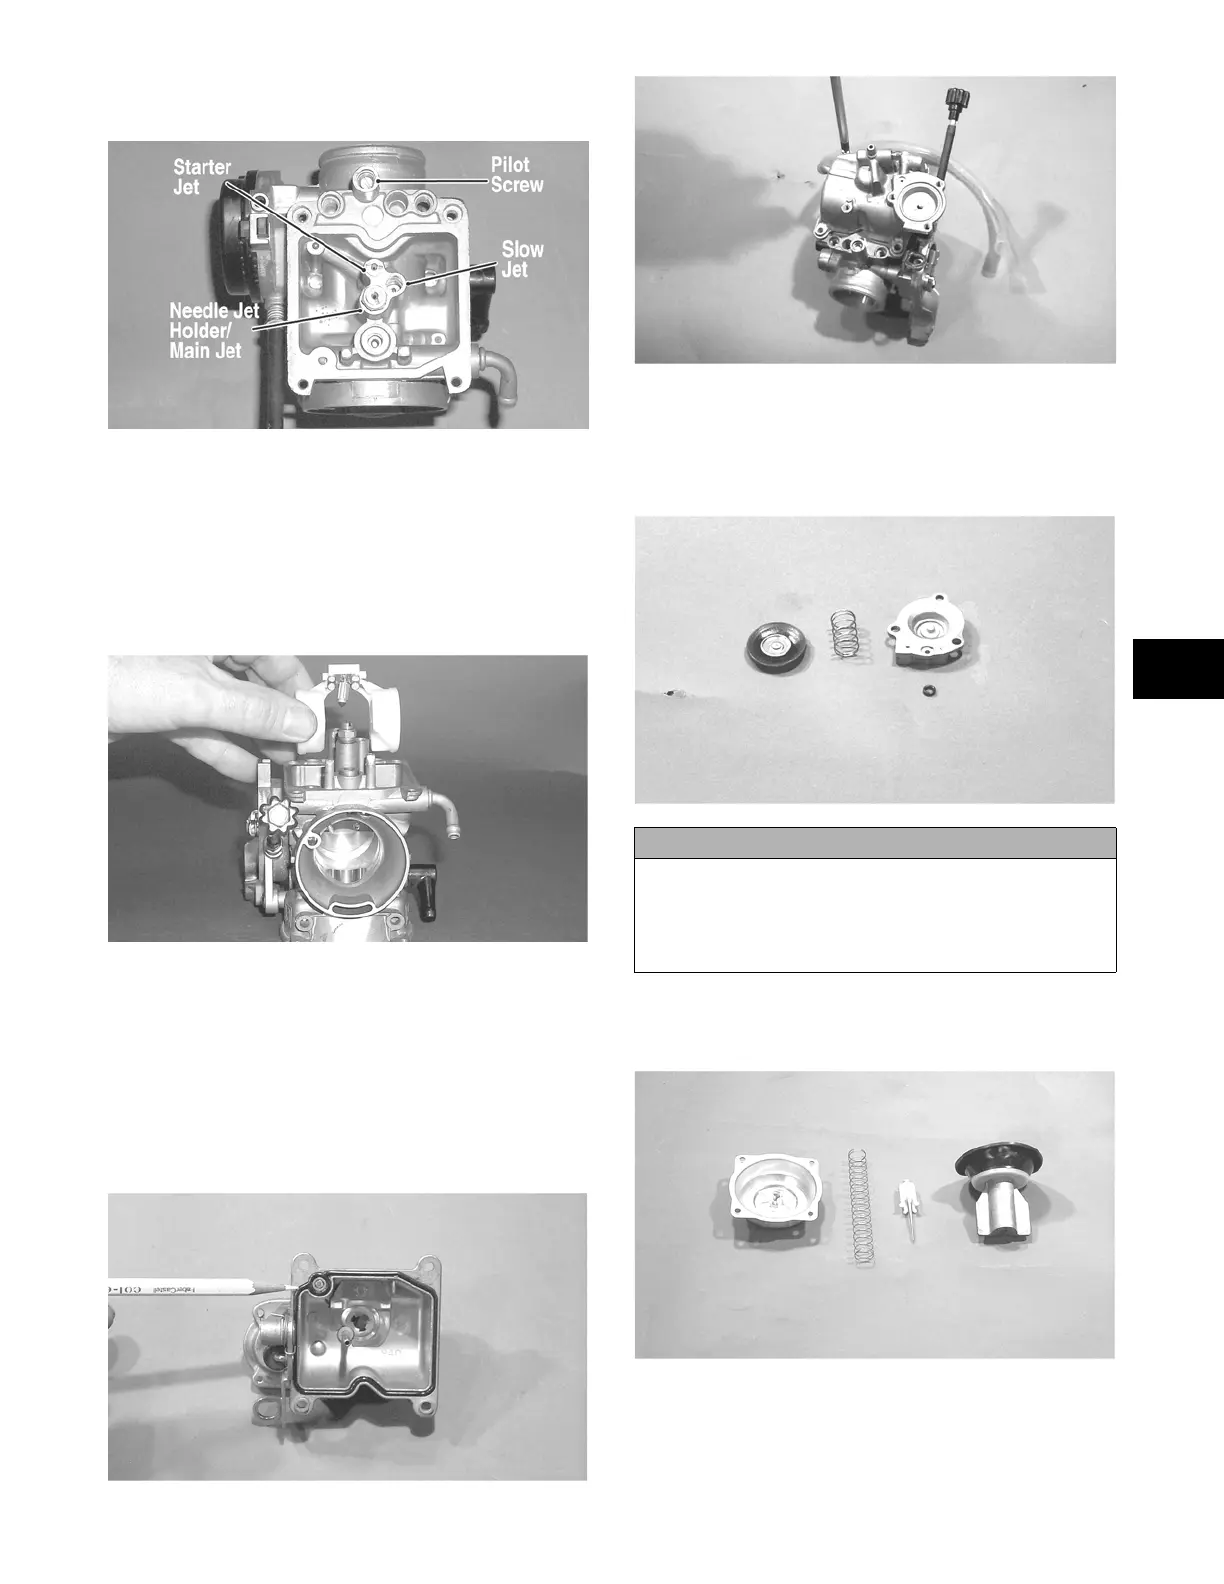
NOTE: Note the locations of the jets and holder dur-
ing assembling procedures.
CC761A
3. Install the slow jet. Tighten securely.
4. Install the main jet into the needle jet holder and
tighten securely; then install the needle jet and nee-
dle jet holder assembly into the carburetor and
tighten securely.
5. Place the float assembly (with float valve) into posi-
tion and secure to the carburetor with the float pin.
CC753
NOTE: Check float arm height by placing the carbu-
retor on its side w/float contacting the needle; then
measure with a caliper the height when the float arm
is in contact with the needle valve. Float arm height
should be 17 mm (0.7 in.).
6. Place the float chamber into position making sure the
O-ring is properly positioned; then secure with the
Phillips-head screws.
CC750
CC749
7. Place the U-ring into the pump housing. Position the
spring and diaphragm assembly (lip toward the car-
buretor) onto the carburetor; then secure the assem-
bly with the pump housing and three screws. Tighten
securely.
CC748
8. Place the jet needle, spring seat, and spring into the
vacuum piston; then place the assembly down into
the carburetor.
CC746
9. Place the top cover into position; then secure with
the Phillips-head screws. Tighten securely.
CAUTION
It is important to press down on the pump housing until
it contacts the carburetor to make sure the diaphragm
lip is properly seated in the groove in the carburetor. If
the diaphragm is not properly seated, leakage will
occur.
FOR ARCTIC CAT ATV DISCOUNT PARTS CALL 606-678-9623 OR 606-561-4983
www.mymowerparts.com
 Loading...