We do the utmost to ensure that the provided informaon is complete and accurate; however, images and
specicaons are subject to change without noce. Visit our website at www.ardaappliances.com
for the latest version of this manual.
- 7 -
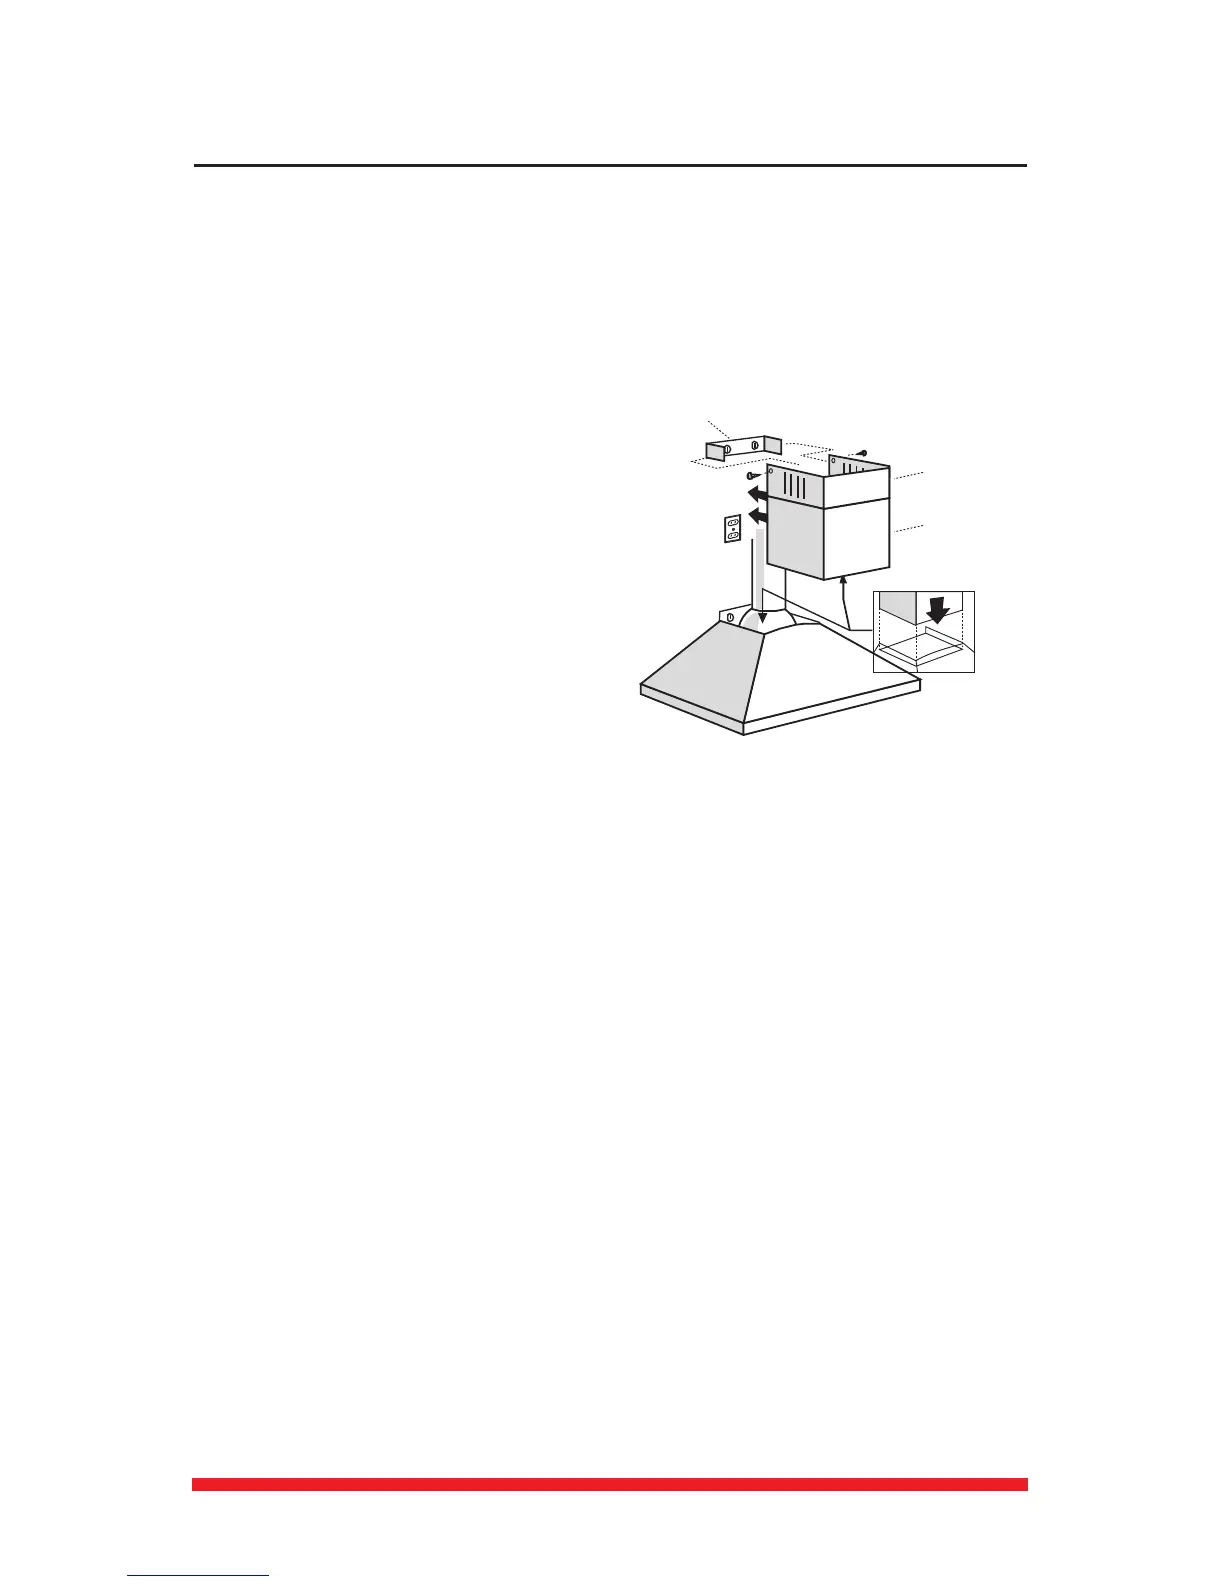
7. Mount the hood on the mounng screws. When the hood has been leveled, secure unit by
ghtening screws.
8. Connect a 6” aluminum duct tube (not included) between your hood and duct path. Ensure that
the damper aps are free to open. Seal all seams using duct tape.
1. Carefully loosen but do not separate the
telescopic chimney duct pieces (A & B - Fig. 10). The
inside piece is the top and aaches to the wall at the
ceiling. The outside piece is the boom and rests on
the range hood.
2. Plug in the hood.
3. Install the recirculaon kit if required.
4. Aach the wall bracket.
: adjust the
width of the support bracket (D) to match the
upper duct width. Fix it to the wall using the
screws. Mark a line 4 mm down from the ceiling.
Fix the adaptor to the wall using the screws
provided so that it is centered in line with your hood and at a distance from the ceiling indicated.
: on the wall, at the ceiling edge, center the bracket on the plumb line.
Aach to the wall using screws appropriate to the wall material.
5. Place the two nested chimney pieces on top of the range hood. Draw the inside/top piece up to
the ceiling and ax to the wall bracket using the provided screws.
6. Remove the decorave plasc wrap from the hood.
A
B
D
C
C
A. Upper vent cover
B. Lower vent cover
C. Screws
D. Bracket
Arda
Fig.10
A. Upper vent cover
B. Lower vent cover
C. Screws
D. Bracket