We do the utmost to ensure that the provided informaon is complete and accurate; however, images and
specicaons are subject to change without noce. Visit our website at www.ardaappliances.com
for the latest version of this manual.
- 9 -
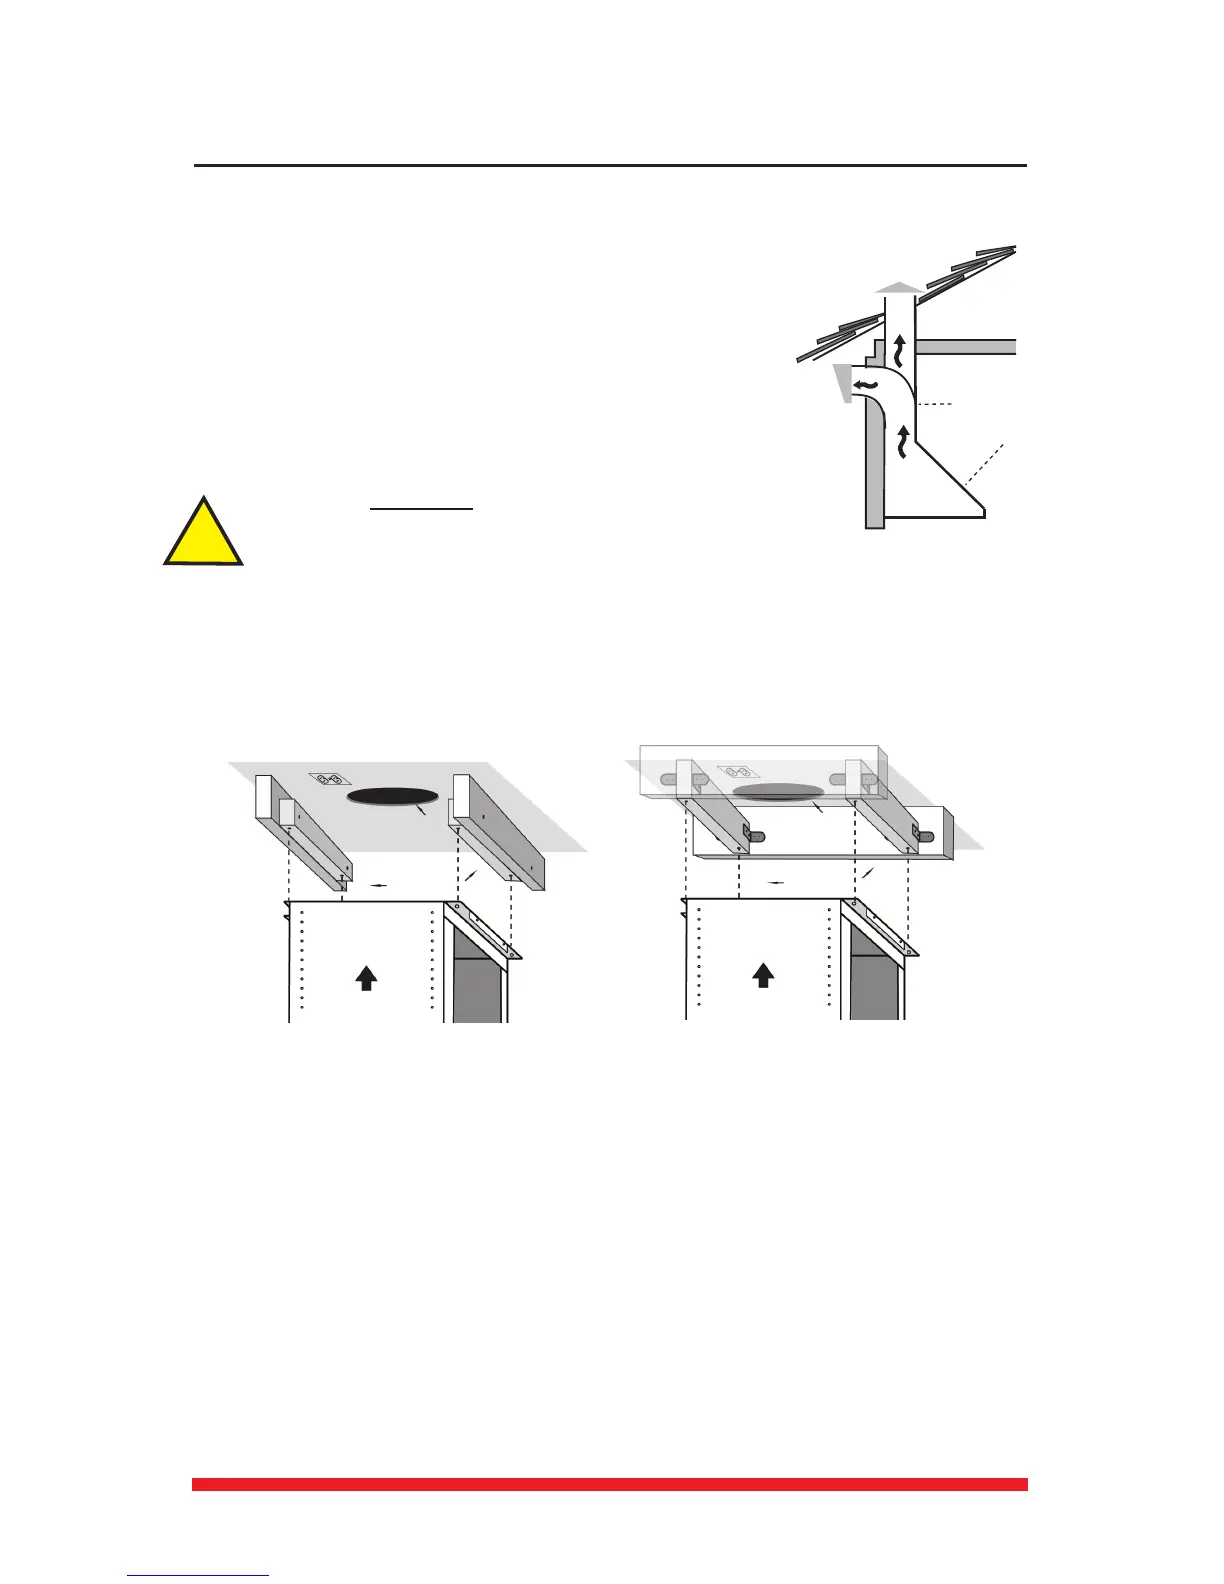
1. Arda hoods exhaust vercally up through the ceiling to the roof
(Fig. 13). They can be ducted to the rear behind the decorave
chimney duct through an outside wall.
2. Plan where the ductwork will run between the hood and the
outside.
3. A short straight duct run will produce the most air ow. Longer
lengths and elbow ducts will reduce the eciency of the blower.
4. Install a roof or wall cap outside your home. Connect a 6” round
metal duct to the cap and work backwards towards the hood.
Ensure connecons are completely sealed with duct tape.
5.
1. In the ceiling, install cross-braces between the ceiling joists (Figs. 14a and 14b).
the boom of the cross-bracing must be level to ensure that the island hood hangs
level.
1. Install a 110/120V receptacle on the ceiling within the dimensions of the decorave chimney
(Fig. 14a). that the removal of the plug will void the warranty of the range hood.
Fig. 14b
Fig. 14a