15
1. Place the weight of the plastic base (2) under the base (3) so that the
holes match
2. Place the lower rod (4) on the base (2)so that the holes match.
3. Insert the screws and washers (1) into the 4 holes at the bottom of
the base’s weight (2), making sure to keep the lower rod (4) in position.
Tighten the screws (1) rmly.
4.Insert the upper rod (5) into the lower rod (4) and turn it clockwise to
tighten the connection of the two rod.
5. Unscrew the lock ring of the fan (12) from the motor shaft (8) by turning
it clockwise.
6. Unscrew the lock ring of the back grid (10) from the motor shaft (8) by
rotating it counterclockwise.
7. Insert the back grille (9) on the motor shaft (8) making sure that the
three locking pins are placed into their holes of the back grille. Screw the
lock ring of the back grille (10) by turning it clockwise.
8. Insert the fan (11) on the motor shaft (8) and fasten the proper lock ring
(12) by rotating counterclockwise.
9. Loosen the safety screw (15) from the lock ring (13) and place it on
the back grille (9).
10. Place the front grille (14) on the back grille (9) making sure that the
logo on the central stud is placed horizontally, parallel with the oor so it
can be hooked together with the ring.
11. Find the proper position, tighten the safety screw (15).
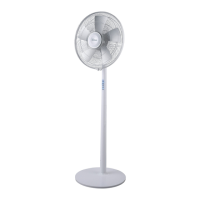
Assembling
Instructions for use
Place the fan on a at, dry and stable surface, and insert the plug of the
fan in a socket; the unit will emit a short “BIP” sound and the indicator light
(1) will be on in the control panel indicating that the power is supplied.
For your convenience the unit can be operated by using control panel
(6) placed on the upper rod (5) or by using remote (16) control included.
Remote control is supplied with battery inside (CR2025 type); remove
the transparent sheet from the battery cover before use remote control.
When the battery is over, it must be replaced with the same type following
the drawing on the back of remote control.
Remove the batteries from the appliance before its disposal. The
batteries must be disposed of in the appropriate containers.