en en
21
4.2. Installation
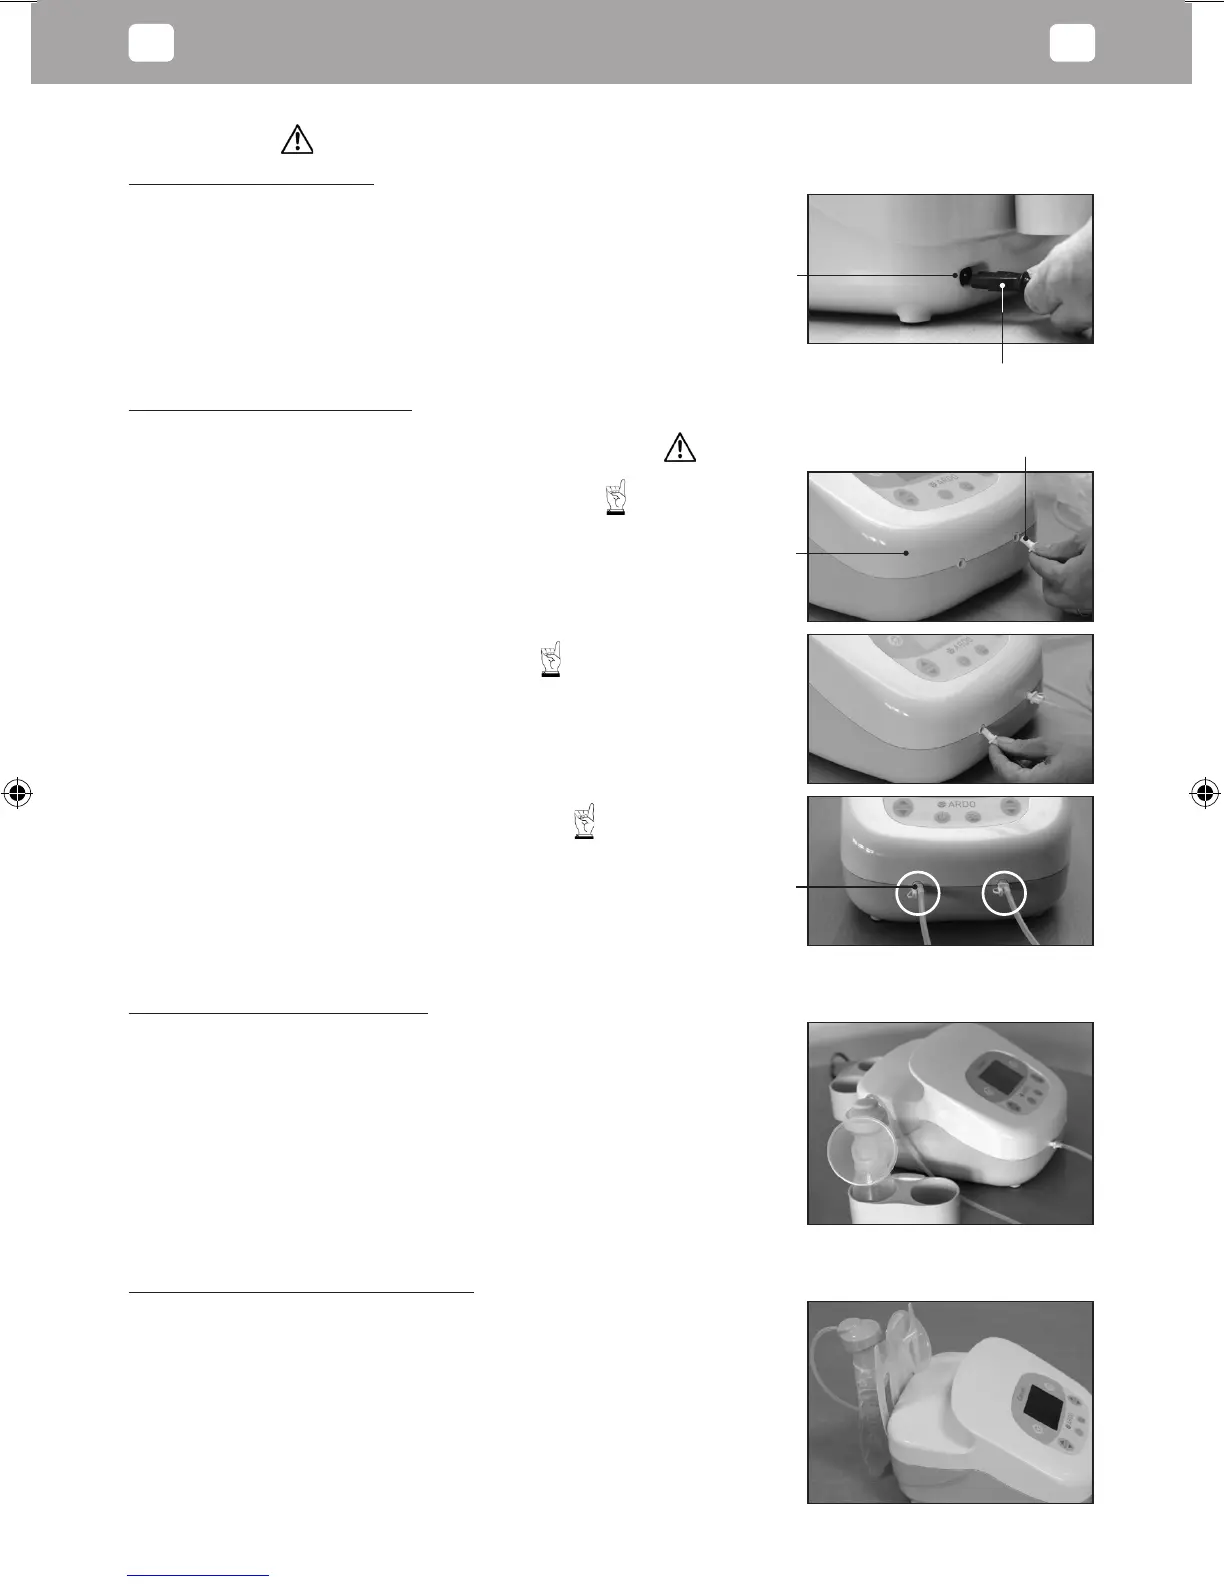
4.2.1. Electrical connection
• Mainsoperation:Insertmainscable(A)intotheCarummains(B)input
socket (Fig.1) and connect the local power plug to the mains power
supply.
• Batteryoperation:Beforeusingthebatteryforthersttime,connect
the unit to the mains power supply for 6 hours.
4.2.2. Connecting the PumpSet
Use of the PumpSet is detailed in the separate user manual:
“ARDO PumpSet“. The PumpSet is an applied part of the pump.
• TousethesinglePumpSet:
Attach the tube connector (C) to the unit (D). (Fig. 2).
• TousethedoublePumpSet:
Attach the tube connector to the unit (Fig 3).
• Thesecondopeningofthetubeconnector(E)
remains closed – by single and double pumping.
4.2.3. Installing the bottle holder
The bottle holder is used for short-term storage of the PumpSets. The
bottle holder is designed to protect against accidental spilling of milk.
The bottle holder can be used free-standing or be plugged into the back
of the Carum
4.2.4. Installing the EasyFreeze holder
The easy freeze holder is used for short-term hang up of the PumpSet
with bag. The EasyFreeze holder is designed to protect against accidental
spilling of milk. The EasyFreeze holder can be plugged onto the back of
the Carum instead of the bottle holder.
B
A
D
C
E
ARDO_GA_Carum_Inhalt_NEU.indd 21 12.10.12 10:48


 To Next Page