Version 1g
By N7XG / KI6TMF
2.4 Assembly Guide
Generally, the following component assembly order is grouped from shortest to tallest parts to
make assembly easier. Special instructions for component orientation should be listed if a
component has any. Don’t stress it- we try to make this as easy as possible!
2.4.1 Install Parts
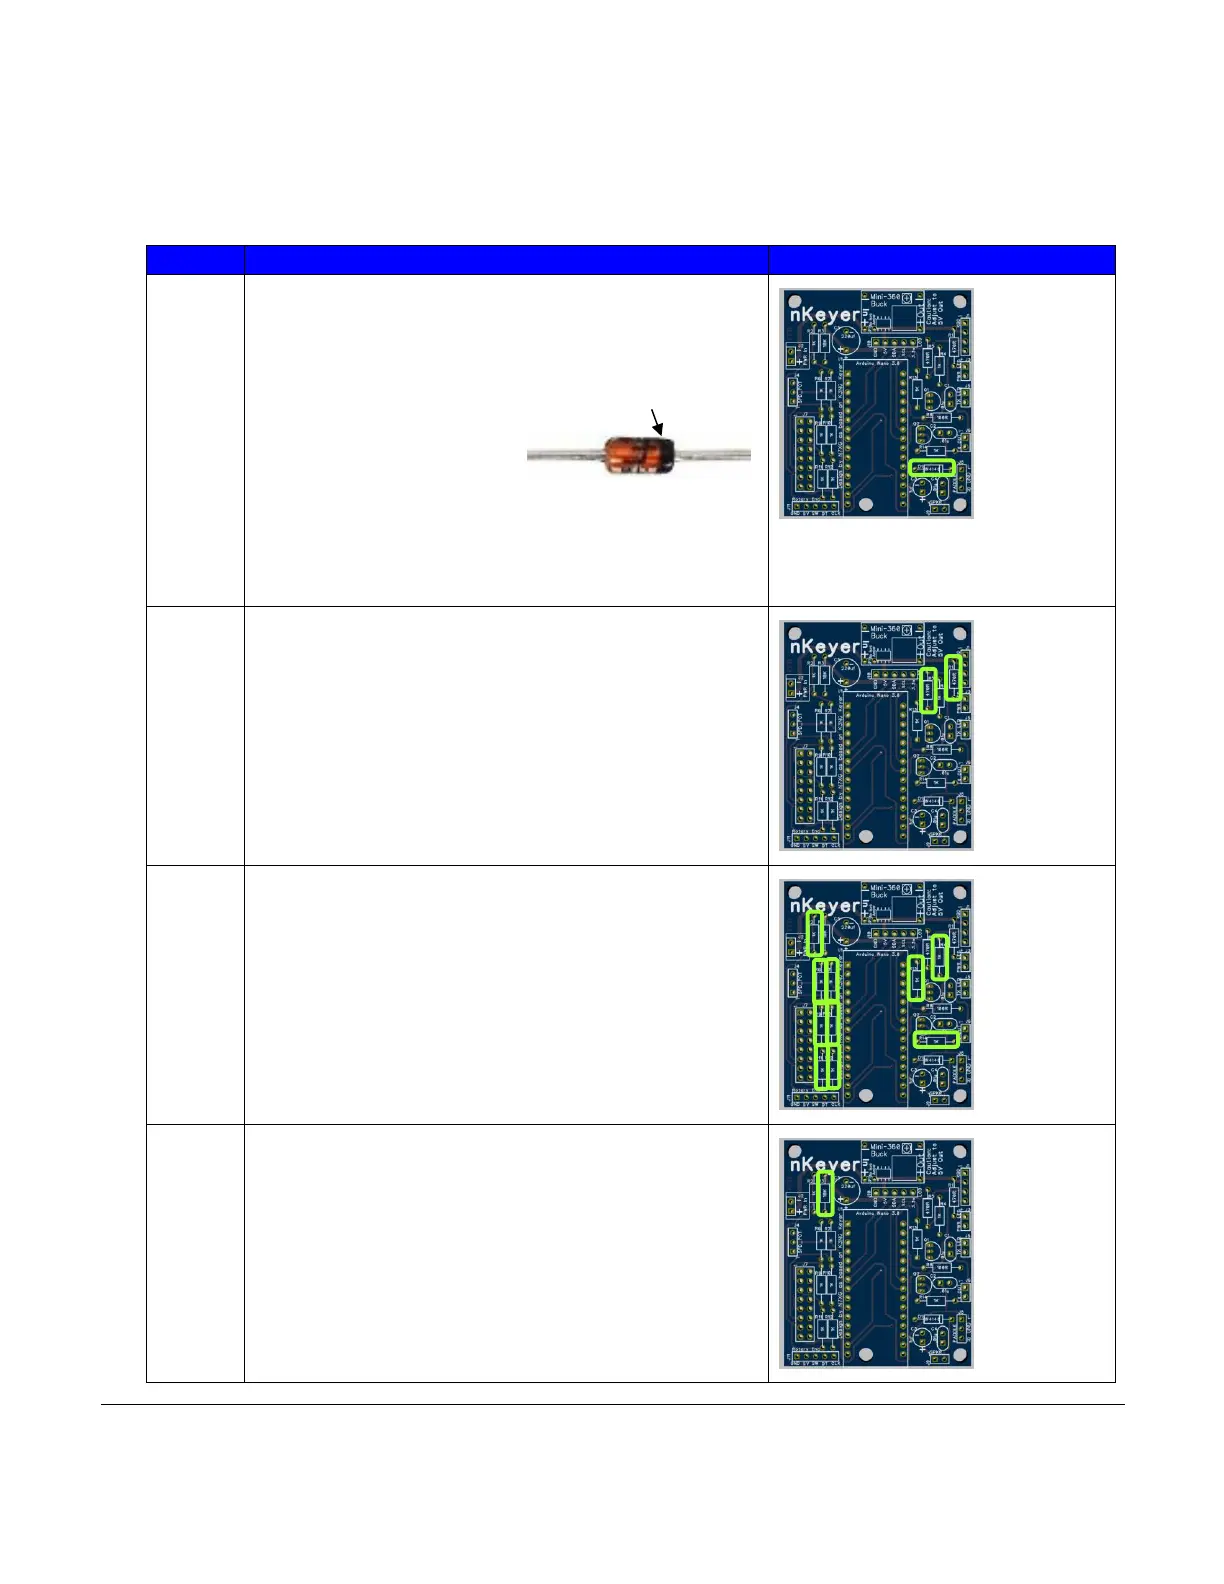
Install the 1N4148 at location D1. Solder and
clip leads.
Note: The diode is polarized and must be
installed with the proper orientation. The end
with the band (cathode)
goes towards the right
side of the board as
shown and as indicated on the board
silkscreen.
Install the two 470 ohm (yellow-violet-brown)
resistor at location R1 and R5. Solder and clip
leads.
Note: Resistors do not have a specific
orientation.
Install the ten 1K (brown-black-red) resistors at
location R2, R4, R6, R7, R9-R14. Solder and
clip leads.
Install the 10K (brown-black-orange) resistor at
location R3. Solder and clip leads.
 Loading...