EasyManua.ls Logo

Areca ARC-1886-6N2I - User Manual

Areca ARC-1886-6N2I
2 pages
Print Icon
To Next Page IconTo Next Page
Loading...
www.areca.com.tw
M.2 NVMe Tri-Mode
RAID Adapters
ARC-1886-4N8I
Quick Installation Guide
Checklist
Inspect ARC-1886-4N8I RAID adapter from the package. If it
appears damaged, or if any items of the contents listed below
are missing or damaged, please contact your dealer or
distributor.
Step 1: Unpack
1 x SFF-8654 to SFF-8643 cable
1 x RAID adapter in an ESD-protective bag
1 x ARC-1886-4N8I quick installation guide
Dual Core RAID-on-Chip (ROC) 1.6GHz processor
PCIe Gen 4.0 x8 lane host interface
8GB on-board DDR4-2666 SDRAM with ECC
Support both 2280 and 22110 form factor M.2 drives
Adapter Architecture
Step 3: Power PC/Server Off and Discoennect Power Cable
Remove the mounting screw and existing bracket from the
rear panel behind the selected PCIe 4.0 slot. Align the
gold-fingered edge on the card with the selected PCIe 4.0
slot. Press down gently but firmly to ensure that the card is
properly seated in the slot. Then, screw the bracket into the
computer chassis.
Step 4: Install the RAID Adapters
Step 2: Mount the M.2 NVMe SSD
The ARC-1886-4N8I utilizes the optional CBM module to
provide below function:
(1). Support Off module (PLP) hold-up power, eliminating the
need for capacitors on the NVMe SSDs which helps
reduce cost.
(2). Support M.2 slot fault LED status and easily be identified
as a failed drive when it is removed from the system
PCIe slot.
(3). Support power to the 8GB cache if it contains data not
yet written to the drives when power is lost.
Please refer to Appendix B of the user manual for installing
the cache backup module (CBM) in your ARC-1886 RAID
adapter.
Step 7: Adding a CBM Backup Module (Optional)
Step 6: Connect Monitor Port - LAN Port
User can remote manage the RAID adapter without adding
any user specific software (platform independent) via
standard web browsers directly connected to the RJ45 LAN
port.
(4) Refasten four screws to secure unit’s front panel
(2) In the backplane solution:
The SAS/SATA/NVMe drives are directly connected to system
backplane or through a PCIe switch/expander board. The
number of SAS/ SATA/NVMe drives is limited to the number of
slots available on the backplane. Some backplanes support
daisy chain expansion to the next backplanes.
SFF-8612 or SFF-8654 are the preferred connectors to use for
NVMe backplane or multiprotocol backplanes based on the
SFF-TA-1001 universal bay definition (UBM).The preferred I/O
connector for server legacy SAS/SATA backplanes is the
internal SFF-8087/8643 connector. For backplane connector
supporting, please refer to the system backplane manual and
choose the proper cable from Section 2.4 Storage Connection
Cables for installation of user manual.
Step 5: Install Storage Connection Cable (Optional)
(1). In the direct connection:
The SAS/SATA/NVMe drives are directly connected to tri-mode
RAID adapter PHY port with proper storage connection cables.
Step 10: Install ArcHTTP Proxy Server (Optional)
ArcHTTP has to be installed for GUI RAID console (MRAID
storage manager) to run. It is used to launch the web browser
MRAID storage manager. It also runs as a service or daemon
in the background that allows capturing of events for mail and
SNMP traps notification. The on-board RJ45 LAN port [Step 6]
can provide the same function as above. Follow the steps
below to install the ArcHttp utility.
Step 8: Power up the System
Step 9: Install the Adapter Driver
Please refer to Chapter 4 “Diver Installation” of the user
manual for the detailed installation procedure.
(1) Remove four screws that secure unit’s front panel
If you use 2280 M.2 NVMe SSD...
(2) Gently insert the SSD into slot and fasten SSD with the
board latch
(3) Repeat steps 2 to install the remaining SSDs
If you use 22110 M.2 NVMe SSD...
(2) Turn the latch 90° clockwise or counterclockwise to
remove it and also remove six screws on the board
(3) Gently insert the SSD into slot, meawhile put the screw
into the groove and fasten the screw to secure SSD
Question and Answer IconNeed help?

Do you have a question about the Areca ARC-1886-6N2I and is the answer not in the manual?

Overview

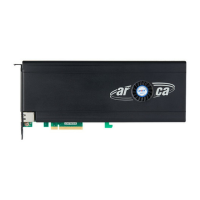
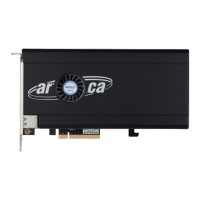
The Areca ARC-1886-4N8I is an M.2 NVMe Tri-Mode RAID adapter designed to enhance storage performance and reliability in PC and server environments. Its primary function is to provide a robust RAID solution for M.2 NVMe SSDs, leveraging a dual-core RAID-on-Chip (ROC) processor operating at 1.6GHz and a PCIe Gen 4.0 x8 lane host interface. The adapter is equipped with 8GB of on-board DDR4-2666 SDRAM with ECC, ensuring data integrity and efficient cache operations. It supports both 2280 and 22110 form factor M.2 drives, offering flexibility in drive selection.

Function Description:

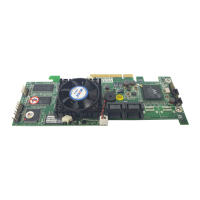
The ARC-1886-4N8I acts as a central controller for multiple M.2 NVMe SSDs, allowing them to be configured into various RAID levels. This enables users to achieve higher data throughput, improved data redundancy, or a combination of both, depending on their specific needs. The "Tri-Mode" capability implies its versatility in handling different storage protocols, likely including SAS, SATA, and NVMe, though the manual primarily focuses on NVMe SSD integration. By offloading RAID calculations to its dedicated ROC processor, the adapter frees up the host system's CPU, leading to better overall system performance. The on-board ECC SDRAM is crucial for maintaining data integrity, especially in high-performance RAID environments where data corruption can have significant consequences.

Usage Features:

The adapter's usage begins with a straightforward unpacking process, where users are instructed to inspect the package for damage and verify the contents, including the adapter itself, an SFF-8654 to SFF-8643 cable, and a quick installation guide.

Mounting M.2 NVMe SSDs is a key step. For 2280 M.2 NVMe SSDs, the process involves removing four screws from the front panel, gently inserting the SSD into its slot, and securing it with a board latch. This process is repeated for additional SSDs. For 22110 M.2 NVMe SSDs, the procedure is slightly different, requiring the user to turn a latch 90 degrees (clockwise or counterclockwise) to remove it, along with six screws from the board. The SSD is then gently inserted, and a screw is placed into a groove to secure it, followed by refastening the four front panel screws. This detailed guidance ensures proper physical installation of the drives.

After physical installation, the system must be powered off, and the power cable disconnected before installing the RAID adapter into a PCIe 4.0 slot. Users are instructed to remove the mounting screw and existing bracket from the rear panel, align the gold-fingered edge of the card with the selected PCIe slot, and press down gently but firmly to ensure proper seating. Finally, the bracket is screwed into the computer chassis.

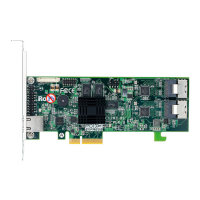
Optional storage connection cables can be installed. In a direct connection scenario, SAS/SATA/NVMe drives are directly connected to the tri-mode RAID adapter's PHY port using appropriate cables. For backplane solutions, drives connect to a system backplane or through a PCIe switch/expander board. The number of drives is limited by the backplane's available slots, with some backplanes supporting daisy chain expansion. The manual highlights SFF-8612 or SFF-8654 as preferred connectors for NVMe or multiprotocol backplanes based on the SFF-TA-1001 universal bay definition (UBM), and SFF-8087/8643 for server legacy SAS/SATA backplanes.

A significant usage feature is the ability to connect a monitor via the LAN port. This allows for remote management of the RAID adapter using standard web browsers, eliminating the need for platform-specific software. This feature is particularly useful for server environments where direct physical access might be limited.

The adapter also supports an optional Cache Backup Module (CBM). This module provides several critical functions:

  1. Off module (PLP) hold-up power: This eliminates the need for capacitors on the NVMe SSDs, potentially reducing cost and complexity.
  2. M.2 slot fault LED status: This allows for easy identification of a failed drive when it is removed from the system's PCIe slot.
  3. Power to the 8GB cache: In the event of a power loss, the CBM ensures that any data residing in the 8GB cache that has not yet been written to the drives is preserved.

After physical installation, the system is powered up, and the adapter driver must be installed. The manual refers to a dedicated chapter for detailed installation procedures.

For configuration, the ARC-1886-4N8I offers multiple management interfaces:

  1. McBIOS RAID Manager: This is a BIOS-based, menu-driven program accessed by pressing Tab or F6 during system boot. It allows users to scroll through menus and select configuration options. The manual provides a screenshot of the McBIOS RAID manager window, showing adapter information and options.
  2. MRAID Storage Manager (via LAN Port): This web browser-based manager allows remote configuration without platform-specific software. Users can find the controller's Ethernet port default IP address in the McBIOS RAID manager's "System Information" option and then access the manager by entering http://[IP Address] in a web browser. The default username is "admin" and the password is "0000".
  3. MRAID Storage Manager (via ArcHTTP Proxy Server): ArcHTTP is a utility that needs to be installed on the host system. It serves as a proxy for the GUI RAID console (MRAID storage manager) and can run as a service or daemon in the background to capture events for mail and SNMP trap notifications. ArcHTTP is downloaded from the Areca website. Once installed, it displays available RAID adapters, allowing users to launch the MRAID storage manager for a selected adapter. Similar to the LAN port method, the default username and password ("admin" and "0000") are used for login.

Both MRAID methods offer a "Quick Create" function, which automatically configures a volume based on the number of disks in the system, creating a RAID set with one associated volume set. More advanced customization options are detailed in the user manual.

Maintenance Features:

While the manual primarily focuses on installation and initial configuration, several aspects touch upon maintenance:

  • ESD-protective bag: The adapter is shipped in an ESD-protective bag, indicating a focus on protecting sensitive electronic components during handling and storage, which is a key aspect of device longevity and maintenance.
  • Fault LED status (with CBM): The optional CBM module provides M.2 slot fault LED status, making it easy to identify a failed drive. This is a crucial maintenance feature, as it simplifies troubleshooting and reduces downtime when a drive needs replacement.
  • Remote Management (LAN Port/ArcHTTP): The ability to manage the RAID adapter remotely via a web browser (either directly through the LAN port or via the ArcHTTP proxy server) is a significant maintenance advantage. It allows administrators to monitor RAID status, perform configurations, and troubleshoot issues without needing physical access to the server, which is invaluable in data centers or remote deployments.
  • Event Logging and Notifications (ArcHTTP): ArcHTTP runs as a service or daemon in the background, allowing it to capture events for mail and SNMP trap notifications. This proactive alerting system is a vital maintenance feature, as it can notify administrators of potential issues (e.g., drive failures, RAID degradation) before they escalate, enabling timely intervention.
  • Firmware Updates: Although not explicitly detailed in the "Maintenance Features" section, the presence of firmware versions (e.g., F/W: V1.56) in the McBIOS RAID manager screenshot implies that firmware updates are a part of the device's lifecycle, which are essential for bug fixes, performance improvements, and compatibility enhancements.
  • Support Data Collection (ArcHTTP): The ArcHTTP configuration screen shows an option to "Collect Support Data." This feature is invaluable for diagnostic purposes, allowing users to gather relevant information to share with technical support when troubleshooting complex issues.

In summary, the Areca ARC-1886-4N8I is a high-performance RAID adapter designed for M.2 NVMe SSDs, offering robust data protection and performance enhancements through its dedicated hardware and flexible management options. Its user-friendly installation process, diverse configuration interfaces, and integrated maintenance features contribute to its overall utility and reliability in demanding storage environments.

Areca ARC-1886-6N2I Specifications

General IconGeneral
ControllerAreca ARC-1886
InterfacePCIe 3.0 x8
Maximum Drives6
Controller TypeRAID
RAID Levels0, 1, 3, 5, 6, 10, 50, 60
Operating System SupportWindows, Linux, VMware

Related product manuals