16
7.4 General instructions for pressure adjustment
Reminder:
Pressure adjustment is only
necessary in the case of a circuit
breaker supplied under reduced
pressure (air transport for example).
Tools required:
- 1 open-ended spanner size 30
- 1 SF6 gas pressure filling and
adjustment kit
Duration: 1.00 h. per circuit breaker
WARNING: Our devices are
produced and controlled with
the greatest of rigour. NevertheĆ
less, despite all our precautions,
handling incidents (shocks), and
those for transport or storage are
always possible.
This is why we recommend laying
protective netting over the circuit
breaker during pressure adjustment
operations in order to prevent any
possible risk of pole failure.
The switchgear should have
the same temperature as the
equipment room in order to carry
out a corrective measure.
Otherwise, it is advisable to wait for
24 hours.
The rated pressure is
specified on the circuit
breaker plate (see § 5.2).
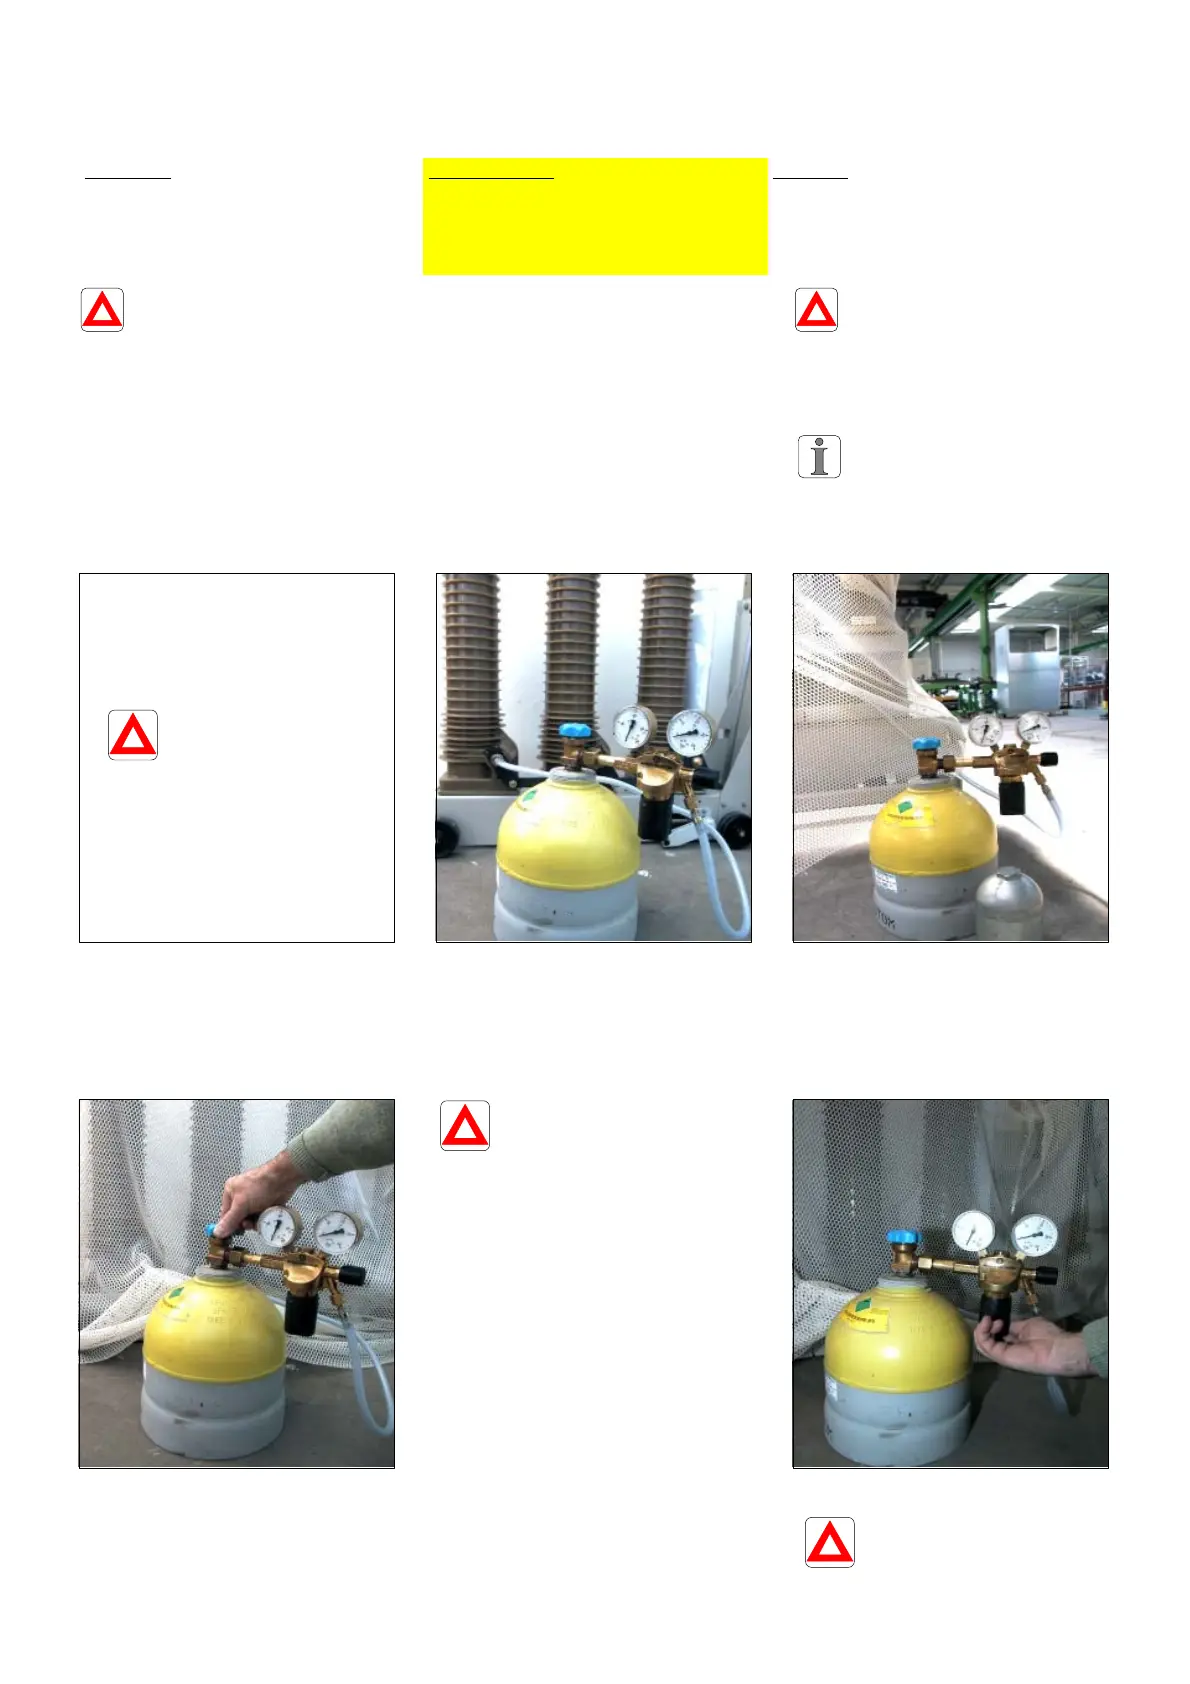
7.5 Pressure adjustment procedure
Remove the protection plug for
the pole filling valve.
The gas bottle must
always be in the vertical
position.
Slightly open the tap of the gas
bottle in order to remove the air
from the hose.
Connect up the hose to the
valve on the pole.
Cover the circuit breaker with
protective netting.
Tie down the protective netting
using bungee cords or linkages
(not supplied).
Open the bottle of SF6 gas.
The pole is filled with gas .
The rated pressure is
indicated at an ambient
temperature
of +20°C.
It will be necessary to correct the
filling pressure whilst taking into
account the ambient temperature
at the time of the operation (refer
to the Pressure ć Temperature
diagram § 7.7).
Adjust the pressure by the
lower screw.
Do not exceed the
recommended pressure.