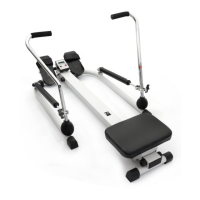
Do you have a question about the Argos Opti Hydraulic Rower machine and is the answer not in the manual?
Precautions for safe assembly of the equipment, including space and child safety.
Guidelines for safe operation, domestic use, and user responsibilities.
Warnings on battery installation, mixing types, and proper disposal to prevent damage.
Attaching the seat carriage to the seat using M6*15mm hex bolts.
Assembling seat carriage onto main frame, securing with bolts, washers, and nuts.
Attaching the rear supporting frame to the main frame with a knob and flat washer.
Fixing main frame floor supports and connecting the link pole with bolts, washers, and nuts.
Connecting rowing arms and hydraulic cylinders to frame supports using bolts and nuts.
Attaching footplates to the main frame using bushings, washers, and nuts, then securing feet.
Installing monitor, batteries, connecting wires, and adjusting hydraulic cylinder tension.
Advice on starting an exercise program based on physical condition and doctor consultation.
Guidance on maintaining target heart rate zones for effective aerobic exercise benefits.
Visual guide to upper and lower body muscle groups targeted by the rower.
Recommended three-part workout structure including warm-up, training, and cool-down.
Guidance on how often to exercise for maintaining or improving fitness.
Instructions for toe touch and hamstring stretches for post-exercise recovery.
Instructions for calf and Achilles tendon stretching against a wall.
Instructions for quadriceps and hip muscle stretching using a wall for balance.
Instructions for inner thigh stretching by bringing soles of feet together.
| Brand | Argos |
|---|---|
| Model | Opti Hydraulic Rower machine |
| Category | Fitness Equipment |
| Language | English |