13 / EN
THERMAL
CUT-OUT
THERMOSTAT
HEATING
ELEMENT
NEON
L
N
E
Fig. 5 Wiring Diagram
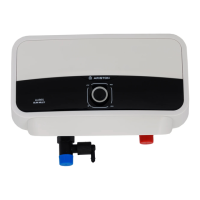
To enter into the terminal compartment unscrew the 2 screws on the cover.
(To access the screws, remove the decorative caps on the front control access panel.
d) COMMISSIONING
- Check that all the necessary components are supplied and for those not factory fitted, that they are
the type recommended by the manufacturer for the particular water heater.
- Check that the water heater/components are undamaged.
- Check that the discharge pipe is plumbed so that it falls continuously and that no taps, valves or
other shut-o devices are installed in the pipe.
- Check that the discharge pipe drains safely to waste and is readily visible.
- Check, in the case where some components are not factory fitted, that they are marked so as to
refer to the warn-ing label on the water heater.
- Open all outlet taps.
- Turn on the mains water supply.
- Close taps in turn as water flow stabilises with no air bubbles.
- Check for leaks.
- Check that no water is passing through the safety valve(s).
- Test the operation of the safety valve(s) by lifting/turning the lever/knob, and observing that water
flows through and safely to waste.
- Switch on electricity and set thermostat to at 60°C to reduce the build up of scale in hard water
areas.
- Check the water heats up.
- Check that <<warning to user label>> is secure and visible on the heater and related warning labels
are fitted to the controls.
- Demonstrate operation to user, including operation of safety valve(s) and what to do if it/they ope
-
rate(s).
- Give this handbook to the user and discuss future maintenance.
- Drain and refill the entire system ensuring it is flushed in accordance with BS67
 Loading...