8 / EN
INSTALLATION INSTRUCTIONS
Before installing the heater read these instructions in full. If you are unsure please contact our tech-
nical service department (03332407777).
Note: For further information please refer to the flow chart on page 19 which gives guidance on
choosing controls. The installation must comply with all relevant Water Regulations/Byelaws and
Building Regulations. The installer should check with the local water authority for confirmation of the
maximum water supply pressure.
a) SITING & FIXING WARNING:
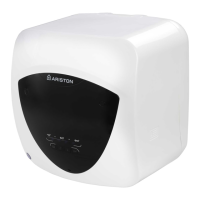
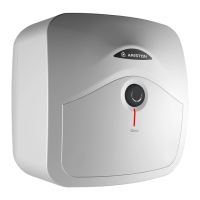
The appliance should be left packed until it is ready to be installed. When unpacking the 30 L
model take care not to damage the temperature and pressure relief valve on the top of the heater.
A drain has to be provided for any water discharged through the safety valves.
Access to the heater is not normally needed on a day-to-day basis, but 300 mm clearance to the
front of the water heater sould be kept for servicing and maintenance A cold water supply pressure
between 1 and 3.5 bar is required (if the mains pressure is above 3.5 bar a pressure reducing valve
must be installed). Please note that turning down the stop-cock will reduce flow not pressure.
The outlet pressure from the reducing valve (if supplied) is 3.5 bar.
A 240 VAC; 3 kW single phase electrical supply is required.
Position the heater against the wall and mark the position of the hooked wall bracket. Fasten the wall
bracket to wall using suitable screws and wall plugs (ensure that wall is suitable to support the unit,
allowing for the extra weight of water when it is full). Hang the heater on the bracket making sure
that the heater is pulled well down on to the bracket, if necessary by forcing the hooks into the foam
insulation.
Ensure the unit is accessible and maintains sucient clearances to allow for service and maintenan
-
ce. Ensure the unit is installed in a place where freezing will not occur.
Ensure a suitable low level drain o cock is installed on the hot and cold plumbing system.
b) PLUMBING WARNING:
The appliance must not be supplied with water of hardness less than 120ppm, nor with especially
hard water (greater than 250ppm); we recommend installing a water softener, properly calibrated and
controlled - do not allow the residual hardness to fall below 150ppm.
The outlet from temperature and pressure relief valve/pressure relief valve must not be for any other
purpose. Take great care not to allow any swarf into the pipe work or fittings, as this might impair the
operation of the safety valve(s).
The heater will only work in the vertical position as the element is shaped to heat the water
at the bottom of the tank. The inlet pipe needs to deliver cold water to the bottom of the tank
and the hot water outlet draws water from the top of
the tank. When water is heated it expands, in a small unvented water heater of this type the
expansion can normally be accommodated back into the cold water mains (not model 30L).
Where this is not possible the installer will need to fit a set of cold water controls.
Note: If a valve i.e. a non return valve, water meter, pressure reducing valve or any type of
valve or fitting that acts as a non return valve is installed on the cold water mains, this will
prevent expansion. Therefore it will be necessary to install an expansion vessel (see pages
10 figs 2 & 3).
Note: If in doubt always install a pressure reducing valve (limited to 3.5bar) and expansion
vessel.

 Loading...