mo n t A G e d e l A t r A v e r S e
Monter la traverse (F) avec l’ouverture vers le haut et pré-monter les xa-
tions du capteur (L).
fi x At i o n A u S o l d e l A S t r u c t u r e
Fixer la structure au sol à l’aide de vis adaptées au support (X, non fournies),
les cotes d’installation sont indiquées dans la gure.
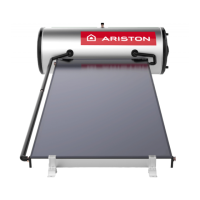
PRODUCT INSTALLATION
GROUND INSTALLATION
CN 150-1 and CN 200-1
The package contains all the components required for installation of the
system on the ground.
The hydraulic kit contains:
• 2 stanchions (A and B)
• 2 ground crossbars (C)
• 2 at bars (D)
• 2 collector brackets (E)
• 1 crossbar (F)
• 15 M8 nuts (G)
• 12 M8 washers (H)
• 15 M8 bolts (I)
• 2 50x50 collector fasteners (L)
The package does not include screws for xing to the ground!
fr A m e A S S e m b l y
Screw the at bars (D) together using the central holes and then to the two
stanchions (A-B) using bolts (I) and nuts (G).
Note: Use the upper of the two holes in the lower section of each stan-
chion.
Mount the collector brackets (E) and the ground crossbars (C) as shown in
the diagram.
fi t t i n G c r o S S b A r
Fit the crossbar (F) with the slot facing upwards and attach the collector
fasteners (L).
fi x i n G f r A m e t o G r o u n d
Fix the frame to the ground using screws that are suited to the supporting
surface (X, not supplied), the installation heights are shown in the diagram.
GROUND INSTALLATION -
INSTALLATION AU SOL
INSTALLATION AU SOL
CN 150-1 et CN 200-1
À l’intérieur de l’emballage se trouvent tous les composants prévus pour l’in-
stallation au sol du système solaire.
Le kit se compose des éléments suivants:
• 2 montants verticaux (A et B)
• 2 traverses de sol (C)
• 2 barres plates (D)
• 2 supports d’appui du capteur (E)
• 1 traverse (F)
• 15 écrous M8 (G))
• 12 rondelles M8 (H)
• 15 vis M8 (I)
• 2 xations pour capteur 50x50 (L)
Les vis de xation au toit ne sont pas comprises dans l’emballage!
mo n t A G e d u c h â S S i S
Visser les barres plates (D) entre elles dans le perçage central puis aux deux
montants verticaux (A-B) à l’aide des vis (I) et des écrous (G).
Remarque : sur les montants latéraux, en bas, se trouvent deux perça-
ges. Le plus haut devra être utilisé.
Monter les supports d’appui du capteur (E) et les traverses de sol (C) comme
indiqué en gure.
DESCRIPTION DU PRODUIT
 Loading...