9
NOTICE: The lter is re-usable and should be cleaned regularly. Clean or change the lter regularly for
best performance.
NOTICE: A dry lter is necessary to pick up dust. If the lter is wet, it will clog quickly and be very
dicult to clean. If wet, let the lter completely air dry before using it for dry pick-up. Handle the lter
carefully when removing it for cleaning and replacing it. Check the lters for tears or small holes. A
small hole can let dust pass through and out of the lter. Do not use a lter with holes or tears; replace
it immediately.
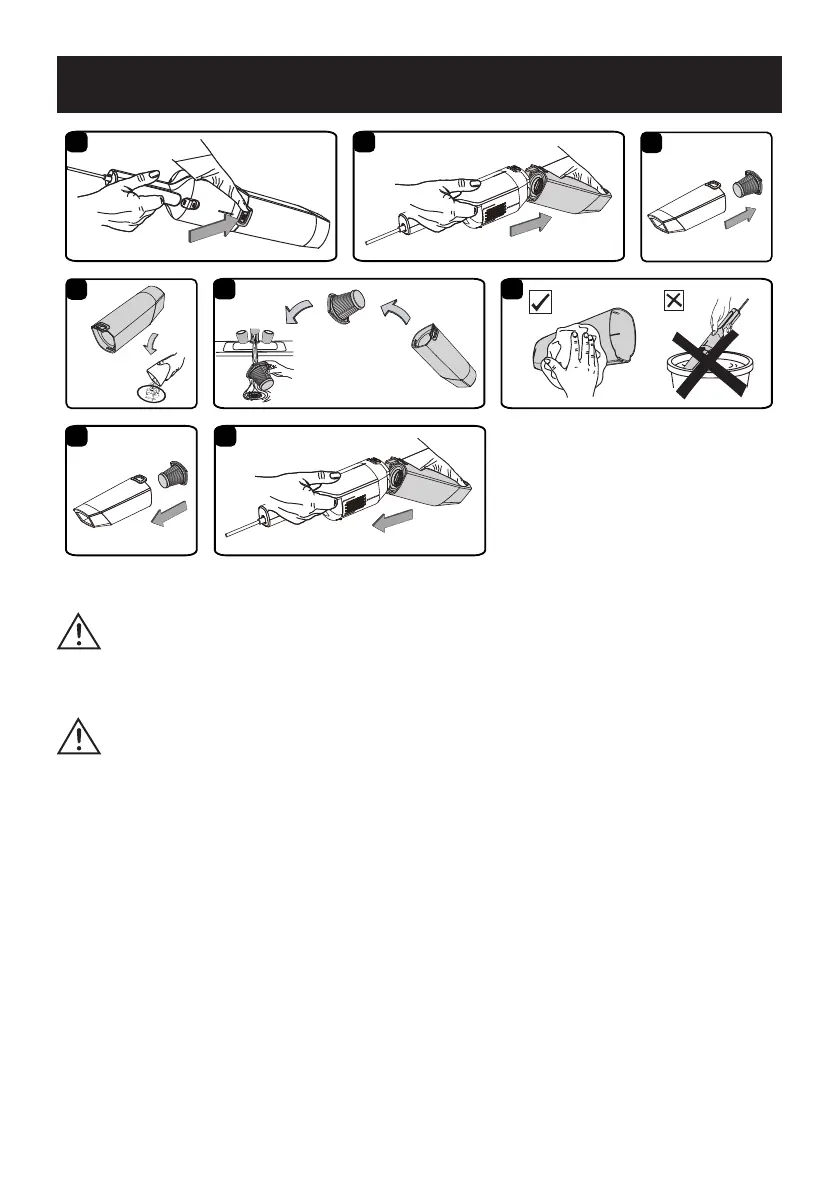
1. Verify that the plug is disconnected from the 12V power socket.
2. Press the release button and remove the dust cup (Fig. 1 & 2).
3.
Remove the reusable washable lter from the dust cup by pulling on the tab at the top of the lter,
then clean any loose dust o the lter with a soft bristle brush (Fig. 3).
4.
Empty all debris and any dust from the dust cup (Fig. 4).
5.
Use a mild soap and water solution to wash the lter and rinse with clean water, air dry and re-insert
lter once completely dry (Fig. 5).
6. Allow the wet lter to air dry for 24 hours before tting into the dust cup. For optimal performance, a
new lter is recommended.
7.
Make sure the dust cup and lter are clean and dry before using it again. DO NOT immerse the
vacuum in water (Fig. 6).
8. Ret the reusable washable lter into the dust cup (Fig. 7).
9. Ret the dust cup onto the vacuum. Make sure the dust cup clicks into place (Fig. 8).
MAINTENANCE
WARNING: VERIFY THAT THE POWER PLUG IS DISCONNECTED FROM THE SOCKET.
WARNING: IF THE MACHINE IS USED WITHOUT THE FILTER, THE MOTOR WILL BURN
OUT AND THE WARRANTY WILL BE VOIDED. ALWAYS KEEP SPARE FILTERS ON HAND.
CLEANING
1 2
5 6
6 7
3
4