EasyManua.ls Logo

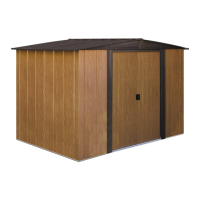
Arrow Storage Products WR86 User Manual

Arrow Storage Products WR86
36 pages
To Next Page IconTo Next Page
Page #1 background imageLoading...
Page #1 background image
Gloves must be worn
at all times to reduce
risk of injury!
Owner’s Manual
& Assembly Guide
732041021
BUILDING DIMENSIONS
* See Inside for Detailed Safety Information.
Size rounded off to the nearest foot
For proper base construction see page 12
Nominal Size
8’ x 6’
EN,FR,SP-01KK
Base
Size
97 1/2” x 68 3/4”
247,7 cm x 174,6 cm
Exterior Dimensions
(Roof Edge to Roof Edge)
Width Depth Height
Interior Dimensions
(Wall to Wall)
Width Depth Height
Door
Opening
Width Height
Approx.
Size
Storage
Area
8’ x 6’ 43 Sq. Ft. 271 Cu. Ft. 99 3/4” 71 1/4” 79 1/8” 94 3/4” 66” 77 7/8” 43 1/2” 69 1/4”
2,4 m x 1,8 m 4,0 m
2
7,7 m
3
253,4 cm 181,0 cm 201,0 cm 240,7 cm 167,6 cm 197,8 cm 110,5 cm 175,9 cm
ShelterLogic.com
/
product-registration
Register • Enregistrer • Regístrate
Model No. WR86
Steel Shed Steel Shed
arrowsheds.com
Visit our website for compatible accessories
Question and Answer IconNeed help?

Do you have a question about the Arrow Storage Products WR86 and is the answer not in the manual?

Arrow Storage Products WR86 Specifications

General IconGeneral
Dimensions8 ft. x 6 ft.
LockableYes
Weather ResistantYes
Assembly RequiredYes
Product TypeShed
MaterialSteel

Summary

Building Dimensions

Exterior Dimensions

Detailed measurements from roof edge to roof edge for the shed.

Interior Dimensions

Internal measurements from wall to wall for the shed.

Door Opening Dimensions

Width and height specifications for the shed door opening.

General Safety Precautions

Assembly Overview

Care and Maintenance

Rust Protection Precautions

Tips to prevent rust and protect the shed's coating.

Hardware List

Parts List

Assembly Steps by Part Number

Constructing a Foundation

Foundation Options

Details on building directly on ground, wood platform, or concrete slab.

Step 1: Floor Frame Assembly

Step 2: Pre-Assembly

Removing or Installing Door Slides

Procedure for removing or installing door slides for maintenance.

Step 3: Framing

Step 4: Jambs and Splice Posts

Step 5: Studs Installation

Step 6: Side Siding Installation

Step 7: Rear Siding Installation

Step 8: Front Siding Installation

Step 9: Gable Installation

Gable Edge Trim Caution

Warning about sharp edges on gable trim during installation.

Step 10: Roof Beams Installation

Step 11: Roof Panels Installation

Step 12: Door Assembly

Door Adjustment Guide

Instructions on how to adjust the doors if they do not align properly.

Anchoring Options and Importance

Related product manuals