5
BACK TO
INDEX
ASSEMBLY
OPERATION
1 MAKE SURE YOU HAVE READ ALL SAFETY INSTRUCTIONS.
2 This tool comes completely assembled. There is no assembly required.
Never load staples and nails at the same time
Loading Staples and Nails
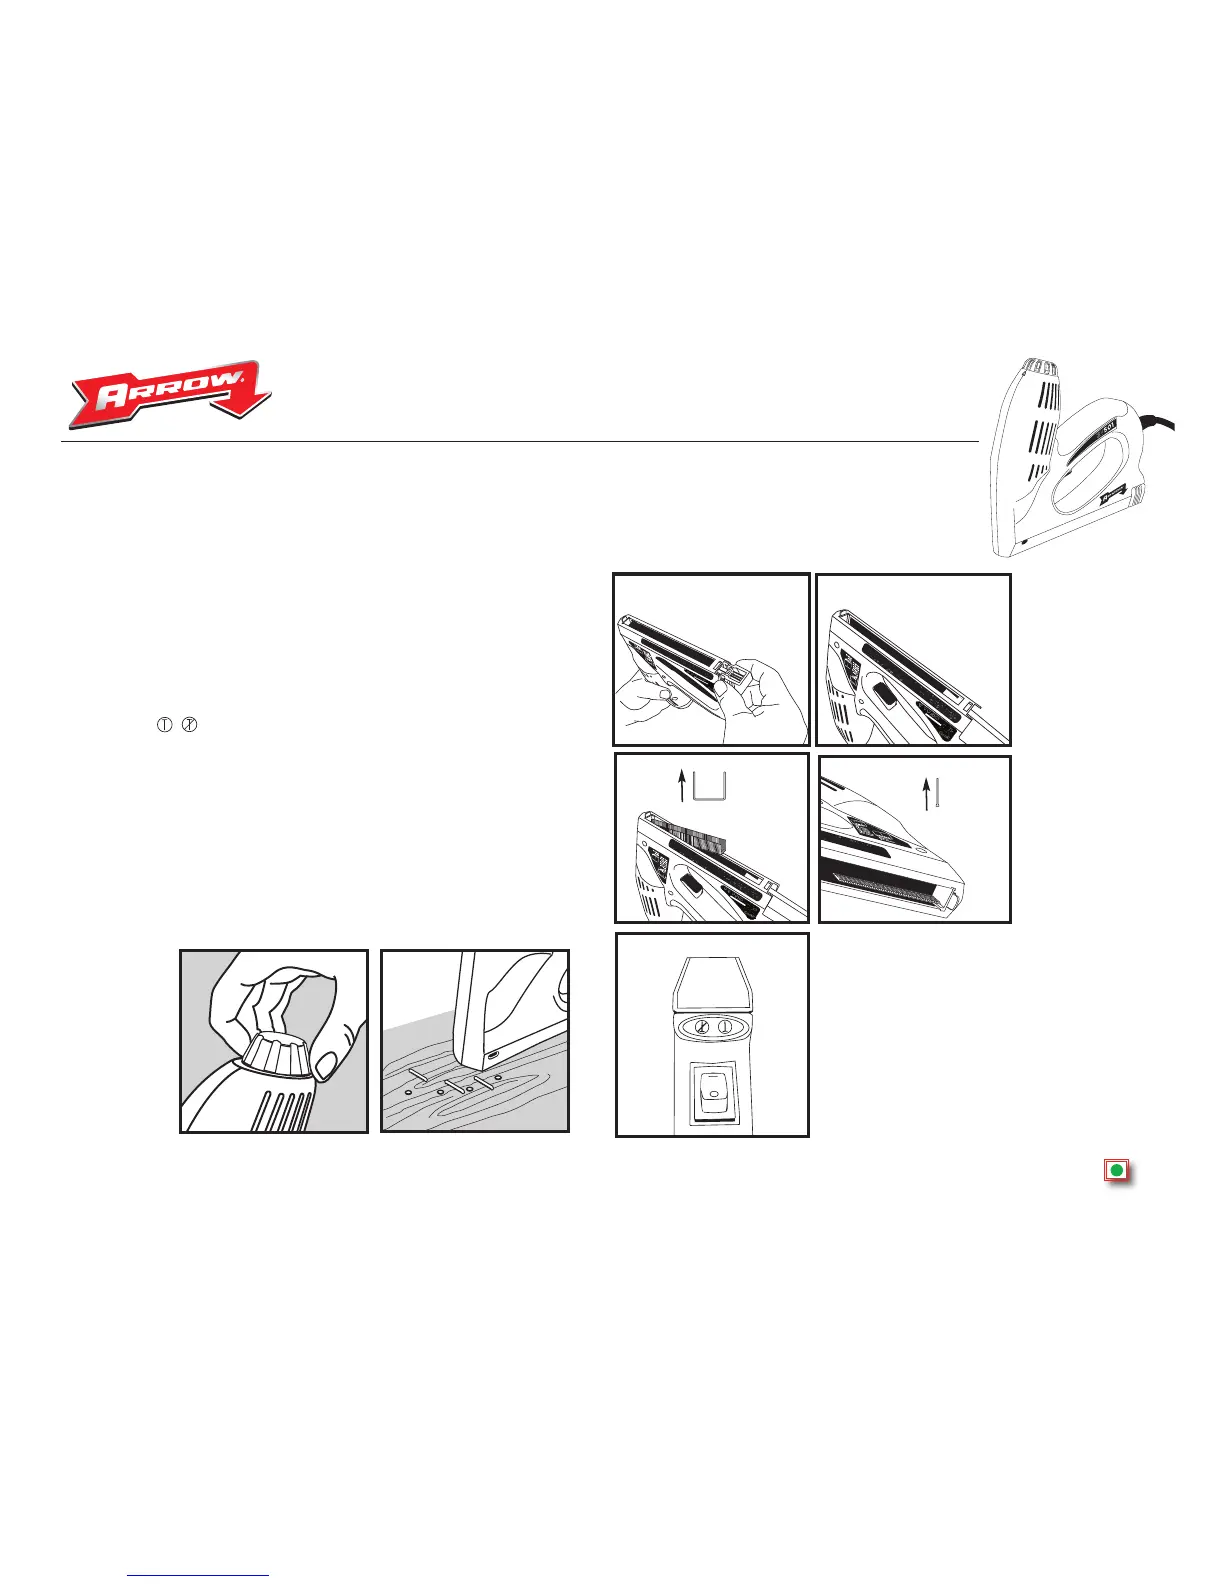
1. Turn tool off. The ET501™ has a bottom load staple magazine. Turn tool upside down and
squeeze pusher assembly (Fig 1).
2. Pull pusher assembly out until it stops to reveal the staple and nail magazine (Fig 2).
3. STAPLES: Place staples into magazine with the points facing up and out of the tool (Fig 3).
4. BRAD NAILS: Place brad nails against the side wall of the magazine ( this is the side with the
staple viewing window) with brad nail points facing up and out of the tool (Fig 4).
Note: Follow the symbols at back of
the tool (Fig 5).
Never Attempt to completely remove pusher assembly as this may damage the tool and void
the warranty.
Close pusher assembly until it snaps into place
.
Fig.5
Fig.1
Fig.2
Fig.3
Fig.4
STAPLES
+ BRAD NAILS
Turn power
adjustment knob to
drive staples & nails
flush into surface.