28
Step 15
N28hw
● Parts Needed For ●
Ridge Caps & Panels
●●
●●
● 8840 Ridge Cap (1)
●●
●●
● 7571 Roof Panel (2)
●●
●●
● 8486 Ridge Cap (1)
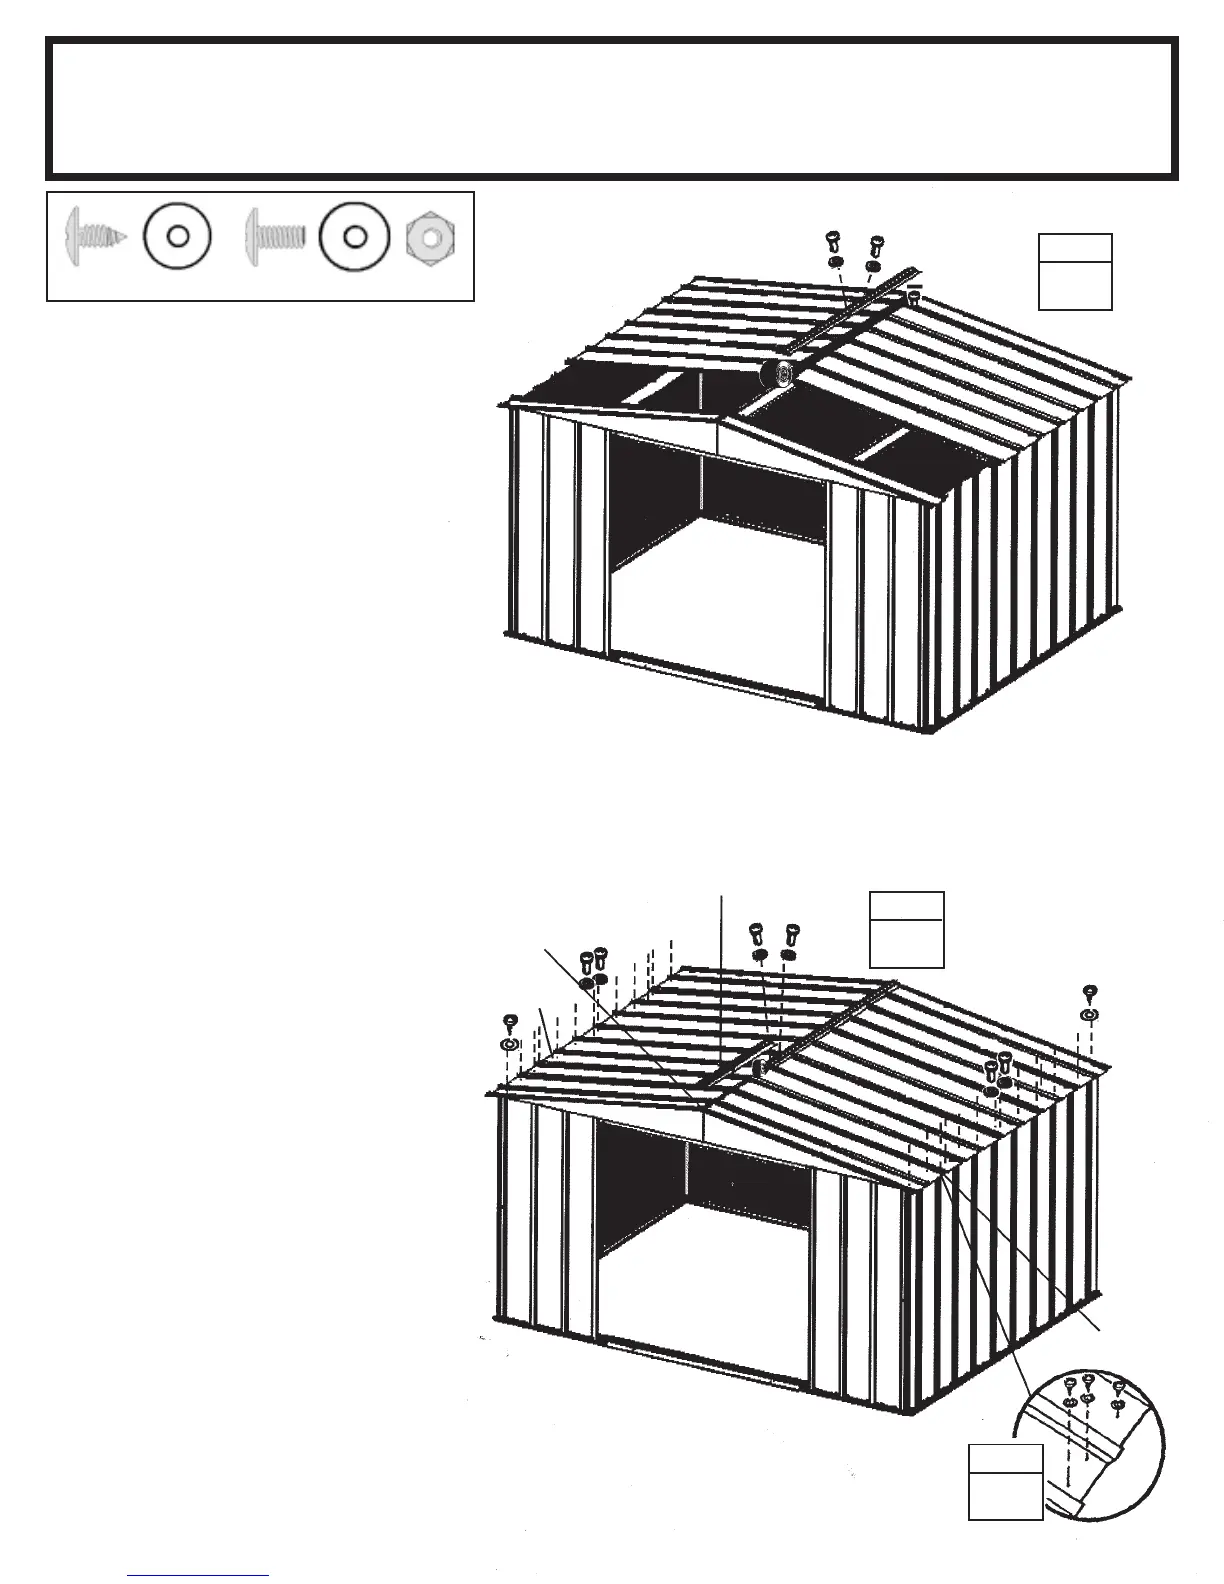
1 Install the first ridge cap on the
completed roof section using bolts
and nuts. Fasten roof panel overlaps
not used for ridge cap. Cover the
head of bolt with the 2" (5,1 cm) piece
of weather stripping tape. Do not
fasten the ends of the ridge cap at this
time.
2 Install the second ridge cap over-
lapping the first ridge cap while in-
stalling the remaining narrow roof
panels. Continue weather stripping
the ridge.
3 Fasten the lower end of the panels
to the side wall angles using screws
and washers. Use bolts and nuts
through wall angle overlaps at the
bottom of the panel.
STEP
1
8840
Strips
STEP
2
7571
8486
Cut Weather
Stripping and
Fold Under
7571
3
STEP
(40)
(16)