The VacMaster VP540 is a commercial-grade chamber vacuum packaging system designed to extend food life, maintain food quality, reduce freezer burn, and minimize food waste and costs. This system offers a much higher level of vacuum compared to non-chamber, external bag type units, leading to a longer shelf life for packaged foods. A key advantage is its ability to effectively vacuum package liquids and liquid-rich foods, such as fresh meats, fish, soups, and stews, making the process quick and mess-free. It is also ideal for marinating vegetables and meats.
The VP540 operates using commercial technology. To use it, a pouch is placed inside the chamber, and the lid is closed. This action initiates the vacuum pump, and the vacuum and sealing process begins. Air is first removed from the entire chamber and the vacuum pouch. Once the preset vacuum level is achieved, the pouch is sealed. After the sealing cycle, air flows back into the chamber, and the lid opens automatically.
The VP540 can be used for various applications, including vacuum packaging soups, stews, and other liquid foods. It helps keep fish and game meat fresh longer and free from freezer burn, and stores meat and fish scent-free. The system allows users to take advantage of bulk purchases by portioning and packaging items. It is also perfect for marinating meats and vegetables and vacuum packaging pre-made meals. Beyond food, it can prevent oxidation and damage to rare coins, silverware, and important documents.
For safe and effective vacuum packaging, users should adhere to basic guidelines. Only fresh foods should be packaged, as vacuum packaging does not improve an already bad product. Fresh foods like meats, vegetables, and cheeses should be refrigerated at 34°F or below or frozen after vacuum packaging. Vacuum packaging removes a high percentage of air (21% oxygen), which slows the growth of most microorganisms that degrade food, such as aerobic bacteria and molds. However, some anaerobic bacteria, like Clostridium botulinum (responsible for botulism), can grow in the absence of oxygen. Foods susceptible to botulism should be refrigerated for short-term storage and frozen for long-term storage, and consumed immediately after heating. Vegetables such as cauliflower, broccoli, and cabbage emit gases when vacuum sealed; these should be blanched before vacuum packaging. All perishable foods must be refrigerated or frozen to prevent spoilage. Vacuum packaging is not a substitute for heat canning.
The VP540 can accommodate a wide variety of pouch sizes and shapes, allowing for the packaging of smaller individual serving portions as well as bulk items. Vacuum pouches keep food fresh 3-5 times longer than conventional storage bags and are available in several sizes to meet diverse packaging needs. They are suitable for hundreds of applications in and out of the kitchen, safe for freezer, refrigeration, and microwave use, and can be boiled for cooking in bags. Pouches are available in standard 3mil or heavy-duty 4mil thickness and are economically priced. The chamber can easily vacuum package various sizes of vacuum pouches, ranging from 2.5" x 10" to 14" x 20".
Before initial use, it is crucial to add oil to the vacuum pump. The VacMaster VP540 uses an oil vacuum pump, and for shipping purposes, it contains no oil. To add oil, the machine must be turned off and unplugged to prevent electrocution. The included ARY approved oil should be used to fill the enclosed plastic oil bottle. The oil fill bolt is located on the top of the vacuum pump. After removing the bolt, the end of the oil bottle is inserted into the hole, and oil is added until the level is between 1/2 and 3/4 of the site glass. Overfilling must be avoided as it can damage the vacuum pump. The bolt is then replaced and tightened. The pump requires approximately 8 fluid ounces of oil (about 1 cup), and only approved VacMaster vacuum oil should be used.
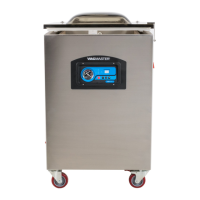
The VP540 features seal bars, silicone bars, a control panel, a power switch, and a lid lock. Filler plates are included to "take up space" in the vacuum chamber, which results in faster vacuum times due to less air needing to be removed. They can also help keep products centered on the seal bar and prevent liquids from escaping. The lid lock feature is not for use during the vacuuming cycle but is intended to keep the lid closed when the machine is not in use or in storage.
Operating instructions involve several steps. First, select the proper size VacMaster barrier vacuum pouch, ensuring a minimum of 1" to 2" of extra headspace at the top for a quality seal. Next, plug in the machine and switch the power "ON"; the "WORKING" indicator light on the control panel will illuminate. All timing controls (Vacuum Time, Sealing Time, Cooling Time) must be adjusted with the lid in the OPEN position. The "SET" button is used to cycle through the settings, and the "+" or "-" buttons adjust the values. For initial testing, set the vacuum time to 40 seconds, sealing time to 1.6 seconds, and cooling time to 2.6 seconds. This model does not offer a gas flush option. After setting, press "SET" until all setting lights are clear, and "Ed" appears on the display, indicating the machine is ready.
To package, remove or replace filler plates as needed to accommodate the product. Always use as many filler plates as possible. Lay the pouch flat in the chamber with the opening across the seal bar, extending by 1/2" to 1", ensuring it is flat and wrinkle-free. The entire pouch must remain inside the chamber. Close the lid firmly until the vacuum engages. Closing the lid begins the vacuum cycle. The vacuum cycle counts down to zero, followed by the sealing cycle (also counting down to zero). Then, the cooling cycle counts down to zero. Finally, air is let back into the chamber (Vacuum Devac), and the lid opens automatically when the cycle is complete. Users should keep their face and body clear of the opening lid.
After processing, remove the pouch and inspect. Check the quality of the vacuum by observing the tightness of the pouch and product. If "air pockets" are present, increase the vacuum time by a few seconds and retest. This may take up to 60 seconds depending on pouch size and product volume. Inspect the pouch seal; a positive seal will appear "clear." If the seal is "spotty or incomplete," increase the sealing time by 0.2 seconds. If the seal is "white or milky," decrease the sealing time by 0.2 seconds.
Additional controls include a Vacuum Gauge, which represents the vacuum level inside the chamber. A STOP Button allows users to stop the vacuum cycle and seal the pouch immediately. This feature is useful for preventing product from escaping during the vacuum cycle or for controlling the vacuum level when packaging softer, fragile items.
Maintenance is crucial for years of trouble-free operation. Before cleaning, always unplug the VP540. The machine should be regularly cleaned with a damp cloth to remove food debris, using only a mild soap or stainless steel cleaner. Acetone-based or abrasive cleaners should not be used on the lid or other plastic parts, as they can cause scratches and discoloration. The seal bar should be wiped with a damp cloth only; it is removable for safe cleaning.
Periodically inspect the seal bar's brown Teflon tape. If it becomes burnt or torn, it should be replaced. The lid gasket and the top of the chamber should be kept clean and free of debris.
Troubleshooting steps for when nothing happens when the lid is closed include:
- Ensuring the power cord is firmly plugged into the electrical outlet.
- Confirming the power switch is turned "ON."
- Checking that the power switch is not damaged.
- Plugging in a different appliance to verify the outlet is functional.
If low vacuum is observed (vacuum gauge not reading in the "green"):
- Make sure the open end of the pouch is inside the chamber.
- Confirm that the lid gasket and sealing area are clean and free of debris.
- Increase the vacuum cycle time.
The VP540 vacuum pump requires periodic oil changes. The first oil change should occur after 25 hours of VP540 usage, and subsequent changes should be performed after every 60 hours of machine usage. The oil level and color should be checked frequently using the pump site glass. The oil level must remain between 1/2 and 3/4 of the site glass. With use, the pump oil will become cloudy, dark, or even "milky." Once the oil becomes discolored, it should be changed, replacing it with new VacMaster vacuum oil.
To change/replace oil in the vacuum pump:
- Run a vacuum process a couple of times to "warm up" the oil.
- Turn off and unplug the machine to prevent electrocution.
- Locate the drain and fill plugs on the side of the unit.
- Locate the drain bolt on the underneath side of the vacuum pump.
- Position the machine so the drain bolt is "clear" and a catch cup can be placed underneath to capture the dirty oil.
- Oil will flow immediately when the bolt is removed.
- Capture all oil from the pump. Once completely drained, replace and tighten the bolt. (Dispose of old oil properly according to local and state regulations.)
- Follow the "Adding Oil to Vacuum Pump" instructions described earlier. The machine should not be used until oil has been added.