The VacMaster® VP321 is a commercial-grade vacuum packaging system designed to extend food life, maintain food quality, reduce freezer burn, and minimize food waste and costs. It operates as a chamber vacuum system, offering significant advantages over non-chamber, external bag-type units. This system achieves a much higher level of vacuum, leading to a longer shelf life for packaged foods. Additionally, it effectively packages liquids and liquid-rich foods, making it suitable for items like fresh meats, fish, soups, and stews without mess. Marinated vegetables and meats can also be packaged quickly and easily.
The VP321 utilizes commercial technology. To operate, a pouch is placed inside the chamber, and the lid is closed. This action activates the vacuum pump, initiating the vacuum and sealing process. Air is first removed from the entire chamber and the vacuum pouch. Once a preset vacuum level is reached, the pouch is sealed. After the sealing cycle, air flows back into the chamber, and the lid opens automatically.
The device can be used for various purposes, including vacuum packaging soups, stews, and other liquid foods, keeping fish and game meat fresh longer and free of freezer burn, storing meat and fish scent-free, and taking advantage of bulk buys by portioning and packaging. It is also ideal for marinating meat and vegetables, vacuum packaging pre-made meals, and preventing oxidation and damage to rare coins, silverware, and important documents.
For optimal results, it is recommended to use VacMaster® Vacuum Chamber Pouches, which are constructed from a heavy-duty poly/nylon combination. These durable pouches offer increased puncture and abrasion resistance, are transparent for easy product identification, and work in conjunction with the VP321 to create a secure vacuum and a tight seal, making them suitable for Sous Vide cooking.
When getting started with vacuum packaging, it's crucial to follow basic guidelines to ensure food safety. Only fresh foods should be packaged; old or rancid foods will not improve with vacuum packaging. Fresh foods like meats, vegetables, and cheeses should be refrigerated at 34°F or below, or frozen after vacuum packaging. Vacuum packaging removes a high percentage of air (21% oxygen), which slows the growth of most living microorganisms like aerobic bacteria and molds that degrade food. However, some anaerobic bacteria, such as Clostridium botulinum (responsible for botulism), can grow in the absence of oxygen. Foods susceptible to botulinum should be refrigerated for short-term storage and frozen for long-term storage, and consumed immediately after heating. Vegetables like cauliflower, broccoli, and cabbage emit gases when vacuum sealed and must be blanched first. All perishable foods must be refrigerated or frozen to prevent spoilage. Vacuum packaging is not a substitute for heat canning.
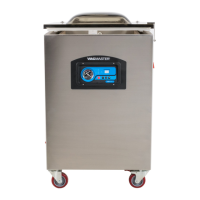
The VP321 features seal bars, a silicone bar, a control panel, a power switch, and a lid lock. Filler plates are included to "take up space" in the vacuum chamber, resulting in faster vacuum times by reducing the air volume to be removed. They also help keep products centered on the seal bar and prevent liquids from escaping. The lid lock feature is for keeping the lid closed when the machine is not in use or in storage, not during the vacuuming cycle.
Operating instructions involve selecting the proper size VacMaster® barrier vacuum pouch, ensuring 1" to 2" of extra headspace for a quality seal. After plugging in the machine and switching power "ON," the "WORKING" indicator light on the control panel illuminates. All adjustments to timing controls must be made with the lid in the OPEN position. These controls include Vacuum Time (initial test set to 40 seconds, adjusted to achieve required vacuum), Gas Flush (not applicable for this model), Sealing Time (initial test set to 1.2 seconds, adjusted for a positive seal), and Cooling Time (initial test set to 2.0 seconds). Once settings are clear, "Ed" appears on the display.
To fill and place the pouch in the chamber, filler plates can be removed or replaced. Pouches should be laid flat with the opening across the seal bar, extending 1/2" to 1" across, flat, and wrinkle-free. The entire pouch must remain inside the chamber. The lid is then closed firmly until the vacuum engages, initiating the vacuum cycle, followed by the sealing cycle, and then the cooling cycle. After vacuum devac (air is let back into the chamber), the lid opens automatically. Users should keep their face and body clear of the opening lid.
After processing, the pouch should be removed and inspected. The quality of the vacuum is checked by observing the tightness of the pouch and product. If "air pockets" are present, the vacuum time should be increased by a few seconds. The pouch seal should be inspected; a positive seal appears "clear," while a "spotty or incomplete" seal requires increasing the sealing time by 0.2 seconds. A "white or milky" seal indicates the sealing time should be decreased by 0.2 seconds.
Additional controls include a Vacuum Gauge, which represents the vacuum level inside the chamber, and a STOP Button. The STOP button immediately stops the vacuum cycle and seals the pouch. This feature is useful for preventing product from escaping the pouch during the vacuum cycle and for controlling the vacuum level when packaging softer, fragile items.
Maintenance of the VacMaster® VP321 is designed for ease of use and low maintenance. Regular cleaning involves unplugging the device, wiping it with a damp cloth to remove food debris, and using only a mild soap or stainless steel cleaner. Acetone-based or abrasive cleaners should not be used on the lid or other plastic parts, as they can cause scratches and discoloration. The seal bar should be wiped with a damp cloth only and is removable for safe cleaning.
Periodically, the seal bar's brown Teflon tape should be inspected. If it is burnt or torn, it needs replacement. The lid gasket and the top of the chamber must be kept clean and free of debris.
The VP321 vacuum pump requires periodic oil changes. The first oil change is recommended after 25 hours of usage, and subsequent changes every 60 hours. To change the oil, the machine should be run a couple of times to warm up the oil, then turned off and unplugged. The four screws on the back of the cabinet are removed with a Phillips screwdriver to access the drain bolt on the underside of the vacuum pump. The machine should be positioned so the drain bolt is clear, and a catch cup placed underneath before removing the drain bolt. Oil will flow immediately once the bolt is removed. After the oil is completely drained, the bolt is replaced and tightened. Old oil must be disposed of properly according to local and state regulations. The vacuum pump is then refilled by following the "Adding Oil to Vacuum Pump" instructions. The pump requires approximately 8 fluid ounces (1 cup) of ARY approved oil, filling the level between 1/2 to 3/4 of the site glass. Overfilling can damage the vacuum pump. The back cover is then reattached. The oil level and color should be checked frequently using the pump site glass. With use, the pump oil will become cloudy, dark, or "milky," indicating it's time for a change.
Troubleshooting common issues includes addressing situations where nothing happens when the lid is closed. This involves checking if the power cord is firmly plugged into the electrical outlet, if the power switch is turned "ON" and undamaged, and if the outlet is functional by plugging in a different appliance. For low vacuum (vacuum gauge not reading in the "green"), users should ensure the open end of the pouch is inside the chamber, confirm that the lid gasket and sealing area are clean and free of debris, and increase the vacuum cycle time.