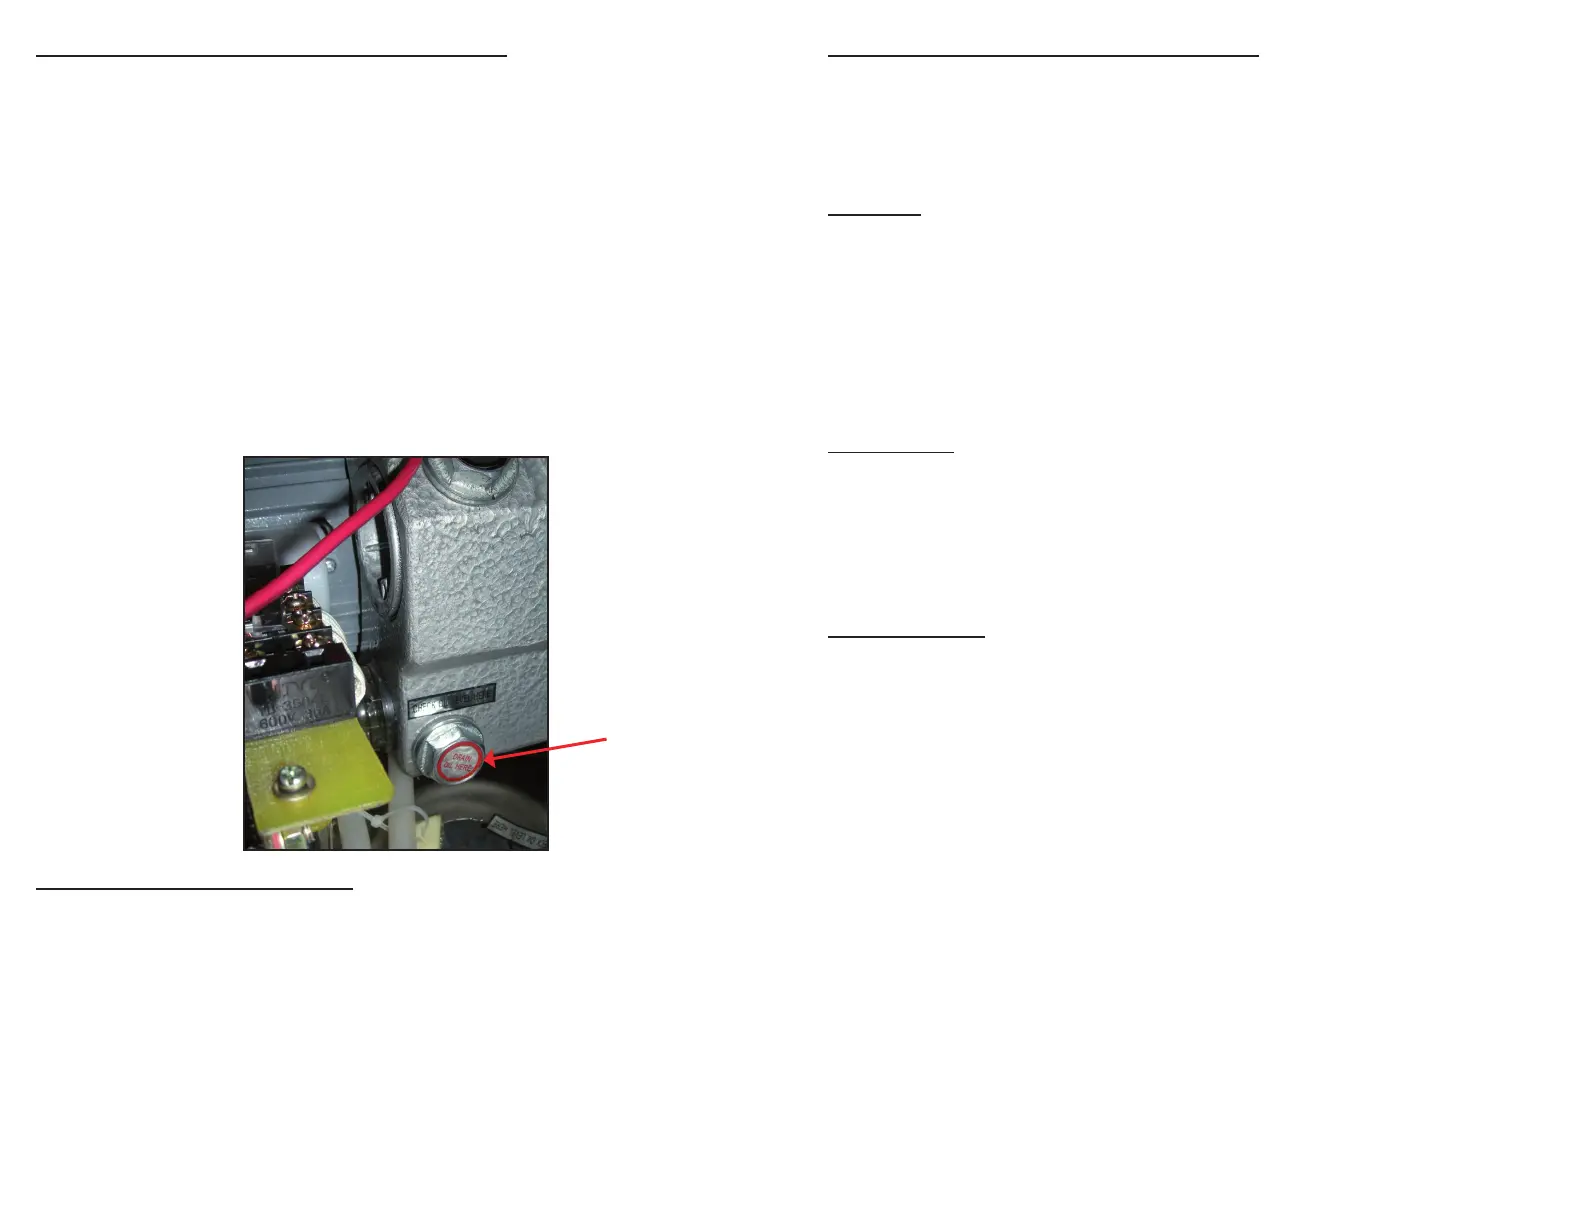
Oil Drain Bolt
Changing/Replacing Oil in Vacuum Pump
1. Run vacuum process a couple of times to “warm up” the oil.
2. Turn off machine and unplug to prevent electrocution.
3. With a phillips screwdriver, remove the 4 screws to open the back
of the cabinet.
4. Locate drain bolt on underneath side of vacuum pump.
5. For access and ease of draining the oil, position machine so the drain
bolt is “clear” and the dirty oil can be captured.
6. Oil will ow immediately when bolt is removed. Place catch cup
underneath before removing drain bolt.
7. Capture oil from pump. When oil is completely drained, replace and
tighten bolt. (Dispose of old oil properly, according to your local and
state regulations.)
8. Follow the “Adding Oil to Vacuum Pump” instructions at beginning of
manual. Do not use machine until oil has been added.
Vacuum Pump Maintenance
The VP321 vacuum pump requires periodic oil changes. Required oil
change schedule:
◦ First oil change: after 25 hours of VP321 usage.
◦ Future oil changes: change oil after every 60 hours of machine usage.
Using pump site glass, check the oil level and color frequently.
◦ Oil must remain between 1/2 and 3/4 of site glass.
◦ With use, the pump oil will become cloudy, dark or even “milky”.
Once oil becomes discolored, change oil replacing with new VacMaster
®
vacuum oil.
Care, Maintenance & Troubleshooting
The VacMaster
®
VP321 has been designed with ease of use and low
maintenance in mind. Follow these few points for years of trouble-free
operation:
Cleaning
◦ UNPLUG your VP321 before cleaning.
◦ Regularly clean machine with damp cloth removing any food debris.
◦ Use only a mild soap or stainless steel cleaner.
◦ DO NOT use any acetone-based or abrasive cleaner on the lid or
other plastic parts. Parts will scratch and discolor.
◦ Wipe the seal bar with damp cloth only. NOTE: Seal bar is removable
for safe cleaning.
Maintenance
Periodically inspect the following items:
◦ Seal bar – inspect the brown Teon tape covering the seal wire. If the
tape becomes burnt or torn, replace.
◦ Lid gasket - make sure gasket and the top of the chamber remains
clean and free of debris.
Troubleshooting
Nothing happens when lid is closed:
1. Make sure power cord is rmly plugged into the electrical outlet.
2. Make sure the power switch is turned “ON”.
3. Make sure the power switch is not damaged in any way.
4. Plug in a different appliance to verify outlet is good.
Low vacuum (vacuum gauge not reading in the “green”):
1. Make sure the open end of the pouch is inside the chamber.
2. Conrm that the lid gasket and sealing area are clean and free of
debris.
3. Increase the vacuum cycle time.
Please read the Operator’s Guide carefully for a full
understanding of your appliance.
Call 800.821.7849 for questions and troubleshooting.

 Loading...