EasyManua.ls Logo

Ashford e-Spinner User Manual

Ashford e-Spinner
2 pages
To Next Page IconTo Next Page
Page #1 background imageLoading...
Page #1 background image
INSTRUCTIONS
e-Spinner
flyer
motor
screw
eye
tension
knob
tension
spring
locking
knob
controls
threading
hook
yarn guidelazy kate
bobbin pins
orifice
flyer hook
bobbin
washer
locking knob
Finish
Your e-Spinner has been lacquered prior to assembly. If desired Ashford
Wax Finish may be applied to further enhance it’s appearance.
Assembly
1. Thread the 2 hooks into the pilot holes in the flyer base.
2. Squeeze and slide the stainless steel yarn guides onto the flyer
arms.
3. Locate the bolt through the slot in the front and secure with a
washer and locking knob.
Warning! - Ensure the head of the bolt fully engages the slot in
the latch before switching on. If not, the front could open and
release the flyer, which could be damaged.
4. Thread the screw eye with the tension spring attached into the
pilot hole in the left hand side.
5. Thread the screw eye into the pilot hole in the right hand side.
6. Apply a drop of oil to the flyer spindle and slide the bobbin on.
Dear Spinner,
Congratulations on purchasing your new e-Spinner. The e-Spinner continues the tradition of my parents Joy and Walter, to design and make
spinning wheels to meet the needs of spinners. There are now over 500,000 Ashford Spinning wheels in use around the world and we are
sure you will enjoy using your new e-Spinner. Thank you for choosing Ashford.
Happy spinning,
Elizabeth and Richard Ashford
7. Loosen and lift the locking knob, then open the e-Spinner front.
As the shaft has minimal clearance on the front bearing, until it
has bedded in, it may be necessary to gently pull on the bearing
at the same time as opening the front.
8. Slide the flyer shaft into the flexible nylon drive bush on
the motor shaft, rotating it until the shaft slides on and fully
engages.
ESP15122015V6
Question and Answer IconNeed help?

Do you have a question about the Ashford e-Spinner and is the answer not in the manual?

Ashford e-Spinner Specifications

General IconGeneral
BrandAshford
Modele-Spinner
CategoryPower Tool
LanguageEnglish

Summary

e-Spinner Assembly and Setup

Prepare Flyer Base and Guides

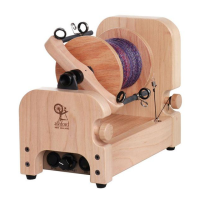
Thread hooks into flyer base and slide yarn guides onto flyer arms.

Secure Front Latch and Tension Spring

Bolt front latch, attach screw eye with tension spring to the left side.

Connect Flyer and Bobbin

Attach right side screw eye, oil flyer spindle, slide bobbin on, and connect flyer.

Lazy Kate Setup

Assemble Lazy Kate

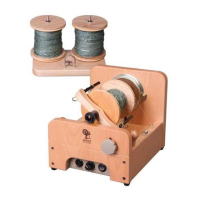
Insert bobbin pins and yarn guide into the Lazy Kate base.

Power Pack and Controls

Power Pack Operation

Connect power cord, set speed to SLOW, and switch on.

Control Panel Functions

Understand FORWARD/REVERSE, SPEED adjustment, and ON/OFF switch.

Safety Precautions

Unplug when not in use, switch off, avoid damp conditions, and disconnect before opening.

Available Accessories

Information on optional accessories like DC power cords and foot switches.

Lubrication Guidelines

Apply oil to flyer bearings and Vaseline to motor drive bush for smooth operation.

Spinning Technique

Starting to Spin

Tie a leader, thread it, and gradually increase speed to begin spinning.

Bobbin Changing

Procedure to change bobbins including motor off and securing front latch.

Orifice Reducer Bush

Use reducer for finer yarns; remove for thick yarns or plying.

Related product manuals