11
INSTALLATION
Unpacking
Remove the packaging with the product in
place. Cut off the packing ribbons and carefully
cut open the packaging (do not cut too deeply),
remove the packaging.
Check that the product is free from transport
damage. Any damage shall be reported imme-
diately to the carrier or seller.
Damage, faults and missing parts must be
reported immediately to the seller.
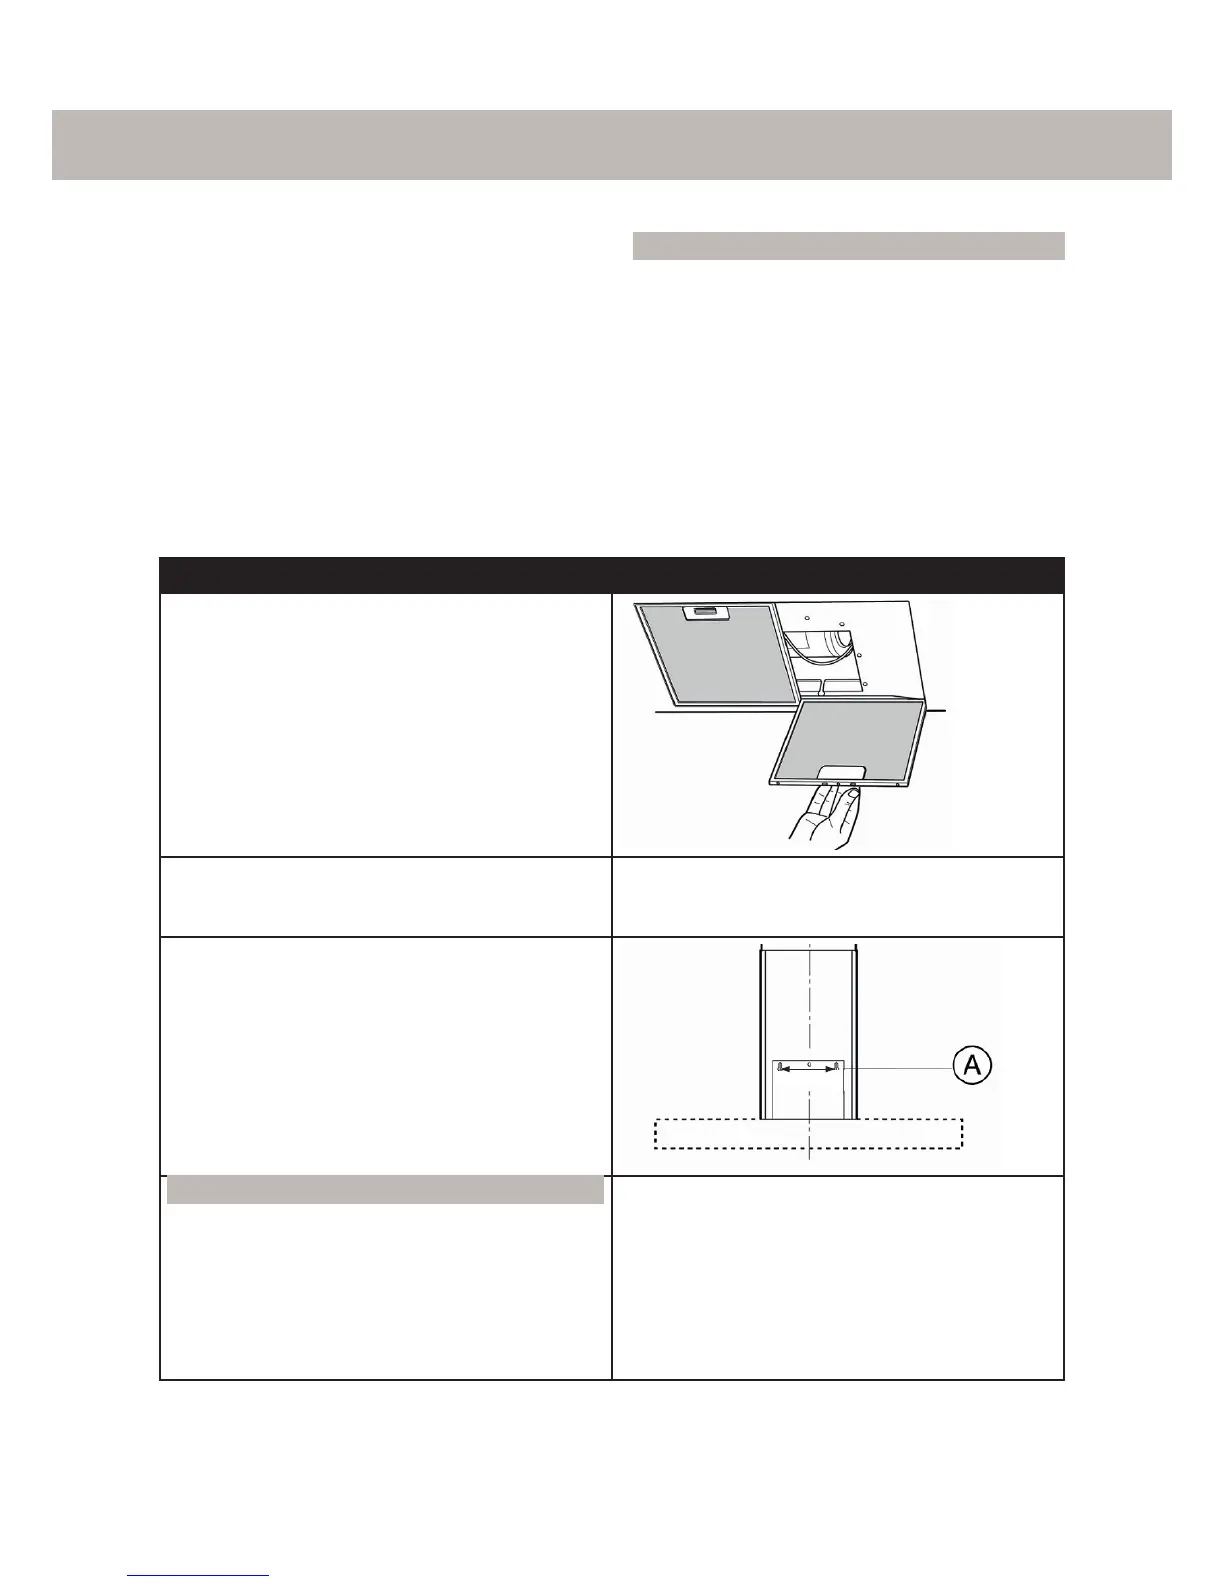
Fixing to the wall
Remove grease filter(s) before installing the
cooker hood.
Prepare the hole for the exhaust air if the cooker
hood is to be installed with outdoor venting.
Drill two holes in the wall spaced as illustrated
(A).
Insert and tighten the screws so that you can
still adjust the cooker hood. Once this is done,
tighten it firmly against the wall.
NB:
Always use screws and fittings suited to the
type of wall (concrete, plasterboard etc.). If
screws and fittings are included with the prod-
uct, make sure they are suitable for the type of
wall on which the cooker hood is to be mounted
before using them.
REMEMBER!
• The distance between the top of the hob and
the lowest part of the cooker hood must be
at least 65 cm.
• If a two-part connection tube is used, the
lower section must sit outside the upper sec-
tion.
• Do not connect the cooker hood exhaust to
a duct used to circulate hot air or vent steam
from another appliance.
• Always use protective gloves when installing
the appliance!