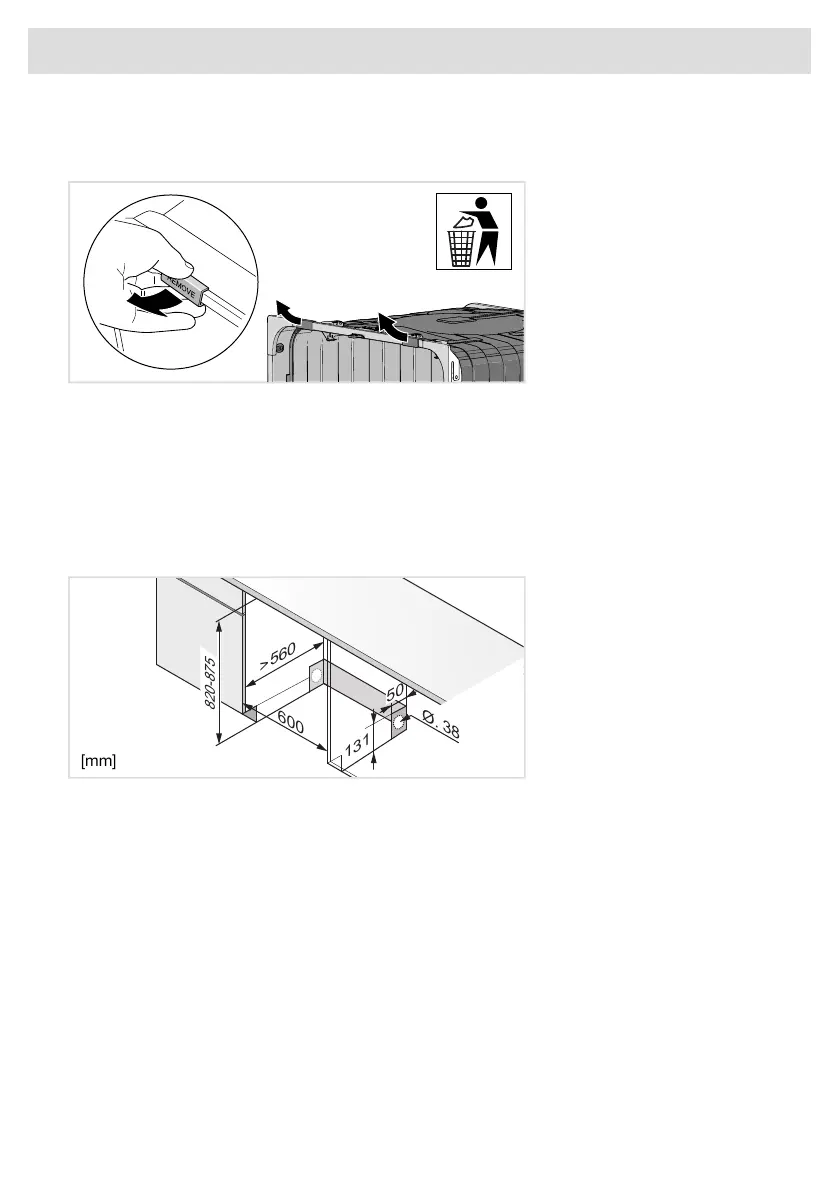
Transport protection for the door
Do not forget to remove the transport protection for the door when unpacking the dishwasher.
Placing the dishwasher
The dishwasher can be installed built-in, completely freestanding or partially built-in. Make sure the
area on which the dishwasher is to be installed is firm.
A. Built-in
The dishwasher is intended for installation under a worktop. The recess dimensions are illustrated.
Holes for wires/cables need not be larger than 38 mm in diameter. Make sure the edges of such
holes are even to prevent damage to the drainage and inlet hoses and the power cable.
Ø. 38
600
50
131
820-875
> 560
[mm]
If the dishwasher is built-in the surrounding furnishings must be resistant to any condensation from
the dishwasher.
Freestanding
A freestanding dishwasher must be fitted with anti-tip brackets. This comprises two brackets, which
are screwed into place as illustrated.
The dishwasher is then pushed in so that the brackets engage the rear feet. Now the dishwasher
will not topple if pressure is put on the open door. If the dishwasher is installed completely on its
own, side panels and a worktop must both be fitted. Accessories can be purchased where you
bought the dishwasher.
36
Installation
 Loading...