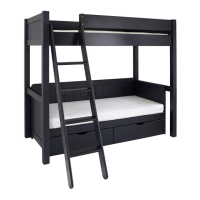
Orientation Options
Please refer to the orientation option images below to help you decide and understand
which way to construct the product.
Orientation Option A (Including Desk)
Orientation Option B (Including Desk)
If the Desk is not used, the Day Ded can also be positioned parallel to the Bed
These are the only two recommended options for orientation.
Ladder and Desk
positioned on the
Right, Day Bed
positioned on the
Left.
Ladder and Desk
positioned on the
Left, Day Bed
positioned on the
Right.
10
1
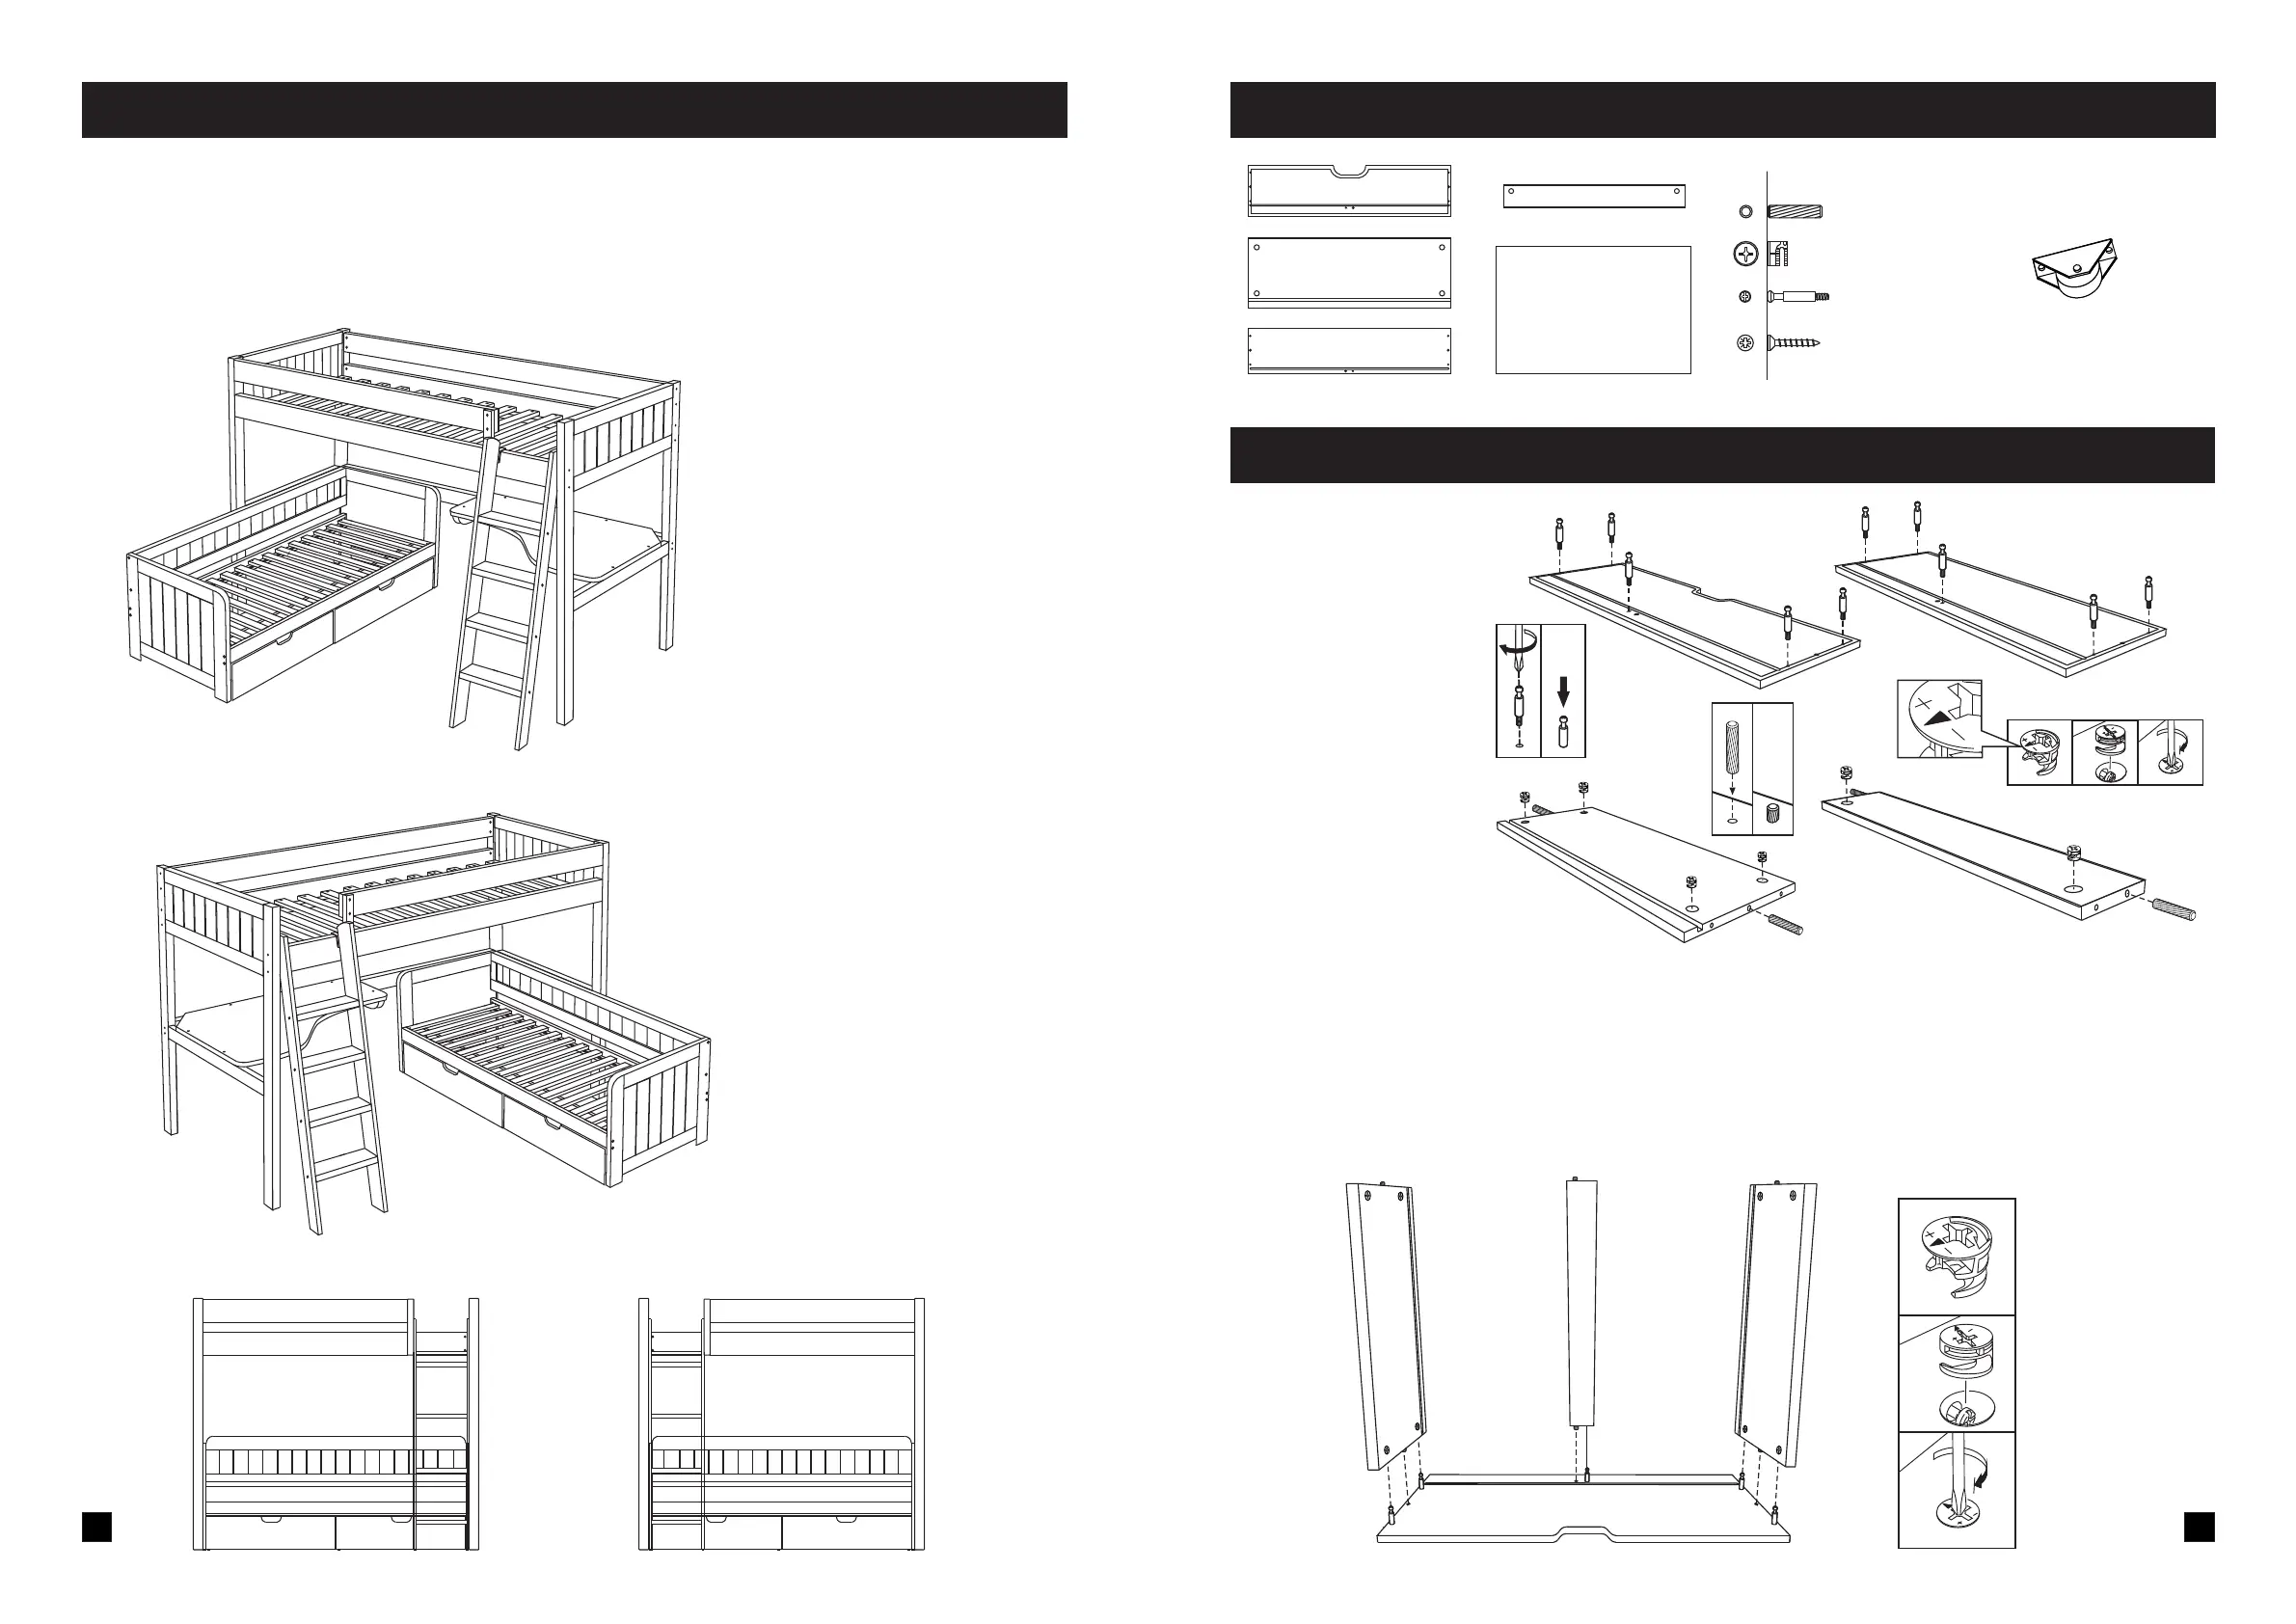
You need: 10x Cam
Pins, 6x Dowels and a
Screwdriver.
Lay the parts on a soft
level surface such as a
carpeted floor and
screw Cam Pins into
the smaller holes on
the reverse of the front
and back as shown
(A). Fit 10x Cams into
the large holes in the
Sides and Brace as
shown (B) and fit 6x
Dowels into the end
edges of both Sides
and Brace as shown
(C).
Parts Check List (Storage Drawers - Per Drawer)
10. Assemble the Storage Drawers (Per Drawer)
4x Castors
10x Cam Pins
10x Cams
6x Dowels
8x Screws
Front
Sides x2
Back
Brace
A
A
A
A
A
A
A
A
A
B
B
B
B
B
B
B
C
C
C
C
A
A
C
Carefully fit the Sides onto the front, ensuring that the grooves and the Cams are facing
inwards. Ensure that the exposed heads of the now fitted Dowels and Cam Pins fully
engage into their corresponding holes as shown. Once all is engaged and aligned, tighten
each Cam clockwise to secure the parts together.