5
6
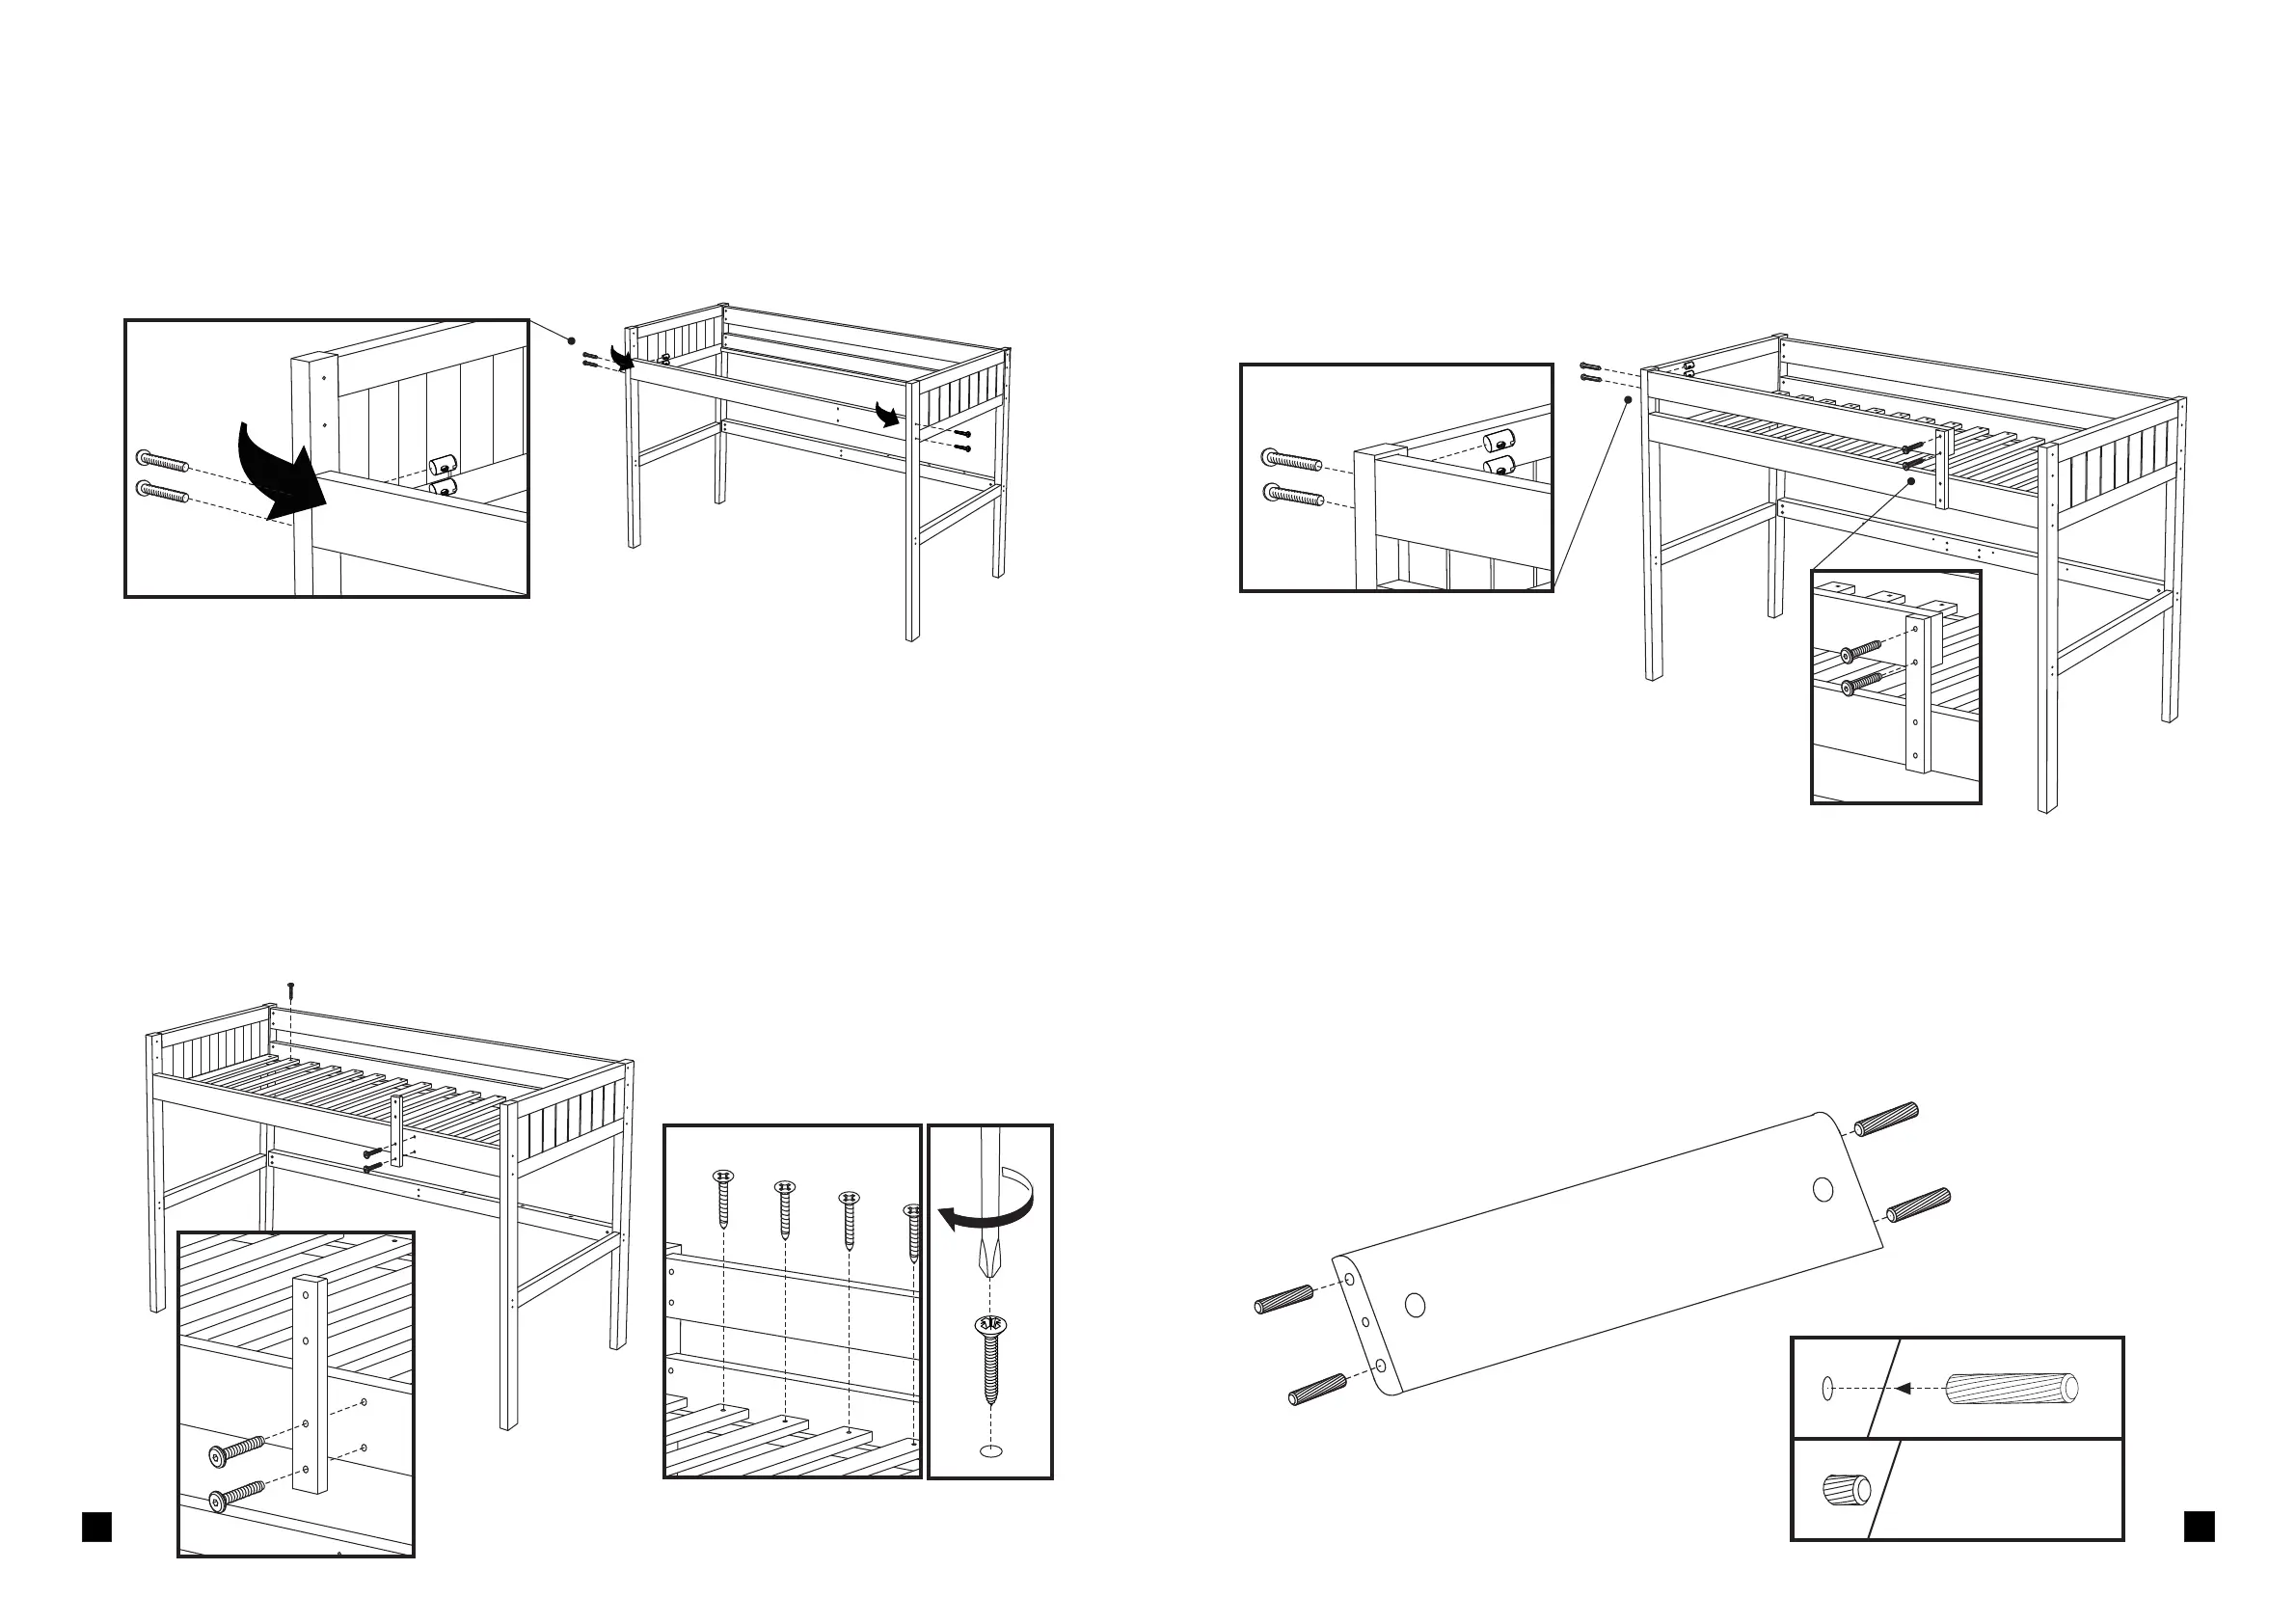
4. Attach the Front Safety Rail.
You need: 2x Bolts (50mm), 2x Bolts (110mm), 2x Barrel Nuts and an Allen Key.
Attach the Front Safety Rail to the End using 2x Bolts (110mm) and Barrel Nuts. Attach the
other End to the Safety Rail Stile using the remaining 2x Bolts (50mm), tighten all the fittings
to secure the structure.
3. Fit the Mattress Base & .
You need: 34x Screws (25mm), 2x Bolts (50mm), an Allen Key and a Screwdriver.
Attach the Safety Rail Stile
Lower the Mattress Base onto the top of the support rails. Spread the slats out evenly on the
mattress support rails, taking particular care that the end slats are placed as near to the Ends
as possible. Use the 34x screws (25mm) to fix all Mattress Base slats onto the mattress
support rails below. Some initial pressure will be required for screws to ‘bite’. Please note: the
Mattress Base must have every slat screwed down.
Attach the Safety Rail Stile to the pair of holes in the Front Mattress Rail closest to the ladder
end using 2 of the Bolts (50mm) and an Allen Key.
2. Attach The Ladder Right Mattress Rail.
You need: 4x Bolts (110mm), 4x Barrel Nuts and an Allen Key
NOTE: With a minimum of two people carefully stand the assembly upright.
Fit the Ladder Right Mattress Rail using 4x Bolts (110mm) and 4x Barrel Nuts as before.
Mattress support rail must be at the bottom of the Rail and facing inwards.
5. Prepare the Ladder Treads.
You need: 16x Dowels (30mm).
Prepare each ladder tread by carefully inserting 4x Dowels into the larger holes in the end of
each tread as shown. Ensure each Dowel is fully fitted into each hole.
All slats must be screwed down