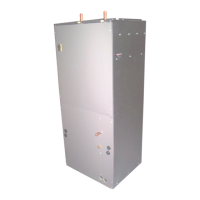
12) Insert TXV equalizer tube approximately 3/8”
into the hole and apply solder to seal.
Fig.5 shows the components of a typical TXV assembly
Using a non-bleed expansion
valve may require the use of a hard-start kit. Follow the
outdoor unit manufacturer’s guidelines.
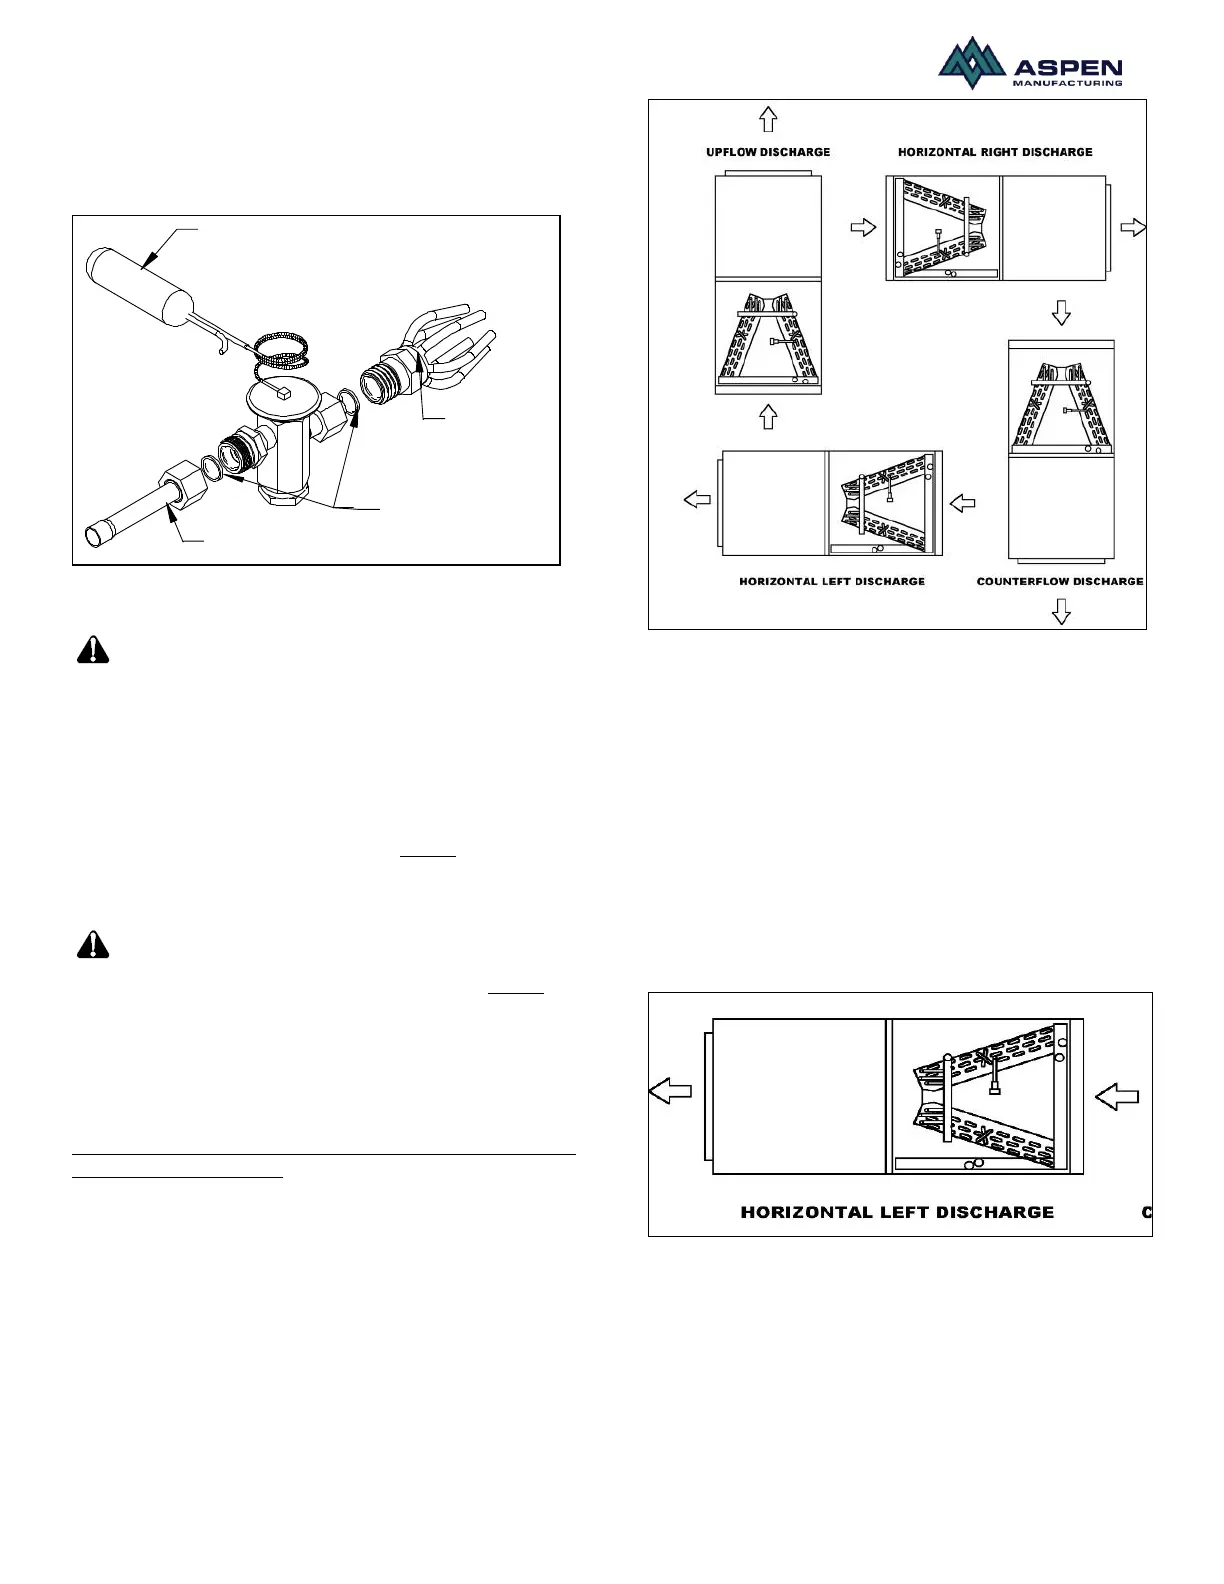
Air handler orientation
This unit can be installed in vertical or right horizontal
position without modifications. In case of a counterflow
application, the horizontal drain pan MUST be removed.
Fig. 6 shows the various orientations this air handler can
be installed in.
When the unit is used in an
horizontal orientation; an auxiliary drain pan MUST be
provided by the installer and placed under the entire unit
with a separate drain line that is properly sloped and
terminated in an area visible to the home owner. The
auxiliary pans provide extra protection to the area under
the unit should the primary and secondary drain plug up
and overflow. As expressed in our product warranty;
failure to follow this installation requirment will void
the product warranty. The drains from the auxiliary
drain pan must be installed according to the local
building codes.
Fig.6. Various airflow orientation
Horizontal Left-hand Installation
• With Air Handler in vertical position remove all
access panels.
• Remove horizontal drain pan from right hand
side. Disconnect any drain connections.
• Relocate the removed horizontal drain pan on to
the left side and reconnect the drain
connections.
• “P” traps must be installed on primary and
secondary drains of the horizontal drain pan.
• Reinstall all access panels to the unit.
Fig.7. Air flow direction in Horizontal Left application
 Loading...