Note for Concrete or Brick Walls:
If the wall is made of brick, concrete, or similar material, drill 5mm-diameter (0.2in-diameter) holes in the wall
and insert the sleeve anchors provided. Then secure the mounting plate to the wall by tightening the screws directly
into the clip anchors.
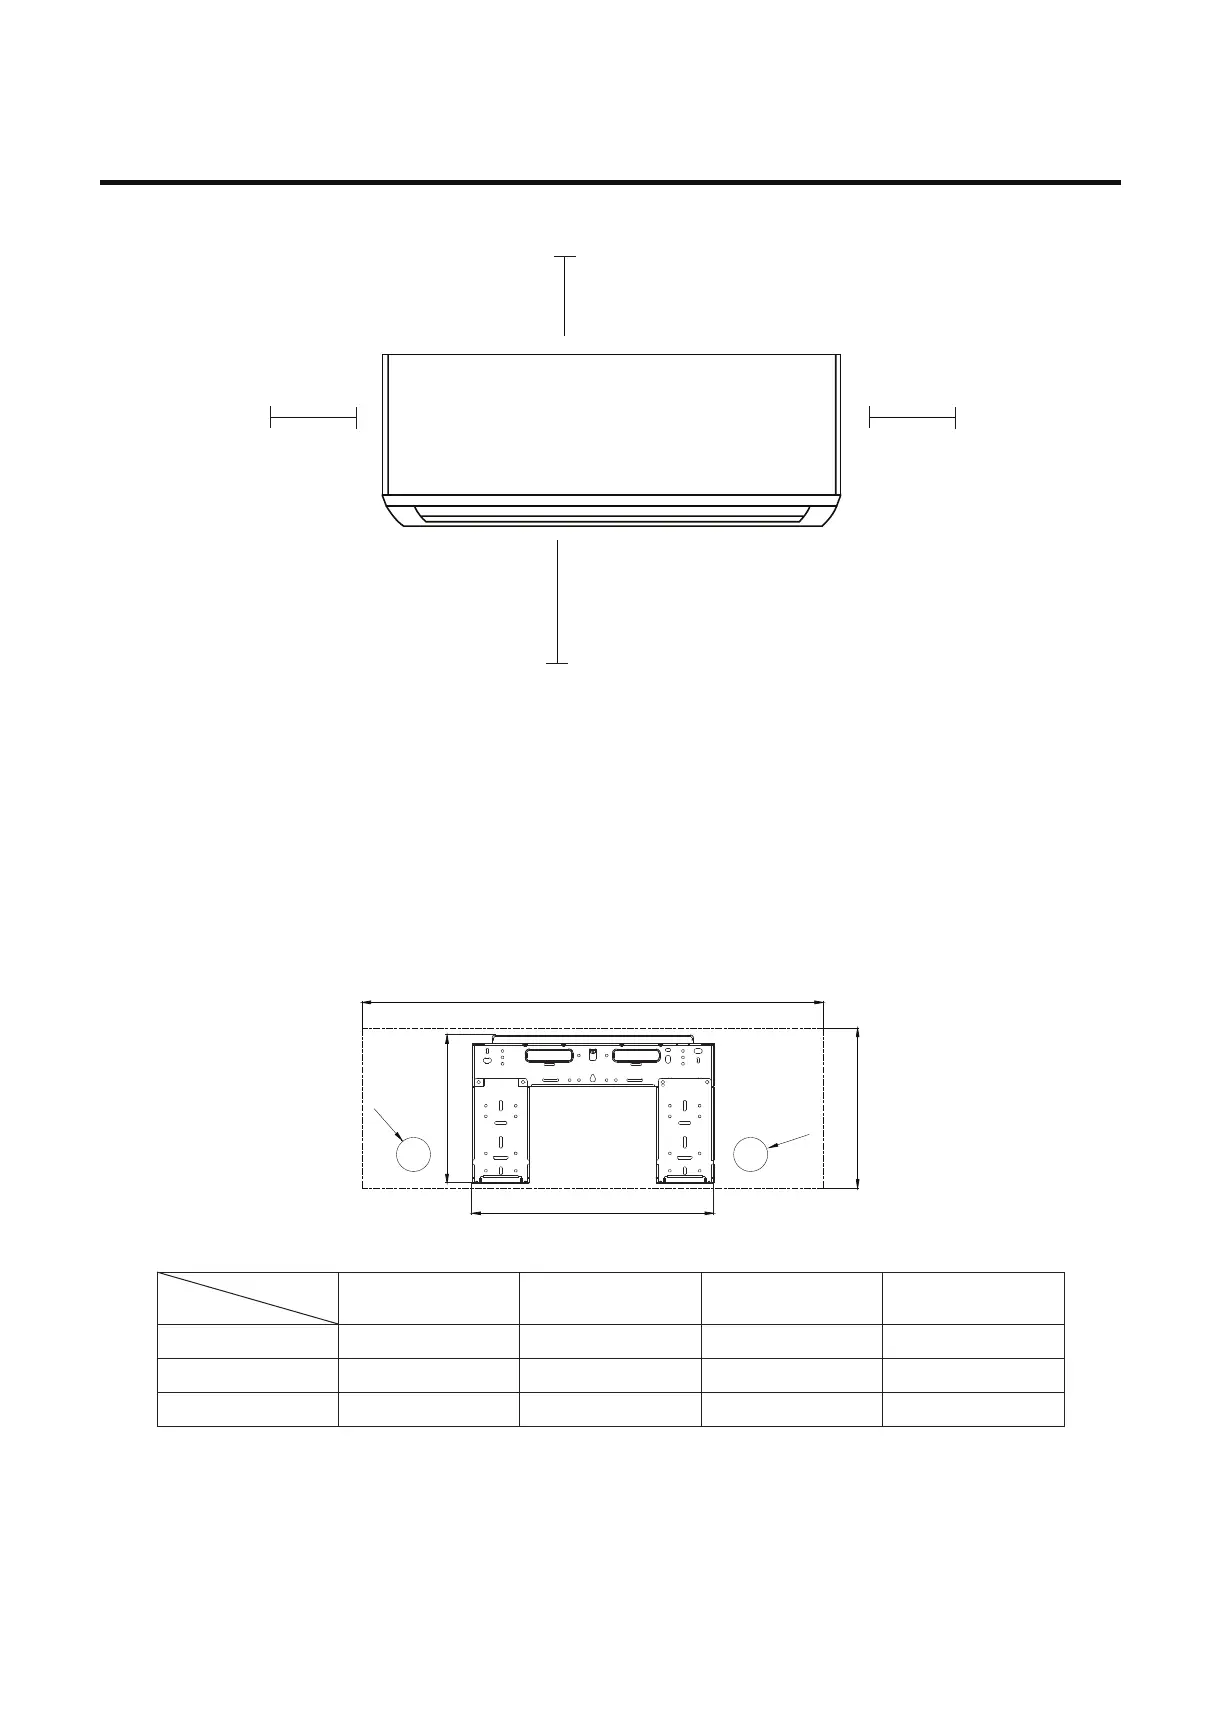
Refer to Fig4.1 to ensure proper distance from walls and ceiling:
4.1 Attach mounting plate to wall
4.2 Drill wall hole for connective piping
Fig. 4.1
12cm (4.75in) or more
2.4m (8ft) or more
12cm (4.75in) or more
15cm (5.9in) or more
4. Indoor Unit Installation
The mounting plate is the device on which you will mount the indoor unit.
1. Remove the screw that attaches the mounting plate to the back of the indoor unit.
2. Place the mounting plate against the wall in a location that meets the standards in the Select Installation
Location step. (Mounting Plate Dimensions as the following Fig.4.2)
3. Drill holes for mounting screws in places that:
1) have studs and can support the weight of the unit.
2) correspond to screw holes in the mounting
4.
Secure the mounting plate to the wall with the screws provided.
5. Make sure that mounting plate is flat against the wall.
12
Fig. 4.2
A
C
φ65
φ65
B
D
Unit: (mm)
Model(KBth/h)
tems
A B C D
09 715 298 396 272
12 865 300 453 277
18/24 972 320 619 294