2323
2323
23
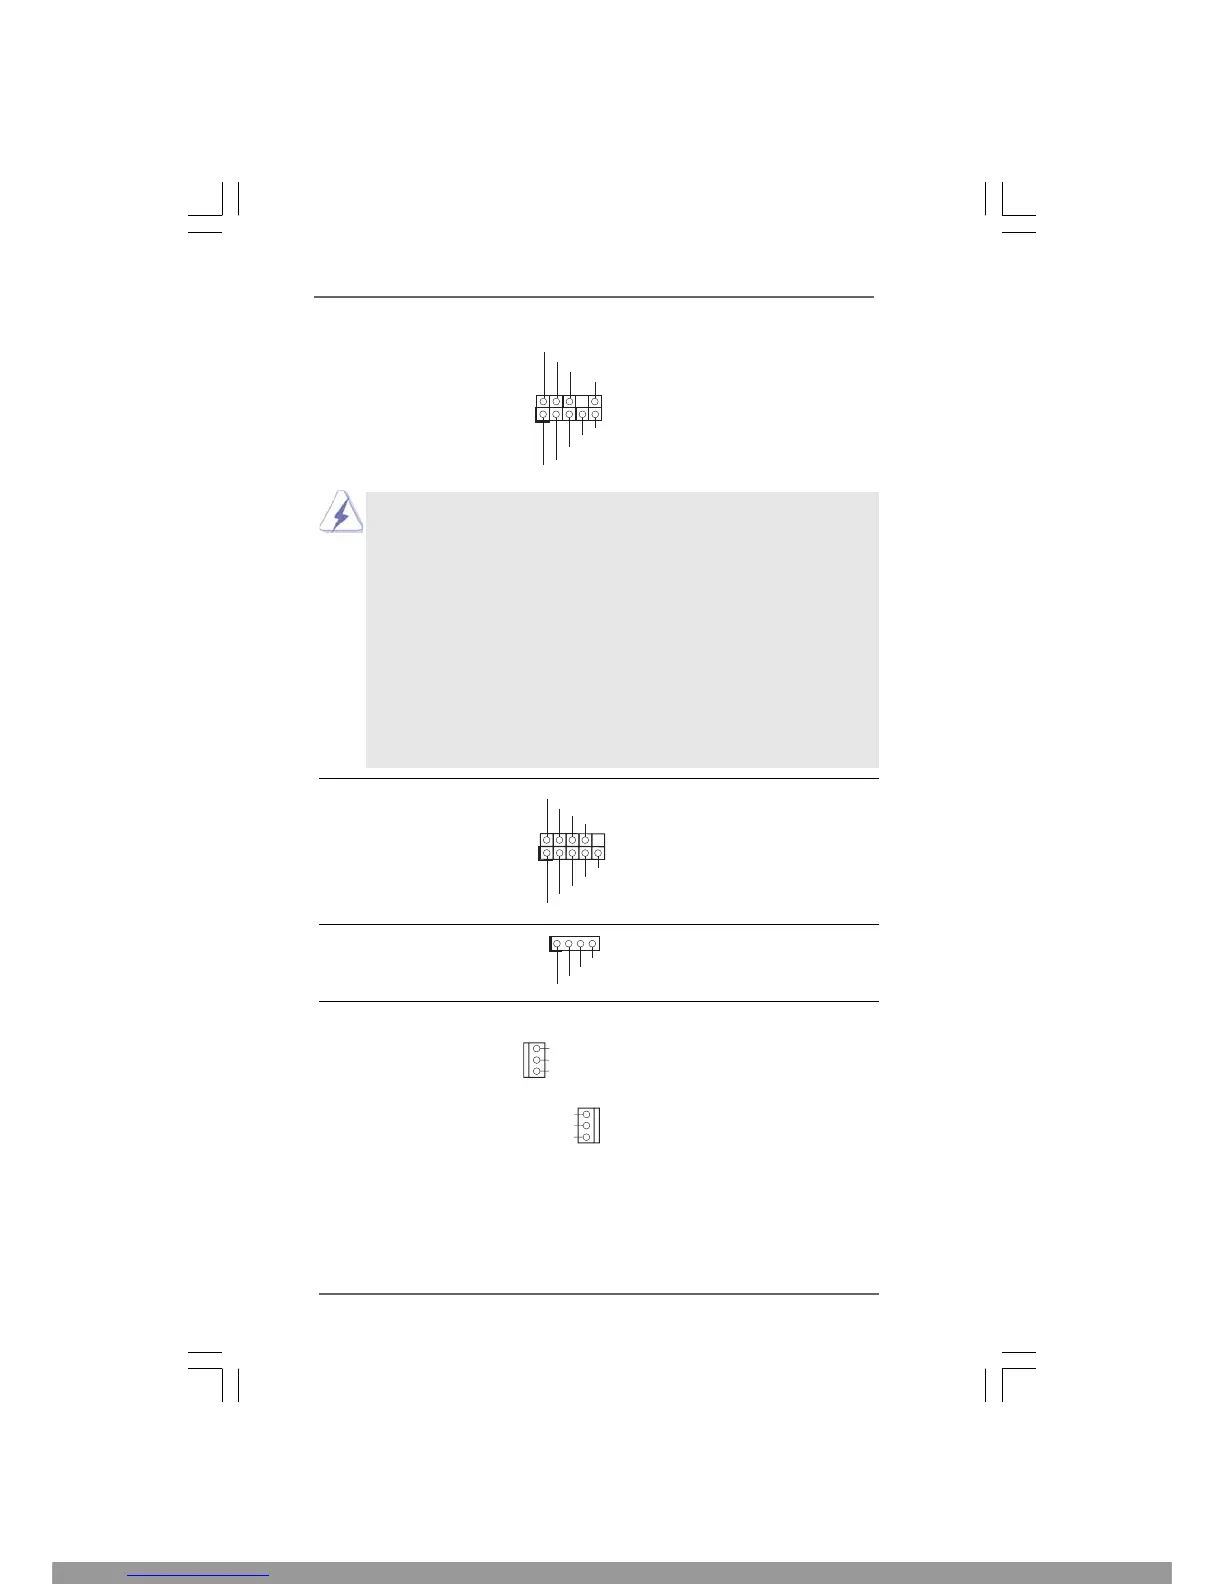
GND
PWRBTN#
PLED-
PLED+
DUMMY
RESET#
GND
HD LED+
HD LED-
1
System Panel Header This header accommodates
(9-pin PANEL1) several system front panel
(see p.10 No. 22) functions.
+5 V
DUMMY
DUMMY
SPEAKER
1
Chassis Speaker Header Please connect the chassis
(4-pin SPEAKER 1) speaker to this header.
(see p.10 No. 23)
Chassis and Power Fan Connectors Please connect the fan cables
(3-pin CHA_FAN1) to the fan connectors and
(see p.10 No. 8) match the black wire to the
ground pin.
(3-pin PWR_FAN1)
(see p.10 No. 36)
1. High Definition Audio supports Jack Sensing, but the panel wire on
the chassis must support HDA to function correctly. Please follow the
instruction in our manual and chassis manual to install your system.
2. If you use AC’97 audio panel, please install it to the front panel audio
header as below:
A. Connect Mic_IN (MIC) to MIC2_L.
B. Connect Audio_R (RIN) to OUT2_R and Audio_L (LIN) to OUT2_L.
C. Connect Ground (GND) to Ground (GND).
D. MIC_RET and OUT_RET are for HD audio panel only. You don’t
need to connect them for AC’97 audio panel.
E. Enter BIOS Setup Utility. Enter Advanced Settings, and then select
Chipset Configuration. Set the Front Panel Control option from
[Auto] to [Enabled].
GND
+12V
PWR_FAN_SPEED
GND
+12V
CHA_FAN_SPEED
J_SENSE
OU T2_L
1
MIC_RET
PR ESENCE#
GND
OU T2_R
MIC2_R
MIC2_L
OU T_RET
Front Panel Audio Header This is an interface for front
(9-pin HD_AUDIO1) panel audio cable that allows
(see p.10 No. 32) convenient connection and
control of audio devices.
This Manual: http://www.manuallib.com/file/2441065




 To Next Page