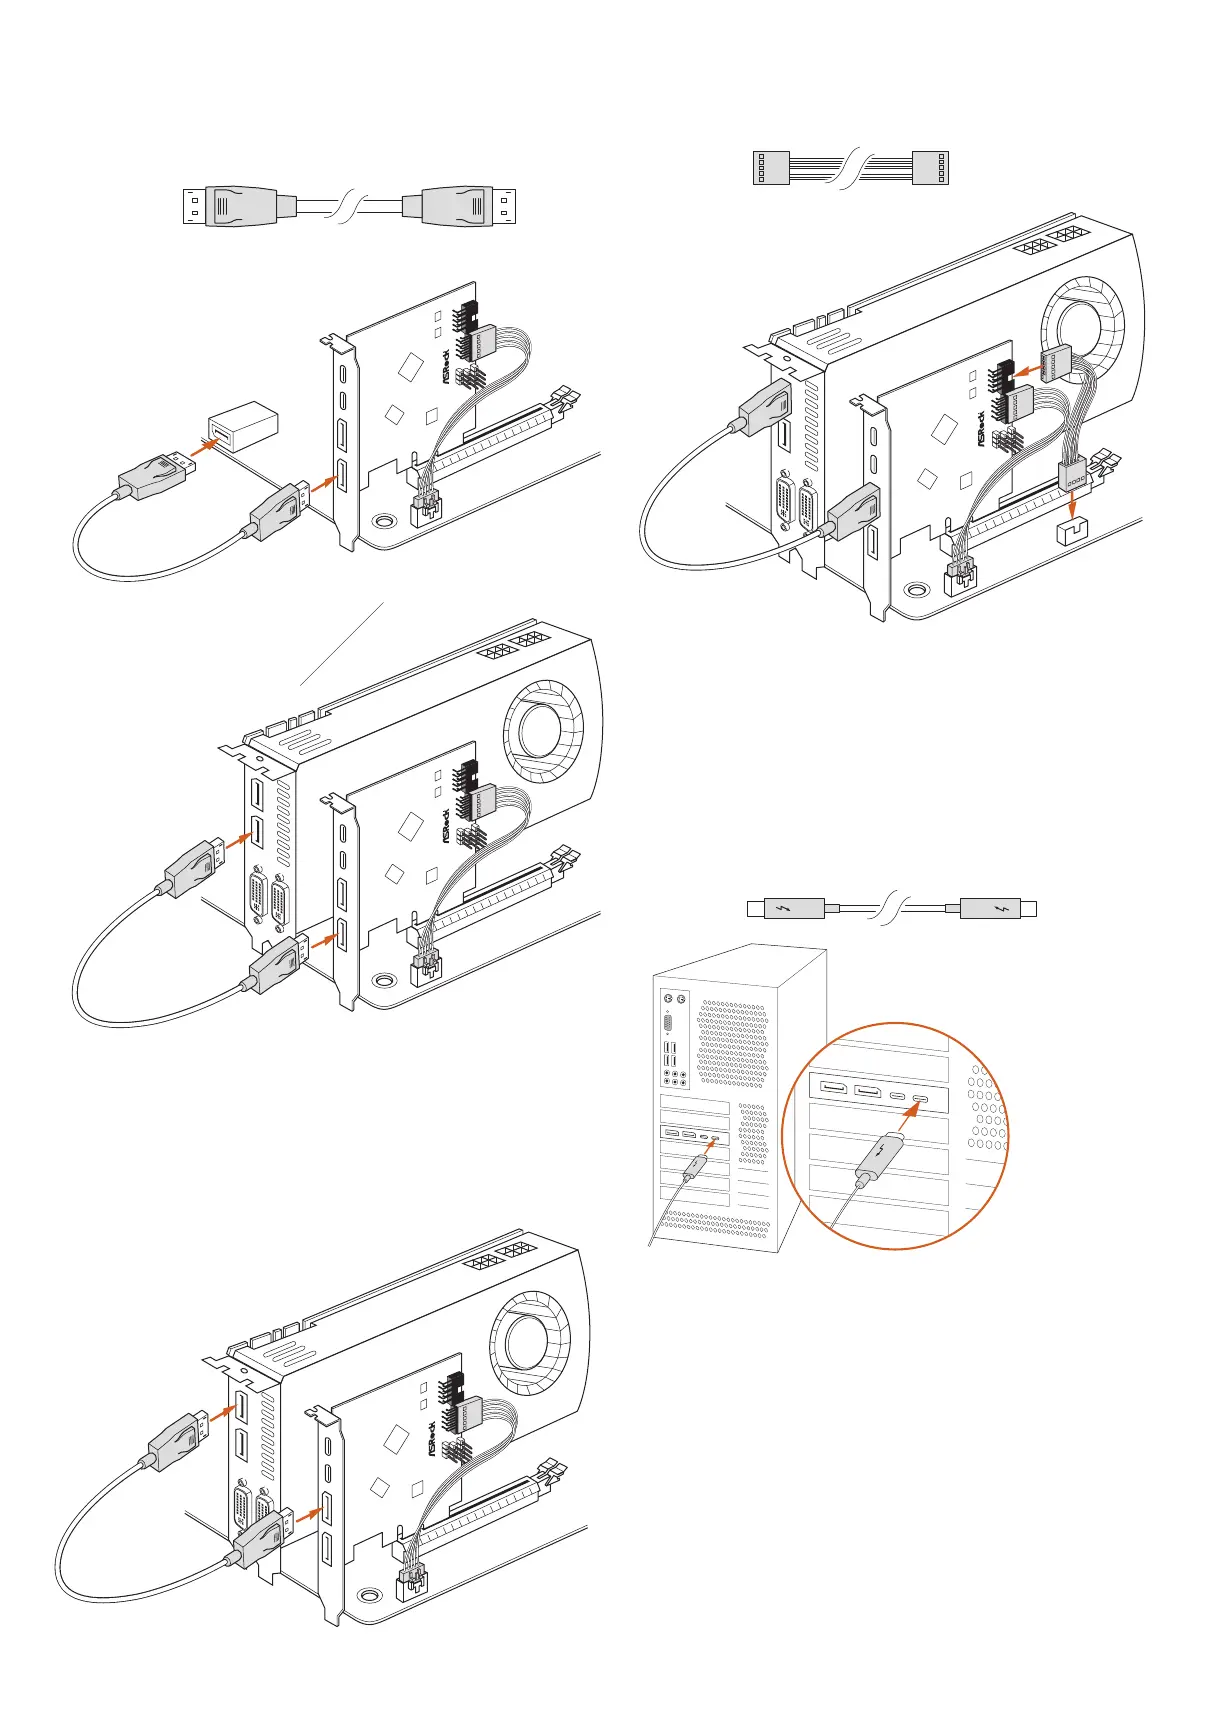
7. Connect one end of the USB 2.0 Cable to the USB 2.0 Header (A) on the
underbolt 4 AIC. en connect the other end of the cable to the USB 2.0
Header (B) on the motherboard.
8. Replace the PC cover.
9. Reconnect the power cord and any other cables that were disconnected.
en power on the PC.
2 Connecting the Thunderbolt™ Cable
Connect the underbolt
TM
cable from your underbolt-enabled device to the
underbolt
TM
4 Port on the underbolt 4 AIC.
* e underbolt
TM
cable is not included in the package.
3 Enabling the Thunderbolt™ Function
Aer hardware installation is completed, enter the BIOS Setup, go to Advanced\
Intel underbolt and then enable the Intel® underbolt™ function.
4 Installing the Thunderbolt Software in Windows
Place the Support CD into your CD-ROM drive and follow the on-screen
instructions to complete the installation.
5. Connect one end of the DisplayPort Cable to the DisplayPort IN Port (DP_1)
(A) on the underbolt 4 AIC. en connect the other end of the cable to the
DisplayPort Port (B) on the motherboard's rear I/O panel or on the graphics
card.
6. Connect one end of the DisplayPort Cable to the DisplayPort IN Port (DP_2)
(A) on the underbolt 4 AIC. en connect the other end of the cable to the
DisplayPort Port (B) on the graphics card.
*If you use a underbolt™ Type-C monitor, make sure that you install the
DisplayPort Cables into both DP_1 and DP_2 on the underbolt 4 AIC.
underbolt™ cable
DisplayPort Cable
USB 2.0 Cable
Thunderbolt 4 AIC
A
B
or
Thunderbolt 4 AIC
A
B
Thunderbolt 4 AIC
A
B
Thunderbo
lt
4 AIC
A
B

 Loading...