Copyright ©2021 Assured Wireless Corporation. All rights reserved. All information provided here is subject to change
without notice. Assured Wireless and the Assured Wireless logo are trademarks of Assured Wireless Corporation.
assured-wireless.com
aw12vehqsg211
AW12 VEHICLE INSTALLATION KIT
QUICK START GUIDE
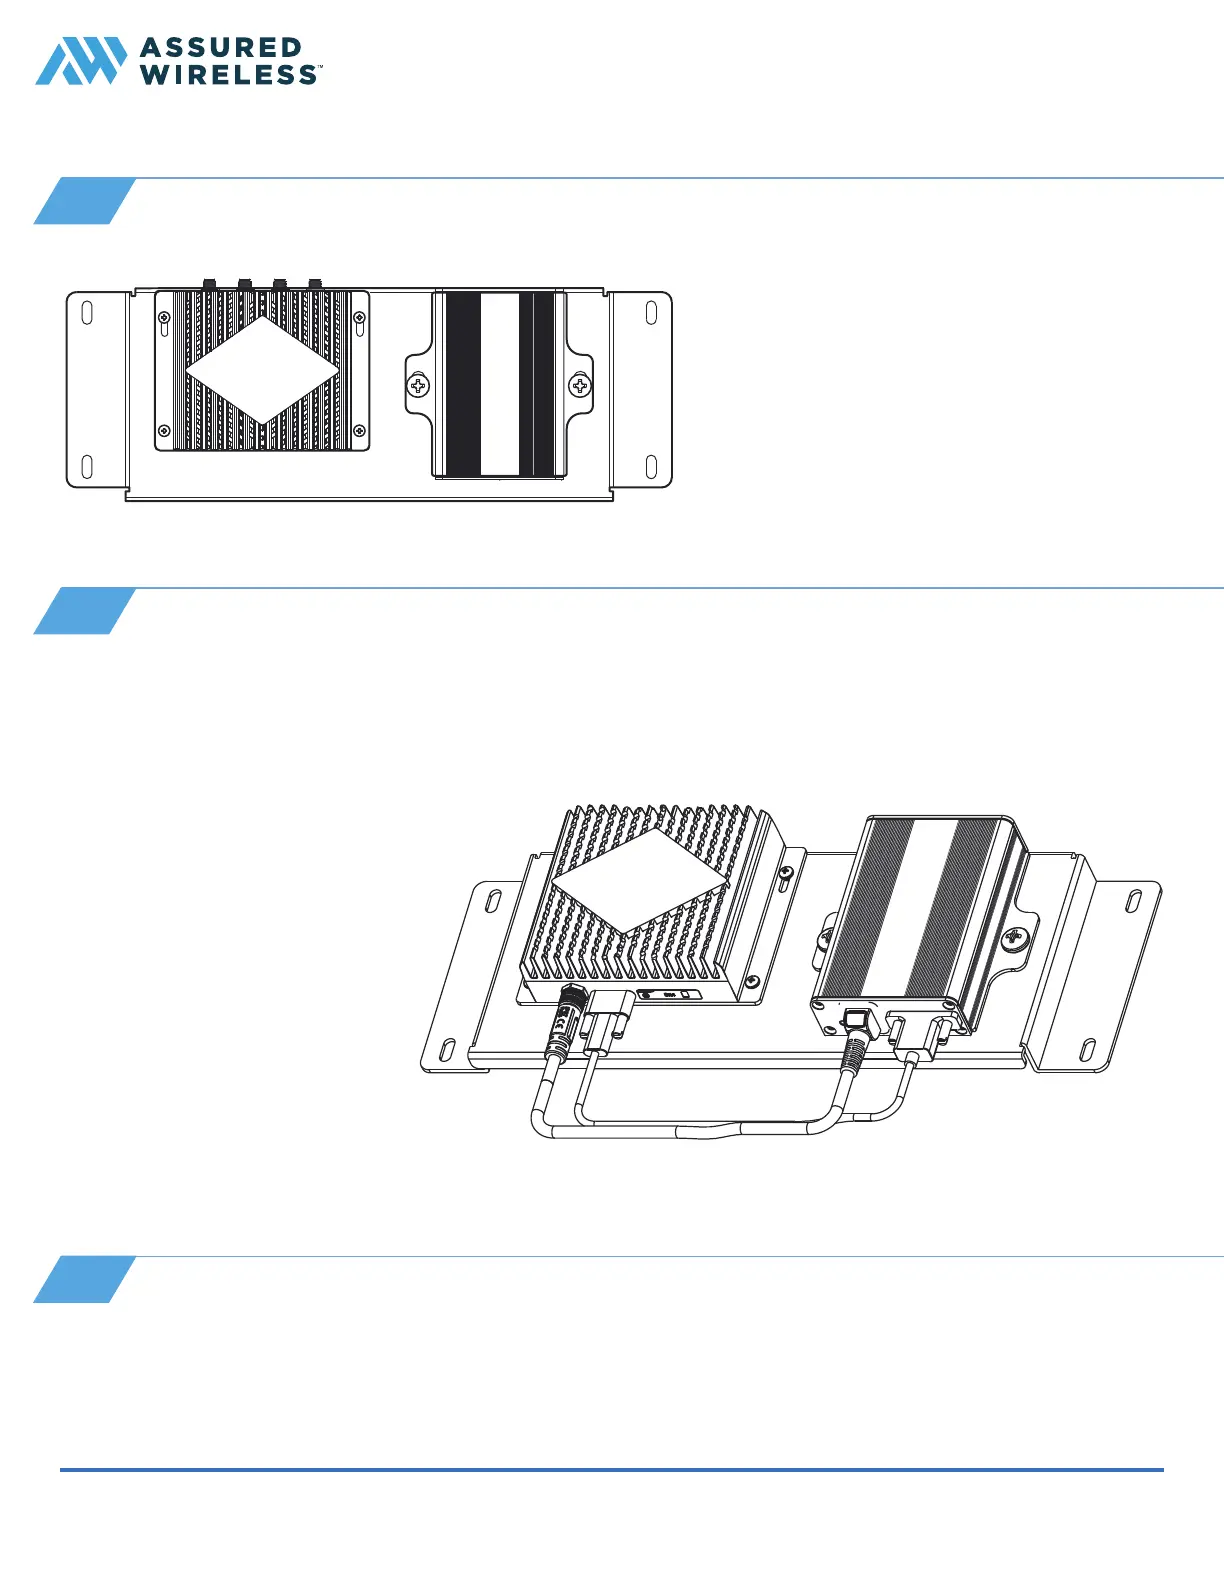
1 Use the included M6 screws and washers
and a Phillips head screwdriver to mount
the modem to the vehicle mounting
bracket. (Put the edge with the SIM door
pointing down.)
2 Use the included M3 screws and washers
to mount the USB to Ethernet converter
to the vehicle mounting bracket. (Put the
edge with the USB port pointing down.)
Connect the USB-C cable between the modem and the USB to Ethernet converter:
1 Find the end of the cable with the USB-C connector. Insert it into the jack labeled USB on the modem.
Tighten the thumb screws.
2 Insert the other end of the
cable into the jack on the USB
to Ethernet converter labeled
Modem. Tighten the thumb
screw.
Now connect the short power
cable:
1 Find the end of cable with the
RF connector. Insert it into the
jack labeled PWR IN on the
modem. Twist to tighten.
2 Insert the other end of cable
into the jack on the USB to
Ethernet converter labeled
PWR OUT.
3
Mount modem and Ethernet converter on bracket
4
Connect power and communication between modules
Install the bracket in the vehicle with the proper hardware; mount securely close to the power source. Where
and how you install the bracket will vary based on vehicle.
5
Mount bracket in vehicle