14
5. OPERATION: _______________________________________________________________________________________________
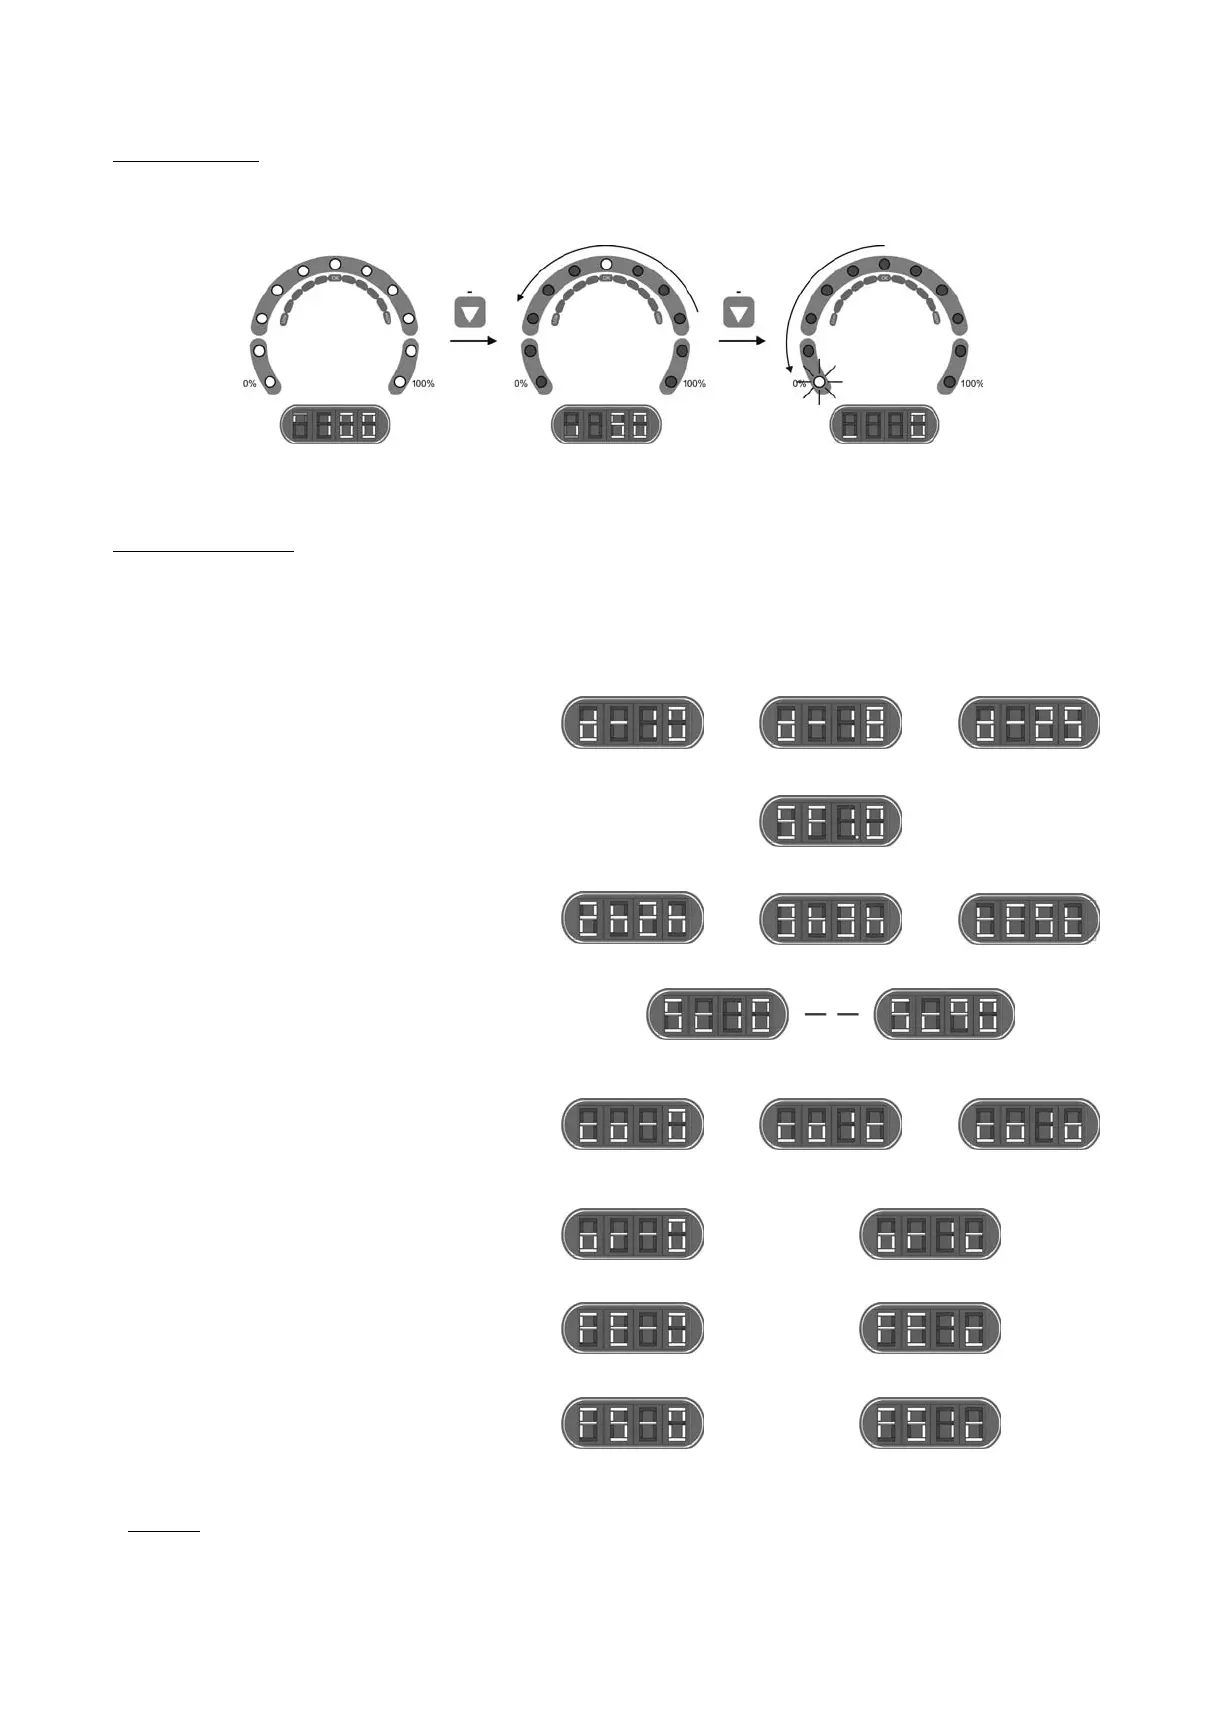
5.1. System stopped
The system enters "stand-by" MODE when the “
-” key [1] is pressed successively until the “0 %” led flashes. In this situation there is no
production in the electrolysis cell.
Fig. 19
5.2. System configuration
The AstralPool Chlore Smart+ system can be reconfigured through a menu accessed from the control panel. The system has to be switched
off, as described in point 5.1, in order to access this menu. Once the system has been switched off, press the “-” [1] key for a few seconds
until the system information screen [11] displays “CONF”. To enable selection of each menu option, keep the “SALT TEST” [9] key pressed
for approximately 1 second. Select the desired parameter using the “-” [1] / “+” [14] keys and validate by pressing the “SALT TEST” [9] key for
one second again (see Fig. 19). The configuration process enables you to establish the following operative parameters:
MODEL
Smart+ 60
Smart+ 100
Smart+ 160
SOFTWARE VERSION
Shows software version (two digits)
POLARITY SWITCH
Switch each 2 hours
(2)
Switch each 3 hours
Switch each 2 minutes
(1)
OUTPUT LEVEL CONTROL WHEN CLOSED COVER
(2)
System may be configured to provide an output to cell in the range 10 ... 90% of its nominal
capacity when the pool cover is closed.
COVER CONTROL INPUT ACTIVATION
Deactivated
(2)
Activated input when closed
contact
Activated input when open
contact
ORP/RESIDUAL CHLORINE CONTROL INPUT
ACTIVATION
Deactivated
(2)
Activated electrolysis system when closed contact
GAS DETECTOR ACTIVACION
Deactivated
Activated electrolysis system when submerged detector
(2)
EXTERNAL FLOW DETECTOR
(FLOW SWITCH)
ACTIVATION
Deactivated
Activated electrolysis system when closed contact
(2)
(1)
WARNING: only use this mode for check tasks, for short periods of time, as it could damage the electrodes.
(2)
Factory defaults.
Fig. 20