Do you have a question about the Astralpool Viron Connect 10 and is the answer not in the manual?
| Category | Lighting Equipment |
|---|---|
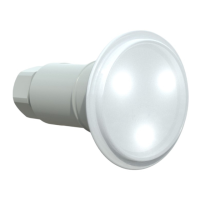
| Product Name | Astralpool Viron Connect 10 |
| Power | 10W |
| Light Source | LED |
| Beam Angle | 120° |
| IP Rating | IP68 |
| Control | Connect |
| Compatibility | Viron Connect |
| Voltage | 12V |
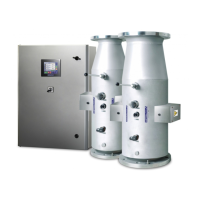
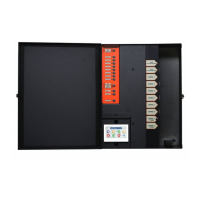
Lists the Viron Connect 10 Pool and Spa Controller equipment centre and optional components.
Describes the ability to control appliances, service mode, and favorite programs.
Explains how to select and operate pool/spa equipment, including heaters.
Details how to select and control lighting zones and colors.
Describes how to set and adjust pool and spa water temperatures.
Explains how to operate solar heating, including settings and modes.
How to activate preset favorite settings for quick system operation.
Procedure to set the current time on the Viron Connect touchscreen.
Guide for programming start and stop times for equipment operation.
How to program custom "One Touch" favorite settings for system operation.
Details on installing the electrical control box, location, and mounting.
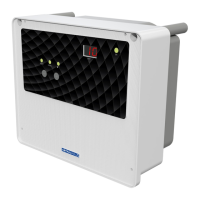
Instructions for mounting the touchscreen controller indoors.
Explains how to connect appliances to the 10A and 15A GPO outlets.
Details connecting appliances via RJ12 cabling and valve actuators.
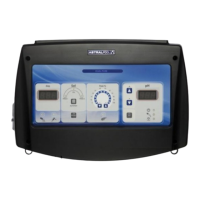
Comprehensive guide for configuring the Viron Connect controller via the touchscreen interface.
Instructions for installing and configuring the wireless link system.
Details on programming the 8-output RF remote control for various functions.
Steps to install and operate an external (non-Genus) heater via the touchscreen.
Guides for installing the touchscreen on plasterboard or solid walls.
How to connect and set up custom switching via external sources.
How to operate equipment from the service panel and manage modes.
Lists optional accessories like wireless transceivers, RF remotes, and sensor kits.
Troubleshooting steps for equipment not activating as per the time clock.
Solutions for when the touchscreen has no power.
Steps to resolve issues when the touchscreen is unresponsive.
Troubleshooting steps for issues with the wireless link.
Space to record equipment plugged into each channel for setup.
Procedures for making a warranty claim, including required documentation.
Details warranty exclusions, including improper installation and normal wear.
States AstralPool's liability limits and express warranties.
Guide to installing the Internet Gateway hardware and connecting to WiFi/Router.
Steps for registering the pool owner and authorizing other users via connectmypool.com.
Instructions for downloading and installing the connectmypool app on mobile devices.
Steps to confirm connectivity, troubleshoot errors, and understand status lights.
Explains the meaning of the Alive, Connected, WiFi, and Ethernet status lights.