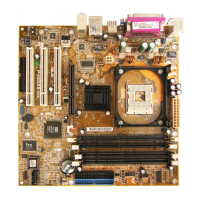
ASUS P4S533-MX motherboard user guide
1-11
1.8.2 Installing the CPU
Follow these steps to install a CPU.
1. Locate the 478-pin ZIF socket on the motherboard.
2. Unlock the socket by pressing the
lever sideways, then lift it up to a 90°-
100° angle.
3. Position the CPU above the socket
such that its marked corner matches
the base of the socket lever.
4. Carefully insert the CPU into the
socket until it fits in place.
5. When the CPU is in place, push
down the socket lever to secure the
CPU. The lever clicks on the side tab
to indicate that it is locked.
Socket Lever
90 -10
Gold Mark
6. Install a CPU heatsink and fan
following the instructions that came
with the heatsink package.
7. Connect the CPU fan cable to the
CPU_FAN1 connector on the
motherboard.
The CPU fits only in one correct orientation. DO NOT force the CPU into the
socket to prevent bending the pins and damaging the CPU!
Make sure that the socket lever is lifted
up to 90°-100° angle, otherwise the
CPU does not fit in completely.

 Loading...