87
3. Set a static IP on your computer and use the following to set up
your TCP/IP settings:
IP address: 192.168.1.x
Subnet mask: 255.255.255.0
4. From your computer’s desktop, click
Start > All Programs > ASUS Utility RT-AC1900P Wireless
Router > Firmware Restoration.
5. Specify a firmware file, then click Upload.
NOTE: This is not a firmware upgrade utility and cannot be used on
a working ASUS Wireless Router. Normal firmware upgrades must be
done through the web interface. Refer to Chapter 4: Configuring the
Advanced Settings for more details.
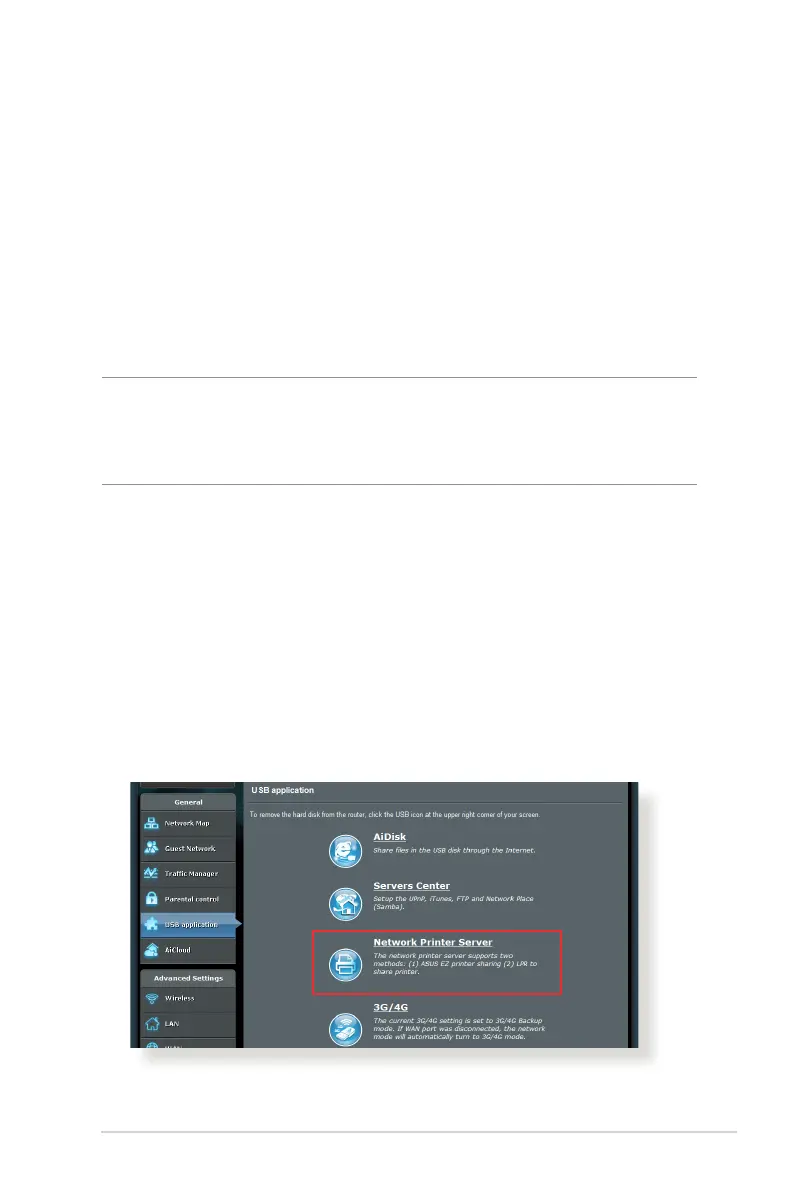
5.3 Setting up your printer server
5.3.1 ASUS EZ Printer Sharing
ASUS EZ Printing Sharing utility allows you to connect a USB
printer to your wireless router’s USB port and set up the print
server. This allows your network clients to print and scan files
wirelessly.