This document is a user guide for the ASUS MQ13AH ZenScreen™ OLED portable USB monitor. It provides comprehensive information on the monitor's features, setup, and troubleshooting.
Function Description
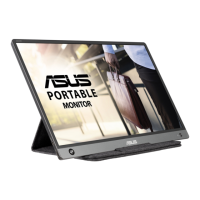
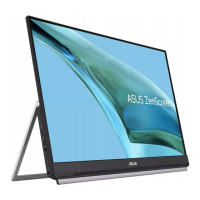
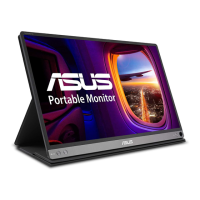
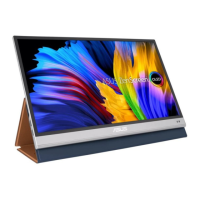
The ASUS MQ13AH ZenScreen™ OLED is a portable USB monitor designed to enhance daily viewing experiences with great portability and simplicity. It can be connected to a system via USB Type-C or Mini HDMI, offering flexibility in input sources. The monitor features an On-Screen Display (OSD) menu for configuring various settings, including image quality, color modes, and system preferences. It also incorporates ASUS-exclusive technologies like Splendid™ Video Intelligence Technology and VividPixel for optimized visual performance.
Usage Features
Monitor Introduction and Controls:
The monitor features a Power button/Power LED, Menu button, Close button, and an Input Select/Shortcut button. The Power LED indicates the monitor's status (ON, Standby, or OFF). The Menu button is used to access the OSD menu, while the Close button exits it. The Input Select button, by default, switches input sources but can be customized to a frequently used function via the "Shortcut" setting in the OSD. It also serves as a Key Lock shortcut, which can be enabled/disabled by pressing and holding it for 5 seconds. The monitor includes two USB Type-C ports (one for charging only), a Mini HDMI port, and a proximity sensor.
Standing Positions:
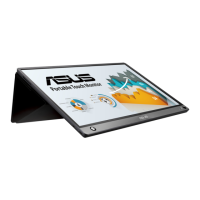
The ASUS MQ13AH can be positioned in various orientations using its smart cover, allowing for flexible viewing angles and setups.
Connecting to a System:
The monitor can be connected to a system using a USB Type-C cable (with DP signal output) or a Mini HDMI cable. If the PC's USB Type-C power output is too low, an external 18W adapter can be used to ensure sufficient power. When the monitor is powered solely by the PC/NB and detects low power, its brightness may be fixed at a certain level (up to 50 or 80, depending on input power) to prevent sudden shutdowns. Plugging in the monitor adapter allows for maximum brightness adjustment.
Announcements and Safety:
The smart cover contains magnets, which could potentially damage computer hard drives or other magnet-sensitive objects. Users are advised not to stack the monitor with a computer when the computer is in use (power on or standby mode) to avoid data loss or activation of the computer's auto-protection mechanism. When transporting the monitor and computer together in a bag, the computer should be powered off to prevent hard drive damage.
OSD (On-Screen Display) Menu:
The OSD menu allows users to reconfigure monitor settings.
- Activating the OSD: Press the MENU button.
- Navigating the Menu: Use the Up/Down buttons to toggle between options.
- Selecting Items: Press the Check button to select a highlighted item.
- Adjusting Parameters: Use the Up/Down buttons to select desired parameters.
- Making Changes: Press the Check button to enter a slide bar, then use Up/Down buttons to adjust values.
- Exiting Menus: Select the Return button to go back to the previous menu or accept changes and return.
OSD Function Introduction:
-
Splendid: Offers eight sub-functions for different viewing preferences:
- Standard Mode: Best for document editing. Saturation, SkinTone, Sharpness, and ASCR are not user-configurable.
- sRGB Mode: Best for viewing photos and graphics from PCs. Saturation, Color Temp., SkinTone, Sharpness, Contrast, and ASCR are not user-configurable.
- Scenery Mode: Best for scenery photo display.
- Theater Mode: Best for movie watching.
- Game Mode: Best for game playing.
- Night View Mode: Best for dark-scene games or movies.
- Reading Mode: Best for book reading. Saturation, SkinTone, Sharpness, ASCR, contrast, and Color Temp functions are not user-configurable.
- Darkroom Mode: Best for weak ambient light environments.
-
Blue Light Filter: Adjusts the energy level of blue light emitted from the LED backlight. Levels range from Min (no changes) to Max (higher level, less blue light scattered). When activated, default Standard Mode settings are imported. Maximum level is optimized and TUV low blue light certified. Brightness is not user-configurable at maximum level.
-
Color: Allows selection of image color preferences:
- Brightness: Adjustable from 0 to 100. Not adjustable when HDR is enabled.
- Contrast: Adjustable from 0 to 100.
- Saturation: Adjustable from 0 to 100.
- Color Temp.: Three preset modes (Cool, Normal, Warm) and a User Mode. In User Mode, R, G, and B colors are user-configurable from 0 to 100.
- Skin Tone: Three color modes (Reddish, Natural, Yellowish).
- Note: If the monitor detects low power from a Type-C input device, brightness may be fixed. Plugging in the adapter restores full brightness adjustment.
-
Image: Adjusts image sharpness, aspect control, VividPixel, ASCR, and HDR:
- Sharpness: Adjustable from 0 to 100.
- Aspect Control: Adjusts aspect ratio to "Full" or "4:3". (4:3 is only available for 4:3 input sources).
- VividPixel: ASUS Exclusive Technology for lifelike visuals, adjustable from 0 to 100.
- ASCR: Enables/disables dynamic contrast ratio.
- HDR: High Dynamic Range, with ASUS Cinema HDR and ASUS Gaming HDR modes (available when HDR is enabled). When HDR content is displayed, Splendid, Blue Light Filter, Gamma, and Color functions are unavailable.
-
Input Select: Selects the input source from HDMI, Type-C 1, or Type-C 2.
-
System Setup: Adjusts system configuration:
- Splendid Demo Mode: Activates a demo mode for the Splendid function.
- Auto Rotation: Enables/disables automatic image rotation (requires DisplayWidget software on Windows OS).
- OLED Setup: Special settings for OLED characteristics, including screen protection (pixel shifting) to prevent burn-in. It is recommended to keep this on.
- GamePlus: Provides gaming tools like Crosshair, Timer, and Display Alignment.
- Activating GamePlus: Select ON, then use Up/Down to choose a function (Crosshair, Timer, Display Alignment). Press Check to confirm, or X to exit.
- QuickFit: Offers Grid patterns (Alignment Grid 1, Alignment Grid 2) for content organization and Photo sizes (4x6, 3x5) for accurate photo viewing/editing. Auto rotation for Alignment Grid 1 works with DisplayWidget software on Windows OS.
- OSD Setup: Adjusts OSD Timeout, DDC/CI, and Transparency.
- Language: Selects OSD language from a wide range of options.
- Key Lock: Disables all key functions (can be disabled by pressing the menu button for more than five seconds).
- Information: Displays monitor information.
- Power Indicator: Turns the power LED indicator on/off.
- Proximity Sensor: Prompts the monitor to switch to power-saving mode when the user is away for over a minute and resumes normal operation upon return. Optimized for distances within 50cm. Avoid obstacles in front of the sensor. Sensitivity may be affected by ambient light, clothing color, and monitor angle.
- Power Key Lock: Disables/enables the power key.
- All Reset: Reverts all settings to factory default.
-
MyFavorite: Allows users to adjust Shortcut and Customized Setting:
- Shortcut: Users can select "Blue Light Filter," "Splendid," "Brightness," "Contrast," "Auto Rotation," or "Input select" as a shortcut key. Default is Input select.
- Customized Setting: Allows users to save their preferred settings.
Maintenance Features
Care & Cleaning:
- Cleaning: Turn off and unplug the monitor. Clean the surface with a lint-free, non-abrasive cloth. Stubborn stains can be removed with a cloth dampened with mild cleaner.
- Avoid: Cleaners containing alcohol or acetone. Do not spray cleaner directly on the screen to prevent electric shock.
- Normal Symptoms: Slight uneven brightness may occur depending on the desktop pattern. Afterimages may remain if the same image is displayed for hours, but the screen will recover slowly or by turning off the Power Switch for hours. If the screen becomes black, flashes, or stops working, contact a service center; do not attempt repairs yourself.
Troubleshooting (FAQ):
The guide provides solutions for common issues:
- Power LED not ON: Check if the monitor is in ON mode and if the USB Type-C cable is properly connected.
- Power LED amber, no screen image: Check ON mode, USB Type-C cable connection, inspect signal cable pins, and test with another monitor.
- Screen image too light/dark: Adjust Brightness settings.
- Screen image bounces/wave pattern: Ensure proper USB Type-C cable connection and move electrical devices causing interference.
- Screen image color defects: Inspect USB Type-C cable pins.
- HDR content not played properly: Ensure input source supports HDR playback (with proper system settings and latest software) and that the content is HDR encoded.
- Power LED blinking/showing ASUS logo repeatedly: This indicates insufficient power from the source USB Type-C device. The guide provides a detailed "safe mode" procedure to identify the maximum brightness value supported by the source device and adjust settings accordingly.
Takeback Services:
ASUS offers recycling and takeback programs for products, batteries, and packaging materials. Details can be found on the ASUS CSR website.
Safety Information:
- Read all documentation before setup.
- Do not expose to rain or moisture.
- Do not open the cabinet.
- Ensure all cables are correctly connected and undamaged.
- Avoid dust, humidity, and temperature extremes; place on a stable surface.
- Do not push objects or spill liquid into slots.
- Contact a qualified technician for technical problems.
- Powered by USB port compliant with LPS and SELV circuit (IEC60950-1:2005).
Restriction on Hazardous Substances (India):
The product complies with the "India E-Waste (Management) Rules, 2016," prohibiting the use of certain hazardous substances above specified concentrations, with listed exemptions.