Transport controls are located in the HyperDecks palette in ATEM Software Control, or in the
system control menu on an ATEM advanced panel, which lets you play back video, jog and
shuttle, skip clips, pause and more. You can also record video.
When you combine this feature with ATEM’s powerful macros feature, it opens up a world of
creative possibilities that can really enhance your live production!
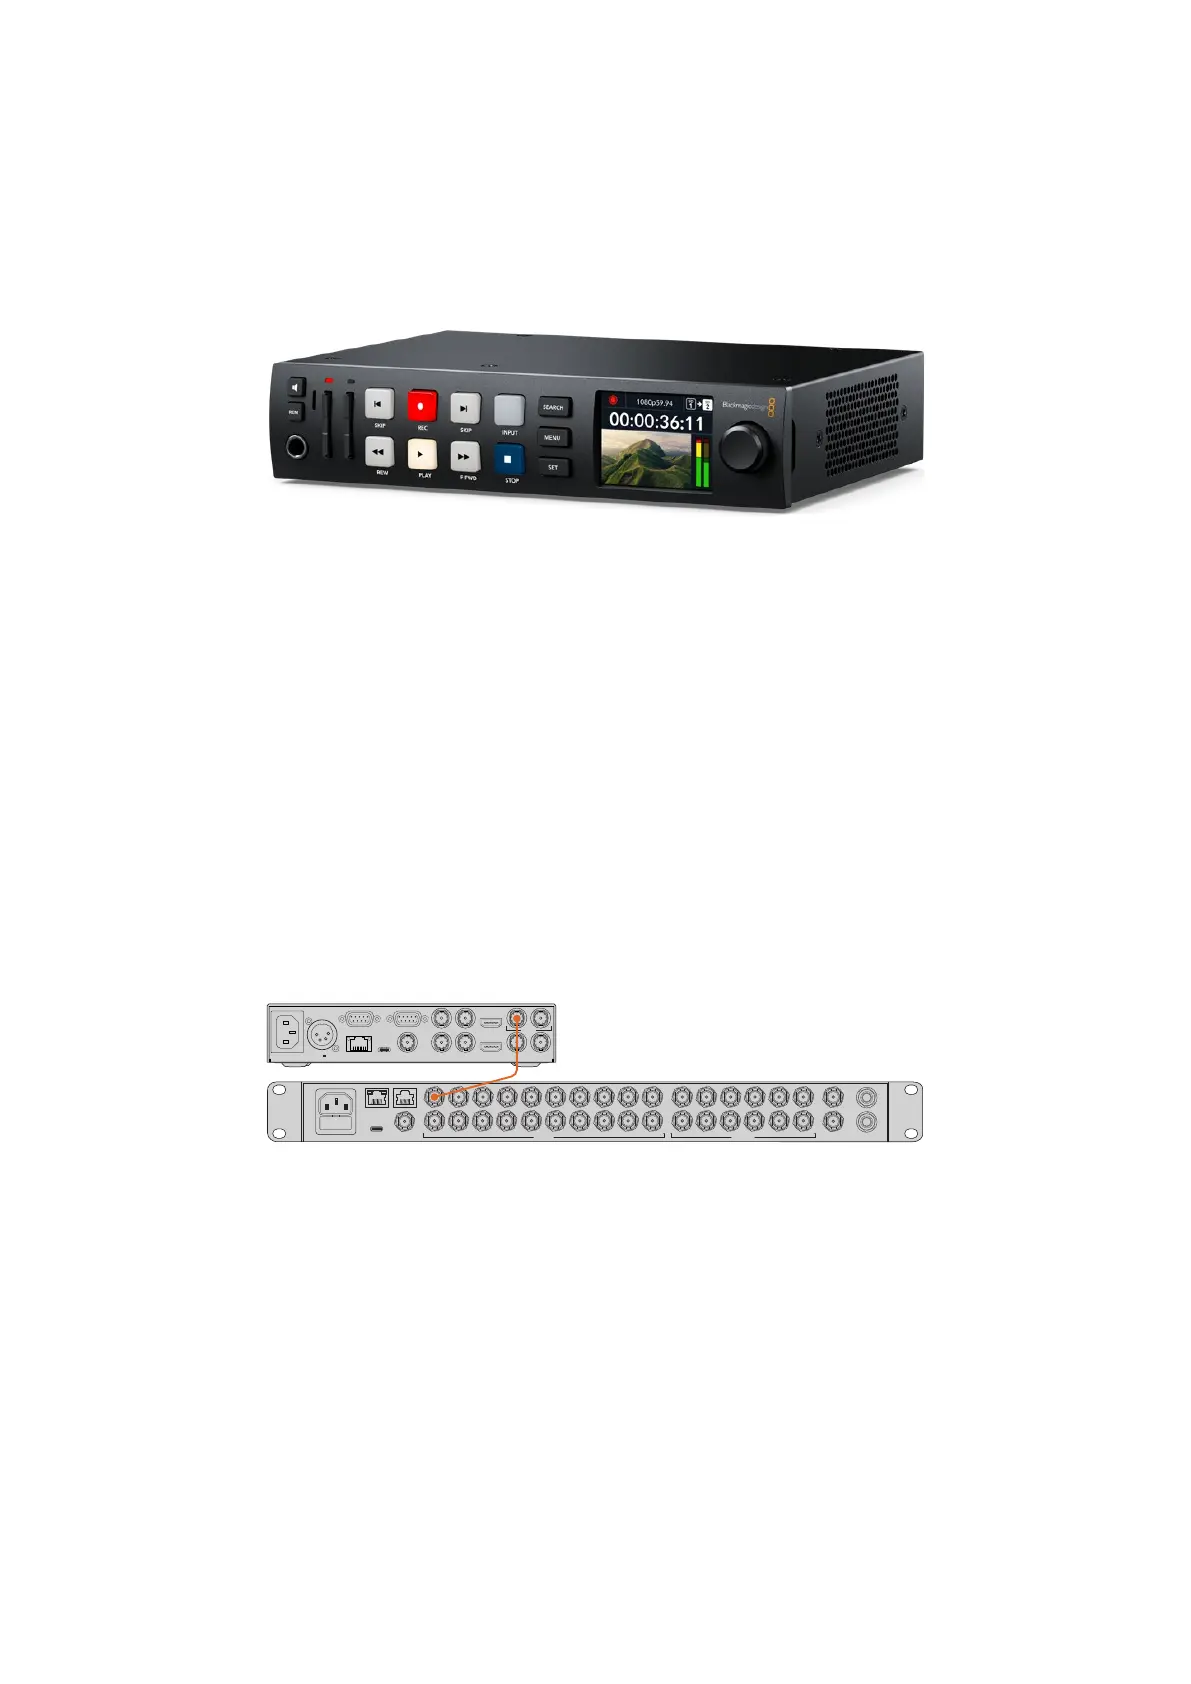
HyperDeck Studio HD Plus
Connecting HyperDecks
Connecting Blackmagic HyperDecks to your switcher is very similar to connecting cameras and
other video sources via your switcher’s SDI inputs. The only additional connection is Ethernet
which lets your ATEM switcher communicate with the HyperDeck disk recorder.
1 Using the Ethernet connector, connect your HyperDeck disk recorder to the same network
your ATEM switcher is connected to.
2 Press the remote button marked ‘REM’ on the HyperDeck’s control panel. The ‘REM’ button
will illuminate which means the HyperDeck has remote control enabled. If you are using a
HyperDeck Studio HD Mini, turn remote on via the settings tab on the LCD menu.
3 Plug the SDI output of your HyperDeck into the SDI inputs of your ATEM switcher.
4 If you want to record your ATEM switcher’s program output with your HyperDeck, plugone
of the switcher’s SDI outputs into the SDI input of your HyperDeck.
5 Repeat the process for each HyperDeck you want to connect.
CONTROL TALKBACK
REF INUSB-C
1 3 5 7 9
2 4 6 8 10
11 13 15
12
1 3 5 7 9
2 4 6 8 10
11 1
12 214 16
17 19
18 20
ANALOG AUDIO INMULTIVIEW
CH 2
CH 1
SDI OUTPUTSSDI INPUTS
REMOTE IN
HDMI IN
HDMI OUT
MONITOR OUT SDI IN
A B
SDI OUT
SDI LOOP OUT
REF IN
REF OUT
TIMECODE IN
TIMECODE OUT
EXT DISK
ETHERNET
REMOTE OUT
10-14V 5A
Plugging the SDI output from Hyperdeck Studio HD Plus into an SDI input on ATEM 2 M/E
Constellation HD
Now all you have to do is tell your ATEM software or ATEM hardware panel which input and
IPaddress each HyperDeck is using. You can do this in the HyperDeck tab in ATEMSoftware
Control switcher settings, or using the system control soft buttons on an ATEMadvanced panel.
HyperDeck Settings
HyperDeck connection settings are located in the ‘HyperDeck’ tab of the ATEM Software
Control switcher settings. Here you’ll see setup options for up to four HyperDecks.
Entering the necessary details is as easy as typing in your HyperDeck’s IP address in the
‘IPAddress’ box and choosing the source it’s plugged into from the ‘input’ menu. Click ‘connect’
and your HyperDeck is ready to be controlled.
143HyperDeck Control
 Loading...