Do you have a question about the Atlantic Furniture DEERFIELD MURPHY BED and is the answer not in the manual?
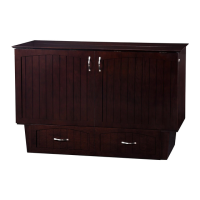
| Product Name | Deerfield Murphy Bed |
|---|---|
| Category | Indoor Furnishing |
| Brand | Atlantic Furniture |
| Type | Murphy Bed |
| Assembly Required | Yes |
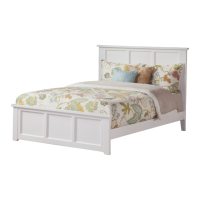
| Size | Full |
| Features | Space-Saving |
| Material | Solid Wood |
Lists and describes all hardware parts, quantities, and spare parts required for assembly.
Details all individual parts of the Murphy bed with corresponding numbers and illustrations.
Insert all wooden dowels (A) into the locator holes on specified panels and rails.
Attach side panels, shelf, and back rails using specific hardware and tightening with Allen wrench.
Carefully guide the back panel into the grooves of the side and bottom panels.
Attach right side panels to the cabinet assembly using specified hardware.
Guide back panel into grooves at the middle rail before fitting the top panel.
Attach the top panel to the cabinet assembly using specified hardware and Allen wrench.
Open the top drawer's folding leg and lock it to the post on both sides.
Attach the door panel to the cabinet using wood screws and a Phillips screwdriver.
Unlock supports, lift the door, and latch it to the side panels to close.
Attach triangle brackets to the back of the cabinet using wood screws.
Fit drawer sides to the drawer face, aligning grooves and tightening with hardware.
Guide drawer panel into grooves and attach panel support to the drawer face.
Attach drawer back and side blocks using hardware and wood screws.
Move the Murphy bed and push the drawer assembly into the cabinet, ensuring alignment.
Unlatch the door, open it, and lock the metal supports to the posts.
Open and pull the footboard frame and extend the footboard leg.
Install the folding mattress onto the bed frame and open the top panel.